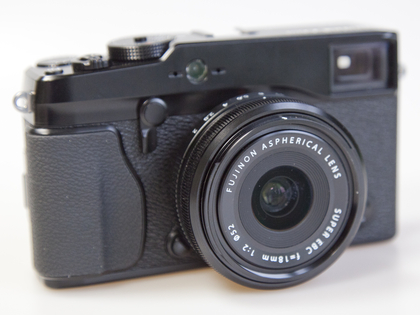
1st Official Fuji X Pro 1 720nm Converted IR Post!


Here it is…

Fuji X Pro 1, Brookgreen Gardens, 720nm B&W processed.  Fuji X 35mm lens.

Fuji X Pro 1, Brookgreen Gardens, 720nm B&W processed. Fuji X 35mm lens.

frontnolensWell, it arrived!  After months of consideration after I got my X-E1 I finally decided to send off the X Pro 1 for  Infrared conversion.  It went to Dan at LDP (maxmax.com) and the cost was $500.00.  YIKES!  yes I said $500.00!  Dan explains that the X Pro 1 is the most difficult conversion that he does!  It required him 1.5 days to do the conversion and lots unsoldering/soldering to get to the sensor.  Still, better than sitting on the shelf or an attempted sale on Ebay, plus  I really like the camera and the hybrid viewfinder is just perfect for IR.

I had to decide between 720nm and 850nm so decided to go for the 720 in order to have a little color ( I really like the bronze tones right out of the camera at 720nm).  The total time for shipping – conversion – shipping was 8 days, door to door.  Very fast!

Importantly, the Fuji X Pro 1 camera White Balances perfectly. For these tests I white balanced on a green shrub in front of my gallery.  The process to do so on the camera is simple and fast!

The scope of THIS post is to talk about the conversion itself and to give you some sample images testing each of my normal Fuji and Voigtlander lens set that I use.

  • Voigtlander Heliar 75mm f/1.8 Lens
  • Voigtlander Ultra Wide-Heliar 12mm f/5.6
  • Fujifilm XF 35mm F1.4 Lens
  • Fujifilm XF 18-55mm F2.8-4.0 Lens Zoom Lens
  • Fujifilm XF 18mm F2.0 Lens
  • Fujifilm XF 60mm F2.4 Macro Lens

My first image out of the camera was with the Fujifilm XF 35mm F1.4 Lens.  It is stunningly sharp with great contrasts and tones without any processing at all! This is simply a perfect IR image right out of the camera.
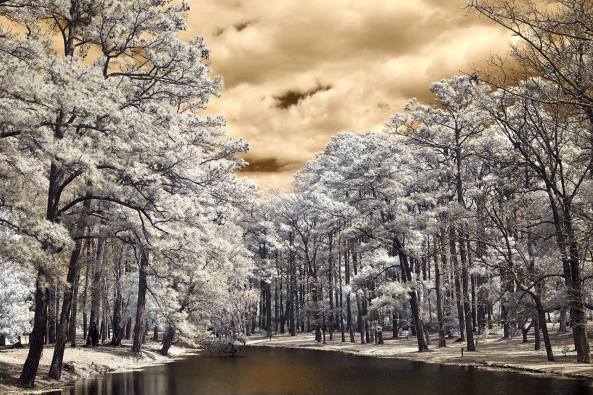
Fuji X Pro 1, Brookgreen Gardens, 720nm RAW un-processed.  Fuji X 35mm lens.

Fuji X Pro 1, Brookgreen Gardens, 720nm RAW un-processed. Fuji X 35mm lens.

OK, the original hot mirror can tell us a lot about the capability of the Fuji body to take IR with no conversion.  The strength of the internal filter from the X Pro 1 is quite strong!  It is actually 2 filters sandwiched together.  They are very much like the B+W 486 IR blocking filter and the LDP CC1 IR blocking filter back to back.  The 486 is a pink/gold  filter that extends a little further into the visible light spectrum before falling off and allows a little less IR to pass through.  The CC1 filter is wider at the UV end.  The two filters together will pass light to the sensor from about  300nm to 700nm.  You can see this in the image below. This is the same filter arrangement (hot mirror) that we normally see in the Canon DSLR line and on the Panasonic Micro 4/3 camera line.
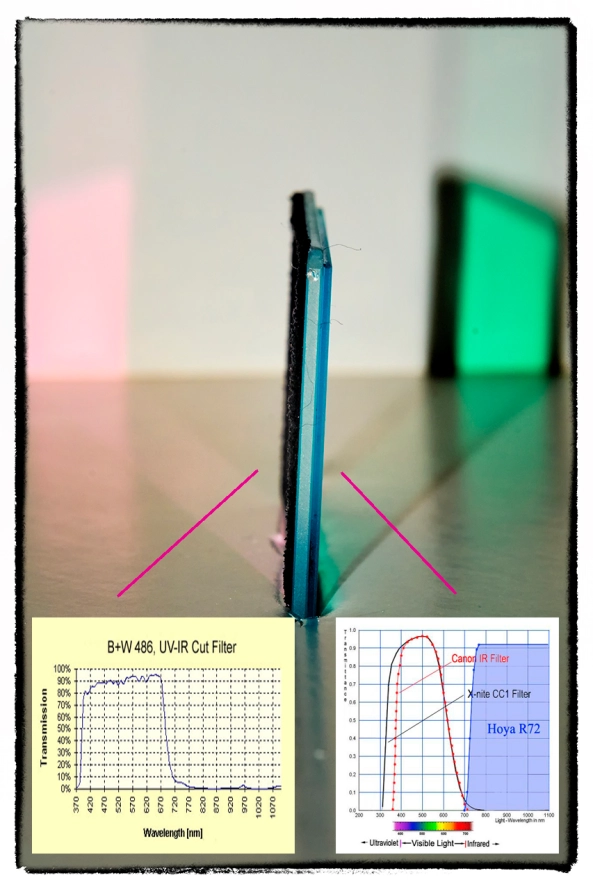
X Pro 1 Hot Mirror showing both Wide bandpass side (gold tint) and the Lower UV side (Aqua)
X Pro 1 Hot Mirror showing both Wide bandpass side (gold tint) and the Lower UV side (Aqua)

X Pro 1 Hot Mirror showing the Wider bandpass side (gold tint)
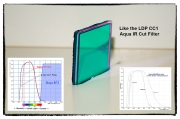
X Pro 1 Hot Mirror showing the Wider bandpass side (gold tint)

X Pro 1 Hot Mirror showing the Lower UV side (Aqua) similar to the CC1 filter from LDP

X Pro 1 Hot Mirror showing the Lower UV side (Aqua) similar to the CC1 filter from LDP

If you were to look at the 486 and CC1 filters they are the same general colors and pass band to what we actually see here!  So , what does this all mean to you?  If you decide (and convince Dan) to have a full spectrum conversion done on your X Pro 1, you can convert it back to a normal color camera by stacking both of these filters (B+W486 and the LDP CC1) on the end of your lens.  The full spectrum Infrared conversion is one where the hot mirror (IR blocking filter) is removed from in front of the sensor and replaced with a piece of clear glass.  Then, the camera is programmed to the specific UV or IR band with the addition of the appropriate filter on the end of the lens.

Normally, the hot mirror can bee seen as the colored layer of glass under the lens as shown here where you can now see the 720nm filter installed.
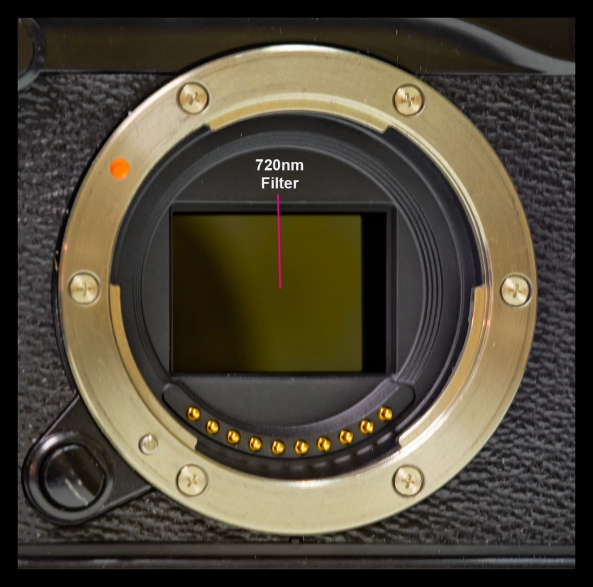
Inside the X Pro 1 showing the 720nm filter.

Inside the X Pro 1 showing the 720nm filter.

Lenses that Work/Don’t Work with the X Pro 1 720nm IR conversion…

Lens Hot Spots

As you may know (or guessed), not all lenses work well in the Infrared spectrum.  This is due to many things, but most commonly, the coatings on the lens elements and the coatings on the internal lens barrel and how they reflect IR light energy.  The common failure then is in the form of HOT SPOTS in the center of the image captured by the camera.  These are always dead center in the middle of the image and present as large round white areas.  Sometimes, they can be overcome by using a wider aperture, but not always…

Lets talk about the lenses that I tested that work (or in 1 case mostly work)…

Fujifilm XF 35mm F1.4 Len:
Fuji X 35mm Lens

Fuji X 35mm Lens

WOW, what can I say?  This lens works perfectly in the 720nm spectrum at all apertures!  The camera auto focuses perfectly and fast, the images are sharp and there are no hot spots at any aperture!  Lets take a look.  This first image is raw out of the camera.  I have done not post processing for B&W or Faux Color but there is enough color in the 720nm spectrum to have some interesting Faux Color results.  These types of images will be covered in another post next week and we will spend a lot of time and effort teaching and going through each step in the recipe used to create them in Photoshop CS6 and the Nik filter set.

Fuji X Pro 1, Brookgreen Gardens, 720nm RAW un-processed.  Fuji X 35mm lens.

Fuji X Pro 1, Brookgreen Gardens, 720nm RAW un-processed. Fuji X 35mm lens f/8

Next, is the same image post processed using CS6 and Nik’s Silver EFX Pro for B&W…
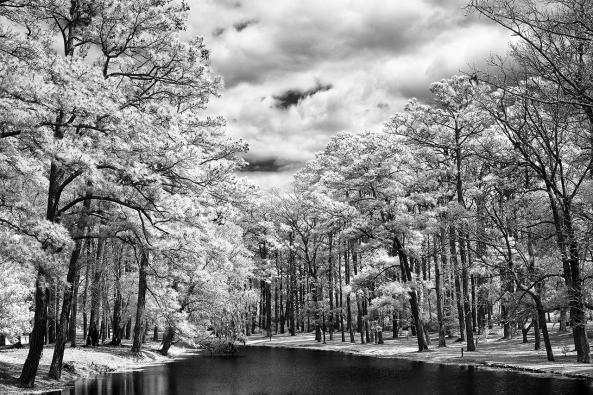
Fuji X Pro 1, Brookgreen Gardens, 720nm B&W processed.  Fuji X 35mm lens.

Fuji X Pro 1, Brookgreen Gardens, 720nm B&W processed. Fuji X 35mm lens f/8

Voigtlander Heliar 75mm f/1.8 Lens:
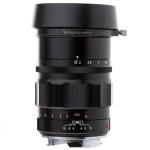
vt7518bThis lens from Voigtlander is one of the sharpest, easy to use lenses that I own.  The fit and finish on this lens is something to behold.  The lens has an included clamp on lens hood that works very well.  The focusing is so smooth that it is scary… It is a PERFECT match for the Fuji X system (X Pro 1 and the X-E1) and works just as well here in Infrared!  I was very happy to discover this in my tests at 720nm!  There are no hot spots at any aperture.  It takes Take a look:
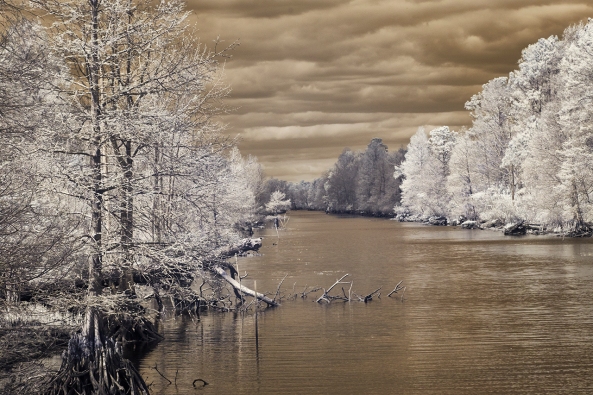
Voigtlander Heliar 75mm f/1.8 Lens at f/11.  Raw

Voigtlander Heliar 75mm f/1.8 Lens at f/11. Raw (notice the nice bronze coloring)
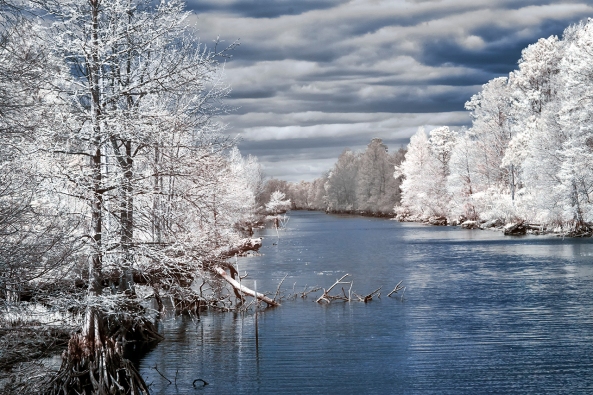
Voigtlander Heliar 75mm f/1.8 Lens, f/8 Faux Color Post Processing
Voigtlander Heliar 75mm f/1.8 Lens, f/8 Faux Color Post Processing

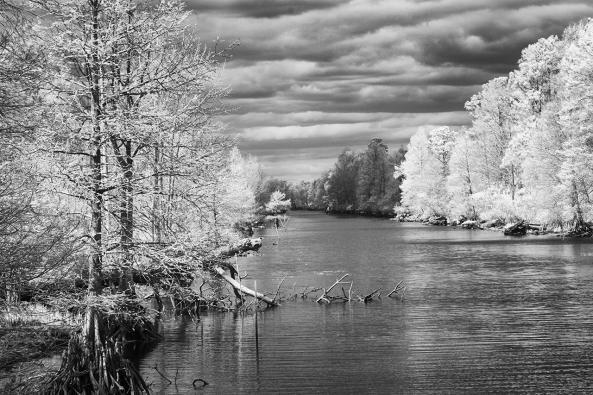
Voigtlander Heliar 75mm f/1.8 Lens, f/8 B&W Post Processing

Voigtlander Heliar 75mm f/1.8 Lens, f/8 B&W Post Processing

Fujifilm XF 18mm F2.0 Lens:
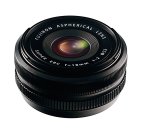
Fuji X 18mm lens.

Fuji X 18mm lens.

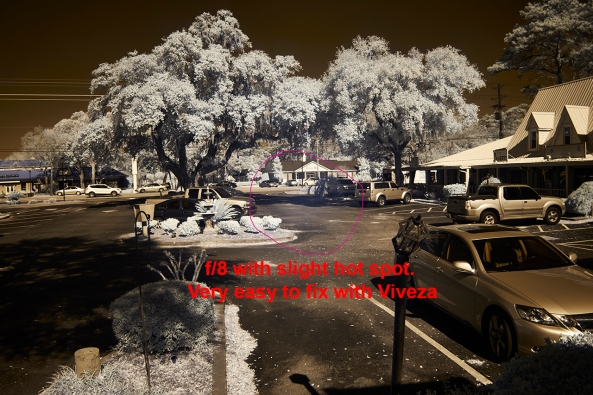
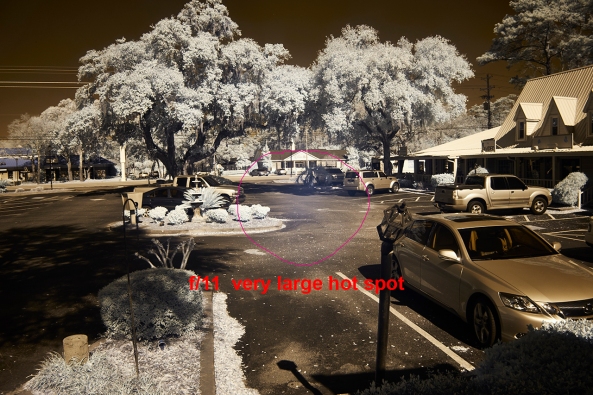
This lens works well as long as you do not go beyond f/8.  Past that it generates very discinct hot spot in the center of the image.  While this can be overcome in post processing  with Nik’s Viveza, it is still slightly disappointing…  Still, when used at f/8 or wider the lens generates pleasing sharp images that make it worthwhile to carry in your camera bag!  Here are the RAW test samples for you to consider.
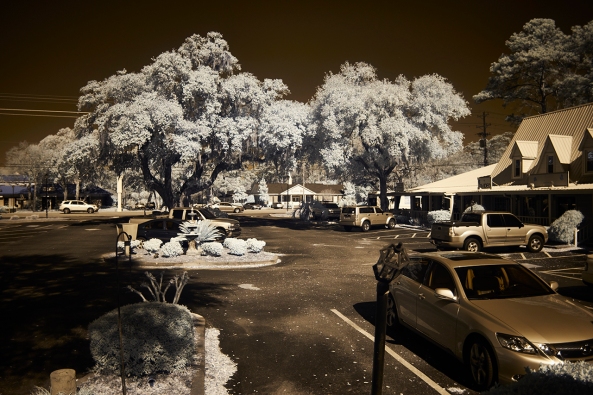
Fujifilm XF 18mm F2.0 Lens at f/2
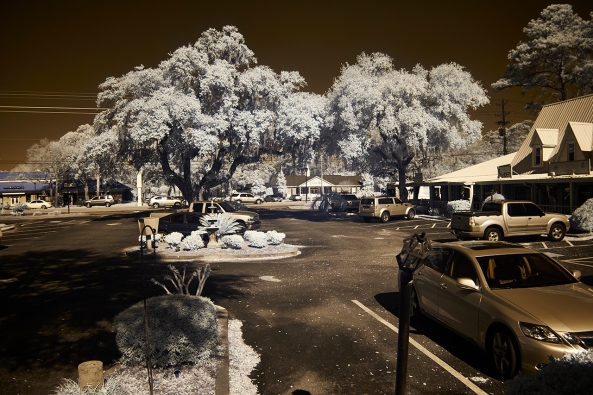
Fujifilm XF 18mm F2.0 Lens at f/2

Fujifilm XF 18mm F2.0 Lens at f/4
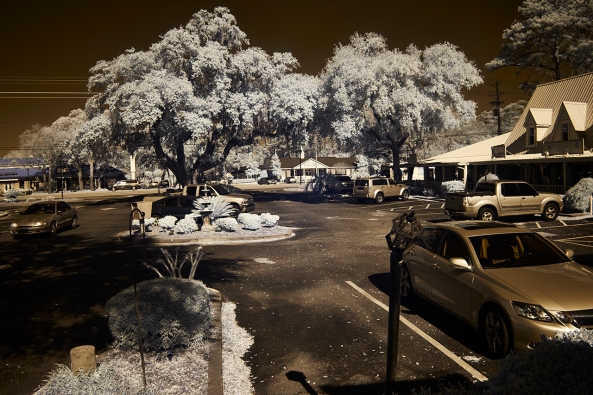
Fujifilm XF 18mm F2.0 Lens at f/4

Fujifilm XF 18mm F2.0 Lens at f/5.6
Fujifilm XF 18mm F2.0 Lens at f/5.6

Fujifilm XF 18mm F2.0 Lens at f/8
Fujifilm XF 18mm F2.0 Lens at f/8

Fujifilm XF 18mm F2.0 Lens at f/11

Fujifilm XF 18mm F2.0 Lens at f/11

Voigtlander Ultra Wide-Heliar 12mm f/5.6
Voitlander 12mm

Voitlander 12mm

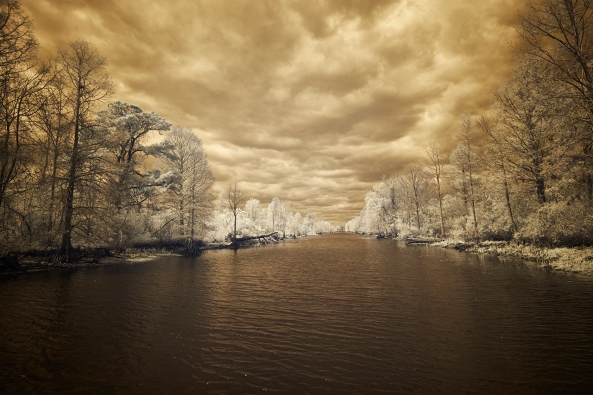
Another great lens from Voigtlander.  This one has a built in lens hood and while it will take screw in filters they need to be wide angle versions.  It also has that super smooth focusing feel but since it is so ultra wide at 12mm you can focus it pretty much at infinity and it will always be in focus.  I love this lens on the X Pro 1 and X-E1.  For 720nm Infrared, it works great until you hit f/22 then it gives a faint hot spot.  This is just fine with me as I rarely go beyond f/11 or f/16.

Take a look at the samples:
Voitlander

Voigtlander Ultra Wide-Heliar 12mm f/5.6 at f/8 RAW
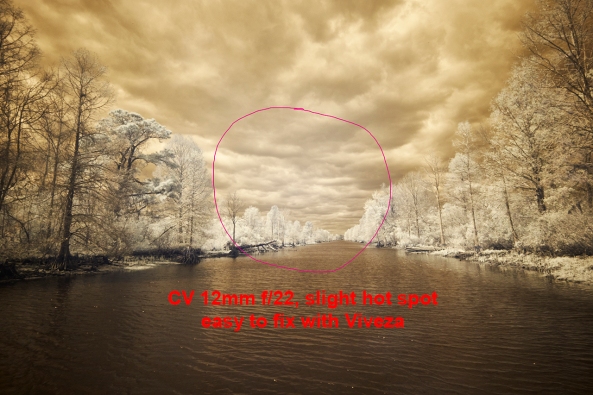
Voigtlander Ultra Wide-Heliar 12mm f/5.6 at f/22 RAW with hot spot

Voigtlander Ultra Wide-Heliar 12mm f/5.6 at f/22 RAW with hot spot

Fujifilm XF 18-55mm F2.8-4.0 Lens Zoom Lens:
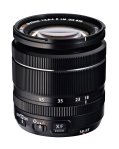
Fuji 18-55

Fuji 18-55

This lens is such a disappointment to me…  It is without a doubt my favorite walk around Fuji lens on the X-E1 camera. I hardly ever take it off.   Sharp and clear with great contrast.  That being said it is all but USELESS for Infrared!  There is a major hot spot problem at ALL focal lengths at ANY aperture past f/4.  At f/4 it did take nice images but as you understand, useless for landscapes.   Bummer…..  I am beyond disappointed over this one.

Fujifilm XF 60mm F2.4 Macro Lens:
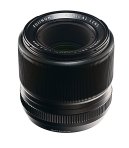
Fuji 60mm

Fuji 60mm

I am going to initially tell you to simply forget this lens for Infrared.  It has a seriously bad hot spot at all apertures.  I will also share with you that I might actually have a bad copy of it.  It gives a terrible hot spot on my X-E1 when shooting in color as well, especially when using a flash.  I think that I am going to send it back to Fuji for repair and see what they think.  Depending upon that I might re-evaluate it for Infrared later on!

Ok this is all for the initial post.  

The next post will focus on post procseeing and what can be acheived artistically with this new Infrared Fuji X Pro 1!

Please let me know what you think!

Get Ready…. Here it comes!


Fuji X Pro-1 720nm Conversion!


Well I actually did it and sent off the X Pro-1 to LDP in New Jersey for a 720nm conversion!  The camera is due back today and the fun will begin!  Stand by….

Fuji X Pro-1  720nm IR conversion!

Fuji X Pro-1 720nm IR conversion!

You Do NOT have to spend a fortune to do IR!


How To Do It On The Cheap!


I know, this was supposed to be a post on the GH2 tests but I have been getting a lot of email and comments about the assumed high cost of getting into Infrared Photography!  This insane notion needed to be stopped before it got any further!

If you have an extra camera system laying around you can reasonably expect to send it off for conversion for $200-$300.  Yes that is a lot of money but the expansion of your artistic mind set that Infrared will give you will be worth it.  But there is a cheaper way!

EBay is a great place to find used digital camera systems already converted to Infrared!  I have purchased several of these used IR camera systems in the past year for next to nothing and have NEVER had a problem with a single one that came from EBay!

So far I have purchased from Ebay:

  • Canon G10 at 720nm for $350 (G10’s are in high demand)
  • Canon G9 at 665nm for $300
  • Canon 10D at 850nm for $250
  • Olympus E-P1 at 720nm for $300
  • Canon 20D at 590nm that I picked up for $300.00!

Why you ask did I purchase all of these system?  Well I TEACH Infrared Workshops and as part of that I have loaner cameras so that my students can try different camera systems before they decide on what type of camera and what conversion they like the best!  But the real point that I am trying to make here is that YOU DO NOT have to spend a lot of money and that EBay is your friend!

Point and Shoot cameras are very inexpensive and are light and easy to carry.  This means that you will always have a IR system on hand.  Mirror-less SLR IR systems like the GH2 and OLY Pen systems give your the advantage of interchangeable lenses and are small and light.  DSLR IR systems have the advantage of being able to share lenses and accessories!  If you shoot Nikon, do not be afraid to buy a used Canon camera and a cheap lens and vice-versa!

Go back through this blog and read the posts on the 14 IR camera systems that I have tested!  You will notice that I tend towards smaller lighter and cheaper cameras!  There is a whole world out there full of people with IR systems that are upgrading to something newer and cooler (in their eyes!) who would jump at the chance to sell the old ones for funds to add to their new ones.

Beware of buying from friends in camera clubs as they are looking to recover ALL of the money they spent both for the camera as well as the conversion!  As I said EBay is your friend!


You are invited to the Low Country Infrared Adventure!


Jamie Konarski Davidson & Mark Hilliard
present an exciting, new Photographic Workshop &
Excursion Series on Fine Art Infrared Nature & Landscape Photography!

By Jamie Konarski Davidson

Come along with two of the most accomplished Infrared photographers on the Southeast coast for this energizing study of Fine Art Infrared (IR) photography! Learn about equipment needed for Infrared photography, what subjects  generate stunning IR images, and how to capture & process breathtaking IR images using this new digital technology.

By J.M. Hilliard

We will teach both Faux Color & traditional B&W post-processing techniques using Photoshop CS5, Elements 9 and Nik software. We will have several loaner IR camera systems for you to share if you do not yet own one!

Explore with us the rustic southern beauty of the Low Country. Along with two intense classroom sessions on Infrared Photography and post-processing, we will be shooting breathtaking land and seascapes in Pawleys Island and Brookgreen Gardens. In historic Georgtown we will capture local nautical themes, including the shrimp boat fleet and an ancient working boat yard where you will never know what you will find!

Infrared photography has become wildly popular in the past two years. It allows us to create new, different and emotionally intense images of things we see every day. Combine this capability with the stunning locations that we will be visiting, and you will understand why we are so excited to share this adventure with you.

Even if you do not currently have a Infrared camera  plan on attending! We will have loaner cameras for you to use as well as Infrared Filters to convert your current camera to Infrared!  This promises to be a great photographic experience for all!

By J.M. Hilliard

Infrared Workshops & Excursions!


Basic and Advanced Infrared Workshops and Excursions are coming!

Seacoast Artist Guild in Pawleys Island, SC is sponsoring a 1 day Infrared Introduction workshop at The Lens Work Gallery  at the end of April.  You must be a member to attend. Please click on their link above to get more information.

Jamie Davidson and I are putting on a 3 day Low Country Infrared Adventure &  Workshop on July 8-10.  This will be centered in Pawleys Island but will include GREAT OUTINGS in and around the Low Country of South Carolina. It also will include two 1/2 day Advanced workshops that cover everything from equipment to printing but REALLY hit Post Processing FAUX COLOR and B&W Infrared Images!  More Info will be coming soon on this workshop.

Jamie and I  are also planing another similar Infrared Adventure in from Oct 30 thru Nov 2nd called The Inner Banks Infrared Adventure & Workshops that will take us down the Sound from Grenville, NC to the Outer Banks shooting shrimp boats and other nautical scenes! It also will include two 1/2 day Advanced workshops that cover everything from equipment to printing but REALLY hit Post Processing FAUX COLOR and B&W Infrared Images!  More Info will be coming soon on this workshop.

Lastly Vic & Lori Grbich and I are  in the beginning stages of planning a weekend Great 2011 Grist Mill Excursion this Fall to Pitkins, SC!  If you have read any of my posts here about grist mills and Infrared then you KNOW how excited I am about this trip!

Stay tuned for Info!

Tipster #2 Perfect NEX-5 & E-PL1 Full Spectrum COLOR!


Getting Perfect Color From A Full Spectrum NEX-5 Conversion


CC1 And CC2 Filter Chart

We have talked several times here about using a Full Spectrum Infrared converted camera to shoot normal color images. Discussions have been around the B+W 486 and the LDP CC1 UV/IR Cut filters (now would be a good time to go back in the blog and read these posts).  The B+W 486 filter alone will generate blue skies with a slight green cast and the LDP CC1 filter leaves something lacking.  The light response charts for these 2 filters show a slight difference between them.

NEX-5 Hot Mirror, Gold Side

The B+W 486 is basically a clear filter with a slight gold cast to it while the LDP is turquoise. If you take a close look at the internal Sony UV/IR cut filter (Hot Mirror) you will notice that it is really 2 filters stuck together, one with a slight gold tint and the other aqua!

Nex-5 Hot Mirror, Aqua Side

This got me thinking that with either add on filter on the end of the lens of a Full Spectrum Infrared converted camera system that I was just not getting the proper UV/IR Cut action.  I searched for weeks on the internet and could not find one filter that had both response charts overlaid.  I couldn’t put both filters on the end of the camera lens because of the vignetting at the image edges.  BUT when I tried this for testing purposes you couldn’t believe my surprise when I discovered that the color image were perfect!  I cannot find a chart for the B+W 486 but believe that it is close to that of the CC2 filter from LDP.  Technically speaking, the CC1 filter should block any effect of the CC2 if stacked because is is narrower and inside of the CC2 passband, BUT it does not work as I would have thought! The only thing that I can think is that the combined effects of the 2 filters within the passband of the CC1 have changed the sensitivity of the passband.

What was I to do?  I couldn’t stack the filters…. Hmmm.


LDP CC1 Aqua Filter

OK, I looked in my box of old 58mm filters until I found one with a 1/4 inch ring (thick).  I took it apart and removed the original filter (LDP).  I then took apart the LDP CC1 filter, cleaned it and set it aside.  I then took the B+W 486 apart which was pressed together, so I held the glass on the top and bottom, twisting and turning and the entire filter fell apart!  I then cleaned it and put it on top of the CC1.  Stacked I then put them into the old LDP ring and re-assembled the spanner ring.  NOW we are talking!  The new filter ring wasn’t too tall and it worked perfectly! Pay attention to how you remove the Cut filters from their rings and place them the same way into the new ring.  I put in the CC1 first then the 486 on top.

You will NOT believe how great the color images now look on the NEX-5 Full Spectrum camera conversion. It is like shooting an un-modified system! So I decided to test this new filter combination on my Olympus E-PL1 Full Spectrum camera conversion as well.  All that I can say without tissues is YES, I HAVE FOUND IT!!! As I stated above, the 2 filters are mutually exclusive and the CC1 should block the effect of the 486 or CC2, but for some reason it does not.  I do not have the equipment to test the response of these filters and must rely on published data found on the WEB and on my own results which clearly say that this works!

I think that since LDP makes custom filters that one could contact them directly and have them build this custom filter for you but have not tried yet.

NEX-5 Full Spectrum IR, 630nm, Pawleys Island Faux Color