Italy, 2012, Post 3


Images, Images and More Images!

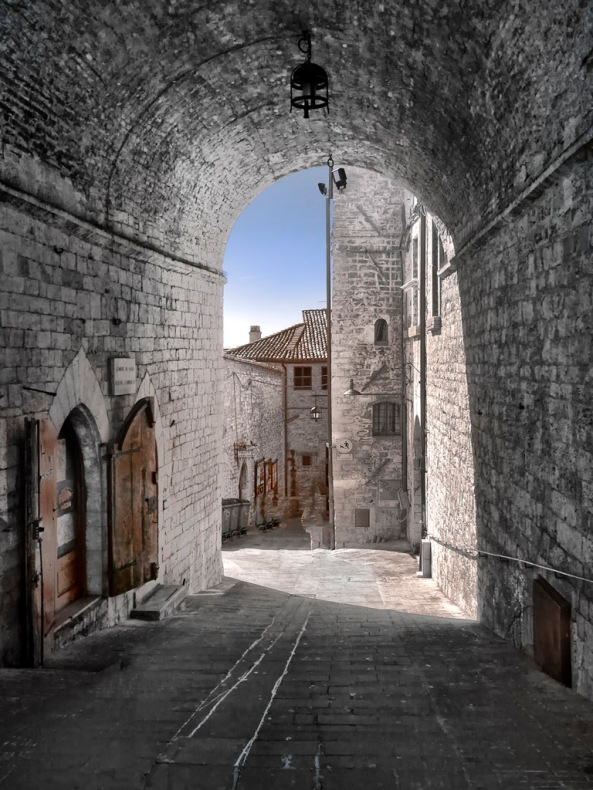
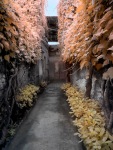
Assisi, Road Thru Houses 590nm Infrared

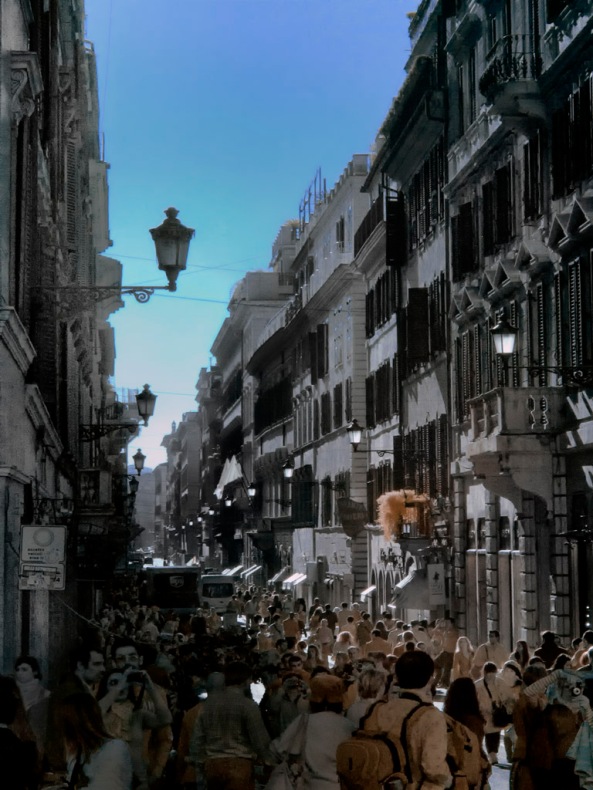
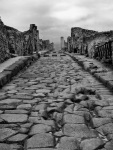
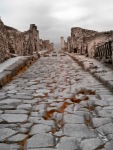
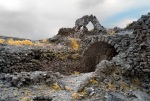
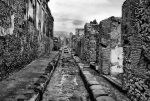
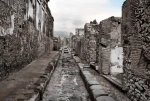
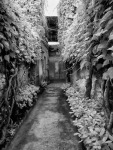
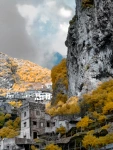
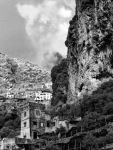
Todays post are just a few more of my favorite Infrared Images taken around Italy.  All are 590nm with an equal mix of Faux Color and B&W.  The post processing on them are basically the same as in the last post.  All were taken with the Panasonic GH2 with the 14-140mm Panasonic lens.

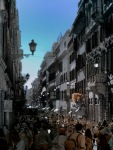
Rome, the high fashion district at the Spanish Steps. Notice the vast crowds! 590nm

I will likely add some Color images here as well in the coming days to highlight the differences between locations done in both Infrared and Color!  But for now, on last gallery of Infrared images:

720nm IR E-P1 Camera System For Sale!


720nm IR E-P1 Camera For Sale!

720nm IR image from THIS camera!

This was the first KING of IR camera systems.  You can read about THIS camera and its capabilities on my Infrared Educational site at:  infraredatelier.wordpress.com  There will be many example images, tips and IR recipes specific to this camera system.  The conversion was done at Spencers Camera in Utah in 720nm called Standard IR.  It is a small, compact IR camera system that is easy to carry with you meaning that you will never have an excuse for not getting the shot!  

Visit this Auction HERE

Included with this auction:


  • E-P1 Camera
  • Olympus 14-42mm lens.
  • Battery Charger
  • 3 Batteries
  • Shoulder Strap
  • Box
  • Lens Hood
  • Instruction Manual
  • Magic Lantern r E-P1 guide
  • Access to educational IR site at infraredatelier.wordpress.com


This is a great IR system that will give you years of fun and artful creation.  Look at the 3 samples above that were taken with THIS camera and you will see what I mean.  You can change the flavor of this camera with the addition of external IR filters on the end of the lens as long as you go up in nm range  ie 800nm 850nm and so on.  You cannot go down since the internal filter will block it.


The camera is in great shape with very small minor scratches on the bottom where the tripod attaches!  The lens is clean and clear with no dust.  For IR work the 14-42mm lens is the best selection since we mainly shoot landscapes but this camera will work perfectly with ANY micro 4/3 lens that you desire!

System


The Hammond & Gilbert Mills In Rhode Island


The Gilbert Stuart Museum & Mills

In Color, Infrared and B&W

The Hammond & Gilbert Mills

The Hammond & Gilbert Mills

The Hammond Mill, Selective Focus

I would like to draw your attention to a specific Grist Mill in Rhode Island!  This is the Hammond and Gilbert Mills at the Gilbert Stuart Museum.  What is so unusual about them is the fact that they are 50 feet apart on the same creek feed!  The Gilbert Mill was a Snuff Mill with living quarters for the family above the mill.  The Hammond Mill is and was a standard Grist Mill.  Both Mills are in AMAZING condition and the location just screams “Photograph Me“!    Location is a little in the back country but well worth the drive.  If you would like directions then download the Mills GPX file in the download window to the right!

The Gilbert Mill

The Mills are full of promise!  Look for detail shots as well as wide angle shots.  If you arrive mid day then you will likely be only able to shoot in Infrared (hey, not exactly a bad thing, you think?)  I think that early morning would be the best.  There is a nice standing pond behind the mills for reflection shots and the water path below the mills is actually a fish ladder to aid in migration! As I said, VERY PRETTY!

I shot these images using a Panasonic GH2 Micro 4/3 camera body (Color) and the Pansaonic 14-140mm lens.  For the Infrared shots I used my Olympus E-PL1 Full Spectrum Infrared camera body with the Olympus 14-150mm lens and an external (on the lens) B+W 091 630nm IR filter.  Since the previous post has a lengthy description and recipe for post processing these IR images I am going to leave the same out of this post!

Again, I am going to place all of the images of these amazing mills in a photo album below and all you have to do is to click on any image to bring up the slide show!

_____________________

_____________________

I hope that you enjoy this collection of a VERY unusual Mill!  

Please let me know what you think!

Grist Mills Of Rhode Island


Post Processing the Infrared Grist Mills of Rhode Island

Hammond Mill, Selective Focus

I have just now getting around to post processing the Rhode Island section of The Great 2 Week Grist Mill Trip!  I cannot believe that I am so behind… Oh well, better late than never!  Since completion of the trip I have had 2 other Grist Mill Trips with a ton of photos in the que! All of these images were taken on my Olympus E-PL1 Full Spectrum converted IR system using the Oly 14-150mm lens with a B+W 091 630nm filter.

As you can see I processed for both Faux Color and B&W IR images because you just never know how they will look unless you try!

Does everyone understand exactly what a Faux Color Infrared image is?  It is likened to the old Kodak HIE IR films of the 80’s (I actually designed the silver salt growing system for that film while I worked at Kodak!).  In modern converted IR digital camera systems the images are true IR images, but since the sensor is RGB we have a lot of color data there!  To get to what the film was capable of producing we simply swap the data on the Red and Blue channel of the image in Photoshop, fine tune the colors in NIK Viveza and work from there!  Just because it is described as a Faux or False Color IR image doesn’t mean that it is so!

The B+W 091 is a little more on the red  end of the spectrum so the images tend to (when Faux Color…) lean more towards the pinks and reds.

Basic Post processing is as follows:

  1. After conversion of my RAW files in Capture One Pro v6 I then do my critical deletion edit using Bridge.  This is perhaps the most difficult step. You have to look beyond low contrast off color images and see what they can be. Look for coloration (this will get better with time), emotional impact (yes you CAN do this! I have several BLOG postings here that talk specifically about this one…) and sharpness and exposure.  Think about each and every image in terms of Faux Color and B&W! When finished, I then open the images one at a time in Adobe Photoshop CS5 with ALL of the NIK filters installed.
  2. I did my normal cropping to my master storage size of 12.5×8.5 making sure that the image was at 300dpi and in the Adobe RGB 1998 color space
  3. I ran NIK Software’s Define 2.0 for noise reduction. For this I simply accept the default settings!
  4. I then ran NIK Viveza 2.0 and specifically added 20% structure and 10% extra contrast without any control points so that the changes affected the entire image!  This was to create a brighter deeper image before I ran the channel swap Photoshop Action!  WOW!  WHAT A DIFFERENCE THIS MADE!
  5. I then ran the channel swap action and proceeded as normal with the rest of my Post Processing Recipe! This is the Khomography Photoshop Action that you can download here towards the bottom of the right hand menu! The action swaps data between the Red and Blue image channel and allows you to adjust the Hue/Saturation in the Red, Yellow, Green, Cyan, Blue & Magenta color channels separately!
  6. In the action select the Red, Yellow, Cyan and Blue channels and adjust each of them using saturation and hue to get the image elements to start to fall into place. Pay careful attention to the Cyan channel adjustment as most of the time the sky takes on a green/aqua tint which looks terrible!  Simply adjust the Hue of the Cyan channel to fix this!
  7. Now, Calling up Nik’s Viveza again I will select specific elements of the image with control points.  I will add contrast and structure then adjust the primary colors R,G and B to adjust the specific color of the compositional element to achieve the overall color I want for it.  You can also use the Warmth Slider to add or remove warmth.  This entire process takes only a few moments to do if you understand your basic color wheel and how to mix to change!  This process will give you your final ball park image!
  8. THEN I called up another of NIK Software’s world class filters and ran the TONAL CONTRAST filter in the COLOR EFX PRO plugin.  The result was this incredible image full of contrasts tonalities as well as contrasting colors!

Rather than simply place the images here in the post separately I am going to try Word Press’s new Photo Gallery.  Simply click on any of the images that you see to bring up a nice slide show!

You Do NOT have to spend a fortune to do IR!


How To Do It On The Cheap!


I know, this was supposed to be a post on the GH2 tests but I have been getting a lot of email and comments about the assumed high cost of getting into Infrared Photography!  This insane notion needed to be stopped before it got any further!

If you have an extra camera system laying around you can reasonably expect to send it off for conversion for $200-$300.  Yes that is a lot of money but the expansion of your artistic mind set that Infrared will give you will be worth it.  But there is a cheaper way!

EBay is a great place to find used digital camera systems already converted to Infrared!  I have purchased several of these used IR camera systems in the past year for next to nothing and have NEVER had a problem with a single one that came from EBay!

So far I have purchased from Ebay:

  • Canon G10 at 720nm for $350 (G10’s are in high demand)
  • Canon G9 at 665nm for $300
  • Canon 10D at 850nm for $250
  • Olympus E-P1 at 720nm for $300
  • Canon 20D at 590nm that I picked up for $300.00!

Why you ask did I purchase all of these system?  Well I TEACH Infrared Workshops and as part of that I have loaner cameras so that my students can try different camera systems before they decide on what type of camera and what conversion they like the best!  But the real point that I am trying to make here is that YOU DO NOT have to spend a lot of money and that EBay is your friend!

Point and Shoot cameras are very inexpensive and are light and easy to carry.  This means that you will always have a IR system on hand.  Mirror-less SLR IR systems like the GH2 and OLY Pen systems give your the advantage of interchangeable lenses and are small and light.  DSLR IR systems have the advantage of being able to share lenses and accessories!  If you shoot Nikon, do not be afraid to buy a used Canon camera and a cheap lens and vice-versa!

Go back through this blog and read the posts on the 14 IR camera systems that I have tested!  You will notice that I tend towards smaller lighter and cheaper cameras!  There is a whole world out there full of people with IR systems that are upgrading to something newer and cooler (in their eyes!) who would jump at the chance to sell the old ones for funds to add to their new ones.

Beware of buying from friends in camera clubs as they are looking to recover ALL of the money they spent both for the camera as well as the conversion!  As I said EBay is your friend!


Panasonic GH2 590nm Review – Part 1


OK, It Starts Again – IR Camera #14 (I think…)

Panasonic GH2

Well… I think this makes camera #14, but I have had so many that I am no longer sure!  This is really a sad state of affairs.  As you all know, I have touted the Olympus E-PL1 as the “King Of Infrared” for a year or so now.  But sadly, the King has died, long live the King!  I am not very sad over sending the color GH2 off to be twisted into 590nm, after all, I am addicted to IR.  Rather I am sad over loosing such a fine COLOR system!

It is true though, that I have returned to my Canon systems for color work, and I am very happy with the results there.  So on with the show!

The body functionality of the GH2 is simply amazing.  It rivals that of the advanced Canon and Nikon bodies but in such a form factor that it makes using it a joy!  I love the fact that it is such a small body.  Add in the fact that it is a 16 megapixel system with both a built in electronic viewfinder and an articulating LCD panel guarantees a true winner.

I sent the camera off to Spencers Camera in Utah and had it back in 3 days!  I decided upon 590nm for this camera rather than Full Spectrum because I find that 99% of the time I shoot in either 590nm or 630nm.  I can change between the two with the addition of a B+W 091 630nm filter on the lens which costs about $25!  This means less to carry when I travel which is very important to me.

The GOLDIE or SUPER COLOR IR Conversion, GH2 Camera

When the camera was returned from Spencers the first thing that I noticed was that I had NO idea how to set the custom white balance.  Spencers had programmed this into the body but I needed to do it again as I am going to use the Panasonic 14-140mm lens on it.  I did some research on the web and discovered how to do a proper WB and no matter how hard I tried I could not get my WB to match Spencers.  So I called them and was informed that they only use a gray card in direct sunlight to WB with!  OK, I will file this data away for later consideration!  For now I have both Spencers WB and mine (green grass) programed into the camera (yes it can hold 4 custom WB settings).

Today I took the camera out and did some test shots using both WB values in a good location that gave the triangle of IR compositional elements:

  1. Sky with clouds…
  2. Reflective Water…
  3. Various types of Green Leaves…

One major difference that I discovered between the 590nm GH2 and the E-PL1 set at 590nm is that the GH2 did NOT over expose the red channel!  The internal exposure metering system handled Infrared poisoned with Red Visible light perfectly!  This really is a big step forward in that I can again trust the exposure meter and concentrate on the subject.

Refresher on 590nm Infrared:

Various IR Filter Curves, Look At the 090 For 590nm

There are some minor issues when using a 590nm filter that you must understand in order to overcome.

  • 590nm is firmly in the realm of the visible spectrum creating visible overexposure from 590nm to 700mm.
  • White Balance is ALL important to getting good color and proper exposure.

The first listed issue really is the most important one to understand.  Our camera’s electronics and algorithms are designed with color images in mind.  When we remove the hot mirror (UV/IR Cut Filter)  and attach a dedicated 590nm or 665nm filter OR a clear glass filter (Full Spectrum) and use a 590nm external filter, we are allowing a small amount of visible light from 590nm to 700nm strike the sensor along with the infrared spectrum from 700nm to 1000nm.  Since 590nm is in the deep red area of the visible spectrum the RED channel is overwhelmed with bright red light and the blue & green channels see more of the 700nm and up light.   This tends to confuse the camera computer and while it will display a normal looking histogram (monochrome), if you look at the separate RGB histograms the red is off the edge and way overexposed!  Usually you can overcome this during the RAW conversion process by changing the exposure down 1 or 2 stops in conversion.  Sometimes the overexposure is so bad that you are out of the range of repair during the conversion process.  So I following the following steps to overcome this in camera:

  1. Proper White Balance to equalize the color Channels
  2. Set the camera histogram to separate RGB channels so that I can directly monitor the RED channel
  3. Check the exposure on EVERY shot and dial in the appropriate exposure compensation.  Normally this is around -1 or -2 but some subject matter like lots of leaves will require you to switch to manual exposure  to go – 3 or more!  A cloudy sky will actually force you to add + exposure compensation.  Just take a test shot and check the red channel histogram then make the proper adjustment.
  4. ALWAYS use your lens hood to prevent lens flare as well as to keep contrast up by stopping light from hitting the objective lens at extreme angles.

590nm will generate very pleasing warm Faux Color images that dip in to Gold tones hence the name “Goldie Filter”!  This can work for very pleasing images that will stun you with their emotional impact.  Yet they will also generate VERY nice B&W images as well in Post Processing!  If you find that you do not care for the Gold tones you can simply reprogram the camera with an external filter to get different results!

  • B+W 091 630nm medium red filters will move you into the Pink/Red toned Faux Color Images and cost around $30.
  • B+W 092 695nm dark red filters will move you into the Red/Copper toned Faux Color Images and cost around $100.
  • Hoya R72 720nm deep red filters will put you into the Coppery toned Faux Color Images and cost around $120.

You can go even higher, 800, 850 ad 900nm but these will require the use of a tripod and they are VERY expensive filters!  Not bad for a dedicated 590nm camera!  You can still change the flavor of it with the addition of an external filter.  The only rule is that you cannot go to an external filter lower than 590nm.

Gray Card Set for Setting Camera White Balance

OK, lets look at some sample images.  I am going to show you 2 sets of 3 images.  First set is with the camera WB set to green grass.  Image 1 will be the RAW image straight out of the camera, Image 2 will be the Faux Color version and Image 3 will be the B&W.  Set 2 will be the same 3 images but with the WB set to a Gray Card in bright sunlight.  You will be AMAZED by the difference that WB can give in your photography after viewing them.   The Gray card used is a simple plastic set that I purchased from Amazon for about $10.00.

OK, here is set #1 with the WB set to the Green Grass:

RAW:

RAW image, WB to Green Grass

Faux Color Post Processed, WB to Green Grass

Notice the lack of gold tones and the shift to orange/red trees.  There is a little yellow grass.  To me this is still a very pleasing image overall!

B&W Post Processing, WB to Green Grass

A very nice B&W image that can still have a lot of work done on it for improvements!  

OK, now set 2, the same basic images but with the WB set to the 18% Gray Card!

RAW:

RAW Image with WB set to the Gray Card

Notice that the colors are WAY off from the image WB’ed to the Green grass!  The sky has shifted towards a greenish/copper and the leaves have shifted towards Aqua  while some of the green has taken on a Yellow glow.

Faux Color:

Faux Color image with WB set to the Gray Card

Here is where we really see a major difference!  NOW the trees have the classic GOLD tone that one expects from the 590nm band!  Some of the grasses are still pink but different plants look different in IR!

B&W:

B&W Post Processed with the WB set to the Gray Card

Even here we see differences between the two different WB’ed images.  This is due to the fact that B&W Post Processing is determined by the range of COLORS of the image that we start with!

So, what I am seeing here with these two sets of images is that WP has a MAJOR effect upon the finished product!  The first set of images actually look closer to what you would see with a B+W 091 690nm filter in place rather than a 590nm filter!  We will discuss this in greater detail in the next post (Part 2) in the next few days.  For now this should give you a lot to think about in relationship to White Balance!

On top of that you have to admit that the clarity and sharpness of this camera/conversion and lens is simply remarkable!  I am very excited about the fact that the exposure is dead on so far.  I will also experiment with the exposure and histogram in the coming days in varying sunlight and different subject to insure that indeed the Panasonic GH2 is the NEW KING OF INFRARED!

What do you think…?

Dang, I Went And Did It Again…


Welcome the NEW Panasonic GH2 590nm Camera!

Or, How to spend money without really trying!

Panasonic GH2

Well, Spencers managed to receive, modify and ship back to me my Color GH2 camera system converted to 590nm Infrared in 3 days! This camera had made the best small color interchangeable lens system that I have ever owned.  But… I am returning to Canon and all of my L glass after 3 years of not being able to use it due to an extreme medical condition from spinal sugury that went very bad, so I decided to convert the GH2 to 590nm while I await its replacement to be announced (hopefully) soon.

I am glad to be able to use my Canon equipment again but will miss the lightness of the GH2 and lenses!

I decided on the 590nm conversion for this camera because over time I have learned through experience that I mostly use 590nm, 630nm and 720nm (occasionally).  This means that I can have no filters on my lenses for 590 and an inexpensive one for 630nm!  Plus there are lots of other lenses that I like to shoot with that I cannot attach filters to:

  • Pinhole Lenses (yes I have several variations for Micro 4/3)
  • Lensbaby with ALL of its options.
  • Holga Lomography Plastic Lens
  • 8mm Fisheye

This will give me greater artistic control in my Infrared world!

Plus there are many advantages of the GH2 over the E-PL1, most important is the fact that the GH2 has a built in electronic viewfinder!  Plus the body is 16 megapixel and has such advanced body functionality that it rivals the advanced Canon and Nikon bodies!

So, here it is sitting on my desk.  Other than taking 2 test images with it I have not had the time to take it out and really use it.  It will be several days before I can so an in-depth review of its Infrared capabilities will have to wait for my next post!

Stay Tuned!

Images from the Low Country Infrared Adventure!


Seven Gifted Attending Photographers Share Their Work!

WOW!  How else to describe the 3 day Low Country Infrared Adventure!  It was an amazing time both in the workshop and out in the field shooting. Both Jamie and I were very impressed with everyone there.  We had seven gifted photographers in attendance, 8 hours in the classroom split between 2 days and 17 hours out shooting in all of the BEST Infrared locations in the Low Country.  Talk about tired, I am still dragging around.

We had a total of 7 photographers in attendance.  There were several Nikon IR conversions, Canon, Panasonic and Olympus systems. Every spectrum was covered from UV to Deep IR.  I am going to show case images from each of the attendees here in the days to come as they send their images to me so stay tuned and re-visit to see the new additions!

______________________________________

Donald E Brown

Mark,
Been at it all morning processing images from this last weekend.  I am hungry and my eyes are hurting and it is all your fault!!!  I have tried many variations of this shot  from “Roadside View”  and it and some other variations are fast becoming my favorites. 

Anyway, enjoy the scenery from my roadtrip home.

Old Barn Version 1

Old Barn Version 2

Old Barn Version 3

Old Barn Version 4

Donald was shooting a 665nm converted Nikon DX2 and was an established Infrared photographer.  He added a lot to the workshop/excursion and was a lot of fun to shoot with!  Donald, these images are just breathtaking!

More please….

______________________________________

Vicki Wilson

Hi Mark and Jamie,

I had a great time in the workshop! Thanks for sharing the IR cameras and letting me try out different filter types.  This has opened up a whole new fun area of photography, I love it! Here are a couple of my photos from the workshop.  Thanks again!

The Path...

Of Boats Long Gone....

Capt Andrew

Vicki was shooting with a loaner IR camera!  My Olympus E-PL1 Full Spectrum mainly with the 630nm filter and the UG1 UV/IR filter!  Her excitement was infectious and she is going to convert a Nikon D90 to the same!  I expect to see a lot of fabulous IR work from her!

______________________________________

Dave Lindey

Jamie/Mark

I processed each in FAUX color and Monochrome. Couldn’t decide which to send. I processed a total of 120 images from the weekend. The attached represents a variety of what I shot over the weekend. I spent the past week experimenting with the post processing and will likely go bacl over a few because I learned a few things along the way. All images were shot with a Nikon D200 665nm conversion processed with Capture One, Adobe Photoshop CS5 and Nik Dfine 2.0, Viveza 2.0 and Silver Efex Pro 2. Select what you like to post. I did not sharpen the images at all.

It was a great weekend.

Walkway, Georgetown, SC

The Path Less Taken....

The Tug Susan RIchards

Brookgreen Gardens Pond

Dave, I am stunned by these images!  To say that they take my breath away is simply an understatement!  For you to be creating this caliber of ART after only shooting Infrared for a year is amazing. Please continue to share your work with us!  I can see now that I am going to have to create a guest gallery now……..

OK, as I said earlier, stay tuned for more images from the workshop!


The Grist Mill Trip – Day 2 Covered Bridges & Farms


Amish Country – Lancaster County, PA

630nm Covered Bridge, Lancaster, PA


Today we drove about 4 hours east to Lancaster, PA.  The point being to visit Covered Bridges, Farms and the Amish people who reside there.  I grew up in the Amish community of Lexington, Ohio and have a good knowledge of the people and their customs and was very excited to visit an area where they reside!

I didn’t expect to see any grist mills today and didn’t really look.  In truth, there are about 30 of them in Lancaster!  But, they are all ugly boxy white buildings with no external water wheel assembly.  They are common on the larger farms but not really worth seeking out.

Lancaster Covered Bridge

I have always enjoyed seeing covered bridges.  They like grist mills are a reminder of times past.  But I didn’t realize how fast I would grow bored with them!  That may sound terrible, but to me here in Lancaster, they just all look the same.  The only real differences were the surrounding trees, their length and the walls, fences or guard rail leading up the their entrances!  Plus we arrived mid afternoon with a BRIGHT white sky and color photography was very difficult.  I even had some issues with them in Infrared!  This is not to say that I didn’t walk away with some nice images, but I could have done much better in the early morning.

The other difficulty in photographing these bridges is that they are hard to find.  All of the web sites direct you to them via a convoluted series of turns and roads.  Not ONE gives an address OR a GPS Lat/Long string which would make it much easier to find them!

All told, we visited 7 bridges here.  They were interesting but most were impossible to get a side angle on for a good photograph.  I still think that they are a worthwhile subject, but one that will require much more research.  They also are a little more interesting when shot in COLOR. I am not going to talk about the Infrared Post Processing since these images are basically the same as the ones in Day 1!  But, the color images while simple really need a small discussion:

Basic Color PP Recipe

Photoshop CS5 with NIK Viveza and Color EFX Pro

  1. Delete marginal, duplicates and bad images!
  2. Convert from RAW to TIFF using Capture One V6
  3. Open in CS5
  4. Crop to standard storage size: 8.5 x 12.5 (the extra .5 is for underlay with the mat.
  5. Run NIK Define 2.0 on images with skies.
  6. Run NIK C0lor EFX Pro color contrast range preset and adjust as necessary.
  7. Run NIK Viveza to adjust various image component brightness (tress and such).
  8. Save as a PSD file.

Lancaster Covered Bridge, Side View

That is it.  Each image only takes about 1 min from start to finish.  You really will like the ease that the NIK plugins give you in processing.  Plus the NIK tools work equally as well in Photoshop Elements!  What more could you ask for?

Take a look at these images and try to decide if you like the Color or Infrared versions better.  For me I almost always will pick the IR version but in the case of the Covered Bridges I like the Color versions a little better!

Lancaster Covered Bridge, Entrance

Lancaster Covered Bridge, Inside Detail, Color

Lancaster Covered Bridge, 630nm B&W

Lancaster Covered Bridge, Color

Lancaster Covered Bridge, 630nm

Lancaster Covered Bridge, 630nm B&W

Have you noticed a pattern with my Infrared photography?  I seem to be spending much more time shooting with the 630nm (B+W 091) filter all of the time.  I do like the 590nm (B+W090) and a 665nm (more pinks and reds) as well as the R72 720nm Hoya filter.  But for most of my work I am getting stunning Faux and nice contrasty B&W from the 630nm.  I like the post processing from this filter as well because it gives me the ability to generate different hues in the tree leaves depending upon the type of tree!

Lancaster Covered Bridge, Long View

All of the bridges were within a 10 mile square and still difficult to locate.  I do feel them to be worth the effort and hope that if you get the chance to see them that you give them a chance!

OK, on to Amish Farm Country!

Working The Fields

They are a very interesting group of people and I admire their fortitude in sticking to their beliefs.  I saw hundreds of horse and carriages on the roads.  I saw small red wagons being drawn by a small pony.  Lots of field equipment behind teams of horses.

Typical Amish Farm

The farms were beautiful but small (as you would think being worked by horse power).  Kids were out playing and riding a bicycle like device with no seat and peddles.  It did have a front turn able wheel and handle bars with full size tires but they stood on it and pushed with their feet!

Cool Rest

We didn’t stay more than a few hours as I was very tired and wanted to get closer to my next main destination which meant another 4 hours of driving east thru Philly and then finding a hotel for the night so that I could be there early in the morning.  Yes, I actually did plan on this stop for early AM!

So the next post for Day 3 Is Cutalossa Farm East of Phili about 10 miles.  I can tell you that this stop will turn out to be the best stop of the entire trip!

Stay Tuned!

The Grist Mill Trip – Day 1


So Much Fun That It Hurts!

Mabry Mill, Blue Ridge Parkway, VA. 630nm Faux IR

Well, I should warn you here…. This is going to be a series of LONG posts (about 6) that will be comprised of both Infrared and Color photography!  I feel that to show only one or the other will just not do credit to the locations that I visited!

I am tired, we got back last Wednesday night after 2800 miles of driving from Pawleys Island to Boston.  Boston was the location of a wedding that I had to attend with my wife and the motivation for 10 days of travel to visit Grist Mills, Covered Bridges & Lighthouses!

Yes, I have a VERY UNDERSTANDING & SUPPORTIVE WIFE!

It was a very relaxing trip and we visited about a dozen of each of the subjects.  I had a great and successful time. I tried to make sure that we visited each location in the best light but as you know sometimes that is just impossible.  This is where Infrared can save the day (or vacation)!  Some locations screamed color but I shot in both formats regardless.  I hope that you enjoy the images as much as I did making them!

Our first planned stop was on the Blue Ridge Parkway in Virginia at the Mabry Mill.  This is likely the most photographed mill in the country and you can see why from the images. It is a stunningly beautiful location with a perfect mill.  The elements of a perfect IR image are all there:  Water Reflections,  Green Leaves & Sky.  Usually there are so many people visiting the mill that it is hard to get a shot without them in it.  Today was the exception.  We got there about 2 pm and it was overcast with very subdued light.  I couldn’t have asked for better conditions for both color and infrared.

Mabry Mill, B&W 630nm Long View

The long view when approaching the mill gives a stunning framed image using the fence, hill and trees.  The entire property is in pristine condition and just screams “Take My Picture”!  Below is a Faux Color version of the same image.

Processing with my standard Faux Color recipe:

For CS5:

  1. Taking the picture I adjusted the exposure compensation to -.7ev to keep the red channel under control and not blow out the sky.  I also set the White balance using a BRNO neutral WB lens cap.
  2. After moving the image to the computer via Downloader PRO (see recent post) and RAW processing with  Capture One V5 where I added a little contrast and clarity, I opened the image in CS5.
  3. I cropped for my master library size (8.5×12.5)
  4. Run NIK Software’s Viveza 2.0 and apply about 15% STRUCTURE to the overall image only by not using control points.
  5. Run the Khromagery Faux Color Action (down load on the right).  In the Master Color Channel I simply increased the Saturation as necessary which brought out the blue sky & water and the yellow plants.  I then choose the Cyan, Red & Yellow channel adjustments and made sure to adjust the HUE to where I liked it.
  6. The ABOVE Cyan adjustment is important, I hate sky’s and water looking blue-green, so I always adjust the Cyan HUE to go to normal blue!
  7. I then flattened the Adjustment Layers.
  8. Next I ran NIK Software’s Viveza (a Photoshop plug in) and simply made point selections of the color I wished to modify, ran up the structure to bring out detail and adjusted the brightness.  I did this to all of the color areas I needed to like the water surface, the yellow plants and the blue sky. I also selected the warm colored wood of the Trunk and the rocks in the foreground and removed color saturation forcing them to be B&W!
  9. Again flatten the image.
  10. Save as a PSD file

For Elements:

You MUST install the Elements Plus Plugin (see post on this BLOG for link)

Link Here to Detailed Post On Elements Processing

  1. Convert your RAW image to Tiff.
  2. Open in Elements
  3. Crop
  4. Run NIK Software’s Define 2.0 noise reduction filter.
  5. Run NIK Software’s Viveza 2.0 and apply STRUCTURE only.
  6. Open the Channel Mixer, changing red and blue
  7. Run the Hue/Saturation adjustment and adjust DOWN the saturation HUE on the Cyan channel.
  8. Run NIK Software’s Viveza 2.0 and make your color, saturation, structure & contrast adjustments across the entire image.
  9. Flatten the Layers
  10. Save as a TIFF or PSD in your output library with a meaningful name!

The most important aspect of this is to look at the trees. Do you see how the leaves look slightly different in coloration?  This means that you should adjust each tree to a slightly different hue to get the most impact!  These small adjustments are so easy to accomplish with Nik Software’s Viveza plugin.

Mabry Mill, Long View. Faux Color 630nm

This image was also one of those rare ones that looked good in the RAW format.  By this I mean straight out of the camera, converted from RAW to TIFF and processed for contrast and structure only using NIK Viveza.  As you can see, it generated a rather pleasing image that is soft on the eyes!

Mabry Mill, Long View, RAW 630nm

As I said, the lighting was very subdued so I could shoot in color also.  Here is a version of that at the same location for you to compare.  Which do you like the best?

Mabry Mill, Long View, Color, Panasonic GH2 w/ 14-42mm Lens

But what ever you decide, make sure that you totally explore your subject.  Walk around it, take both long and short view images, landscape and portrait, DETAIL closeup shots and look for the unexpected!

Mabry Mill, Sluice

Process EVERY image you take in both color and B&W (color) and RAW, Faux and B&W (Infrared).  You will be surprised at the variety of emotions each will generate! Below is the same color image but converted to a medium contrast B&W image using NIK Silver EFX Pro V2.  I actually think that in the case of this image that the B&W image has more impact!

Mabry Mill Sluice, Color Converted To B&W

OK, moving on, I moved in closer to the mill but still giving space for a water reflection in the foreground. This image is a little more pleasing due to the greater detail that our eyes can detect.  Again, process in all possible ways to discover what we actually have!

Mabry Mill Closeup, RAW

Mabry Mill Closeup, Color

Mabry Mill Closeup, 630nm B&W

Now, had it been a bright sunny day color photography would have been out of the question due to the late arrival time at the mill.  Keep this in mind as you plan your excursions.  Regardless of this, you can always depend on great Infrared images any time of the day.  That is a pretty good motivation to embrace IR don’t you think?

This was a really good first day for the trip.  Mabry Mill is indeed worth the time necessary to travel to it.

There is another mill around the corner from it about 3 miles away, but it is in a commercial center and the wheel is gone.

Knowing that I was going to take 10 days to travel up the east coast to Boston, I RESEARCHED all of the mills and covered bridges from South Carolina north, and Missouri  east all the way up. I think that I have all of the worthwhile mills in 19 states entered into my GPS now!  There are about 300 mills that I narrowed down to about 75 based on their beauty first and foremost.  I then took the time to enter them ALL into my GPS so that I could easily find them.  This also has the added benefit that as you travel, the GPS will show you how far away you are from any of the mills in the list and continually update moving the closest to the top of the list!  What more could you ask for when you are ALWAYS in search of mills?

Even now that the trip is over I continue to research mills.  Just this weekend I added another 30 to my GPS list.  This list can be managed on your computer and downloaded directly to your GPS! 

I plan on adding this way point list to my download section here on this blog shortly so that you all can have access to these perfect subjects!  I only hope that you do the same and share new mills with me!

I hope that you enjoyed this LONG OVERDUE first post on the 2011 Great Grist Mill trip!  I will add every few days the next day of travel as I process the days images.  Keep in mind that I came back with over 2500 images which I reduced to about 1200 by the first editing step:  DELETION of the bad, marginal or duplicate images.

Tomorrow, Day 2:  Lancaster County, PA for Covered Bridges and Amish Farmland!