A Simple Tutorial on Infrared Post Processing…

from my fine art photography blog

Murrells Inlet Marsh, X Pro 1 720nm IR Faux Color

Murrells Inlet Marsh, X Pro 1 720nm IR Faux Color

The Fuji X Pro 1 has turned out to be one of the best Infrared camera systems that I have ever used… period!  The only good Fuji lenses for Infrared have proved to be the 35mm f/1.4, the 18mm f/2 and the new 14mm.  The Viogtlander 75mm f/1.8 has also proved to be a STUNNING lens also!  So, the camera has proven its infrared capability, now it is time to discuss in detail the recipe for post processing!  It is all quite simple but there are a few requirements that you must understand in order to follow my workflow with understanding.

Needed:

  • Photoshop CS5 or CS6
  • Nik Filters, Viveza, Define Silver EFX Pro plugins for Photoshop, NOT LIGHTROOM.  (You can now purchase the entire library of Nik filters for $149)
  • Kromography False Color Action which can be downloaded here from the right menu bar under the box menu.  You can simply  click on it to download to your computer then drag it to photoshop to install.
  • A converted Infrared camera system capable of generating enough color data to make Faux Color images.  This means 720nm, 665nm, 630nm and 590nm conversions.
  • The ability and desire to experiment!

As you move your RAW (shoot only RAW for IR because of the ability to shift the white balance easily) onto your computer you should automatically tell yourself that you are going to process each selected image in Faux color and B&W.  Sometimes you will notice that the un processed image looks great also (wonderful bronze tones) and decide to do a version like this as well!

Lets talk about the RAW conversion process a little bit.  Photoshops ACR built in RAW converter will NOT apply the white balance correctly and your images will appear deep red.  For this reason I use Capture One version 7 from Phase One.  It is simply the BEST RAW converter that I have ever used.  You can download a trial version and decide for yourself if what I am telling you is true!

My Initial Editing Steps:

  1. Move images from my camera to my computer with an intelligent download tool that renames them with a meaningful name and create an intelligent directory tree for my RAW Library.  For this I have tested dozens of tools and found that Ingestimatic is the best and lowest cost one out there! You can find them here.
  2. Visually edit the RAW files by deleting the images that are simply no good.  Do not clutter up your computer with these useless files.
  3. Batch process my RAW conversion choices and adjust the exposure, contrast and angles.  Capture One will allow this and place the converted image files into a storage directory for later editing.
  4. Within Photoshop, open  each converted image one at a time for post processing
  5. Run Nik Define 2.0 in its default mode on the image for noise reduction, Save.
  6. Run Nik Viveza and without using any selection points increase the structure around 10% and the contrast about 5%, Save.
  7. Having installed the channel swap action that you downloaded here, run it on your image.  The last thing it will do is to open a Hue/Saturation window with the Master channel selected.  Simply select the CYAN channel  and vary the HUE a little bit to bring the sky to a normal blue rather than a blue/green.  Then select the RED channel and adjust the saturation up to a value you like, and repeat with the YELLOW and MAGENTA channels.  When you are happy with the results click on DONE to move on.  REMEMBER:  This is to only get the colors of the FAUX COLOR IR image into the ball park!  The real adjustment will happen next.
  8. Run Nik Viveza again.  Here is where you will use your control points to slightly adjust the colors and contrasts of various image elements to bring out a stunning, etherial work of art!  LOOK closely at your image, decide what you wish to adjust (Hue, saturation, contrasts and de-saturation). MORE ON THIS LATER!
  9. Run Nik Define one more time.
  10. Flatten the image, crop to taste, correct any imperfections (healing tool and content aware fill).
  11. Save the image with a meaningful name in a planned and thought out master image library.
  12. With the finished Faux Color image still open in Photoshop, now run Nik Silver EFX Pro to do your B&W conversion.  There are several built in recipes in this filter that can be used as a starting point.  My favorites are:
  • High Structure Harsh
  • High Structure Smooth
  • Full Dynamic Range Harsh
  • Full Dynamic Range Smooth
  • Fine Art Process
  • Wet Rocks (once in a while)

Save your image again with a NEW file name that reflects the difference in your master image library tree!
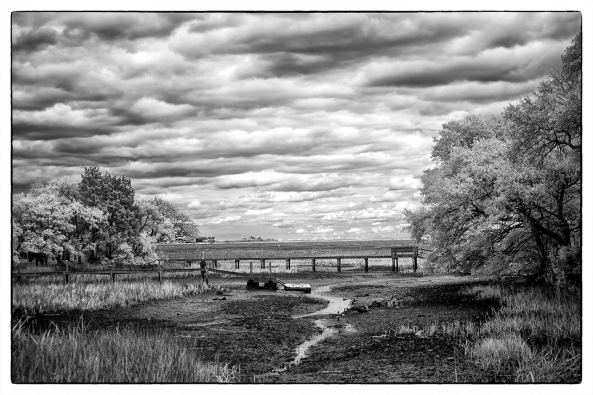
Murrells Inlet Salt Marsh, X Pro 1 720nm IR

Murrells Inlet Salt Marsh, X Pro 1 720nm IR

Remember:  Process ALL IMAGES as both Faux Color and B&W.  You really do not know what you are going to get till you do so.

All of this really is VERY SIMPLE and once you have done it a few times it will become second nature to you.  Soon you will be a post processing Infrared God or Goddess!  Congratulations

No, let’s take a look at the image below.  Notice the areas that I have circled as places where I desire to change the colors, contrasts and saturations (both plus and minus). Also consider that this is a 720nm converted camera and as such has a very limited color range (light pinks and warm tones and blues).
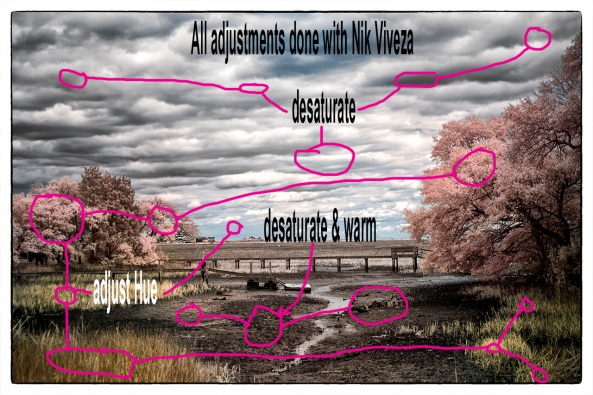
Annotated Faux Color, X Pro 1 720nm IR

Annotated Faux Color, X Pro 1 720nm IR

It is in this area and others like them (similar color values that are the same) that we are going to place control points on and change these values!  If you notice that the areas around them also change a little you can place what we call anchor points which are simply control points with no adjustments to bring those areas back to where you wanted them!

You will find this ENTIRE process from the initial loading into photoshop to finish will just take 4 or 5 minutes or less as you become more practiced!

Here are a few more images for you to consider that were taken on the 720nm Fuji X Pro 1 camera system:
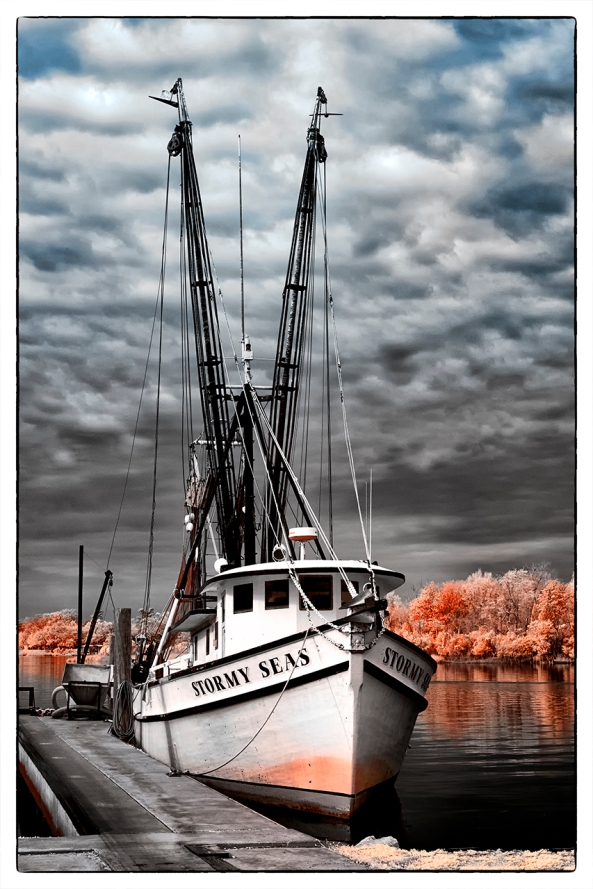
Stormy Seas Faux Color, X Pro 1 720nm IR
Stormy Seas Faux Color, X Pro 1 720nm IR

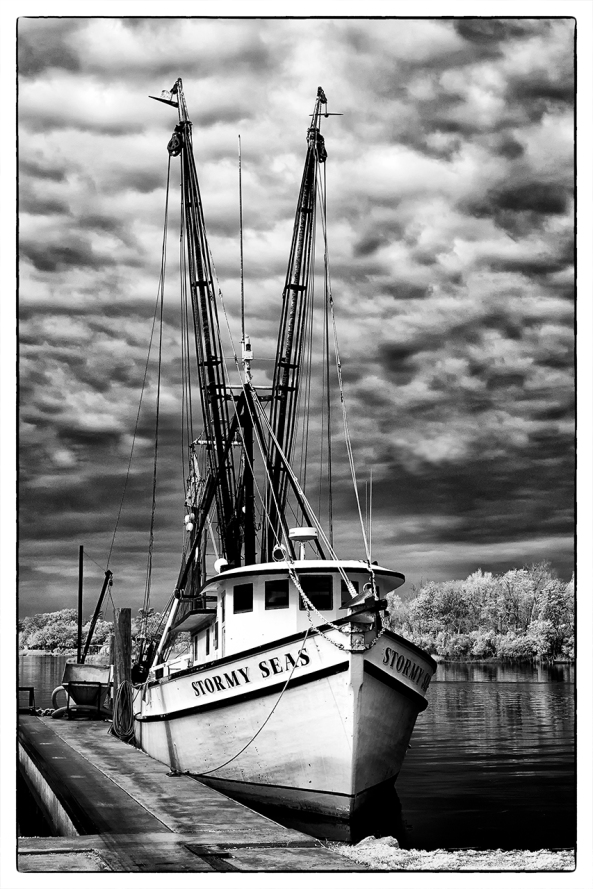
Stormy Seas B&W, X Pro 1 720nm IR

Stormy Seas B&W, X Pro 1 720nm IR

Sometimes Faux Color images simply do not work, then you still have the great B&W ones to work with!
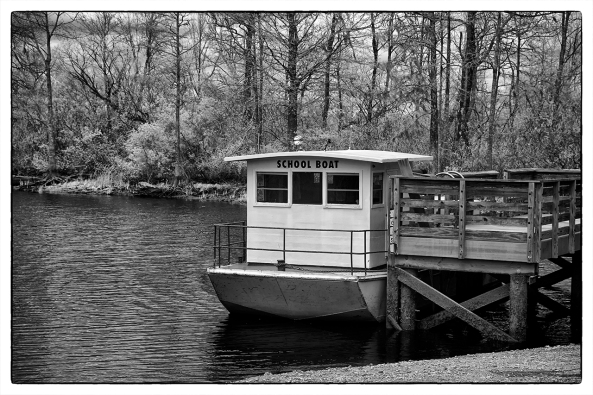
SC School Bus Boat, X Pro 1 720nm IR
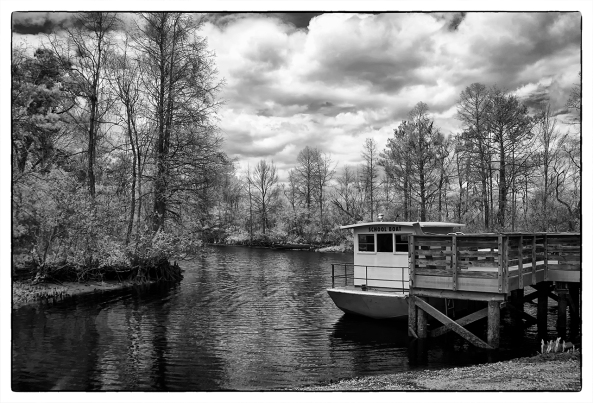
SC School Bus Boat, X Pro 1 720nm IR

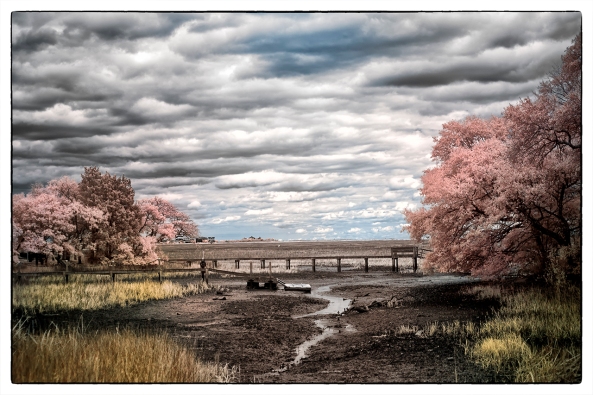
SC School Bus Boat, X Pro 1 720nm IR

SC School Bus Boat, X Pro 1 720nm IR

Was this information helpful?  Please let me know one way or the other!

You Do NOT have to spend a fortune to do IR!


How To Do It On The Cheap!


I know, this was supposed to be a post on the GH2 tests but I have been getting a lot of email and comments about the assumed high cost of getting into Infrared Photography!  This insane notion needed to be stopped before it got any further!

If you have an extra camera system laying around you can reasonably expect to send it off for conversion for $200-$300.  Yes that is a lot of money but the expansion of your artistic mind set that Infrared will give you will be worth it.  But there is a cheaper way!

EBay is a great place to find used digital camera systems already converted to Infrared!  I have purchased several of these used IR camera systems in the past year for next to nothing and have NEVER had a problem with a single one that came from EBay!

So far I have purchased from Ebay:

  • Canon G10 at 720nm for $350 (G10’s are in high demand)
  • Canon G9 at 665nm for $300
  • Canon 10D at 850nm for $250
  • Olympus E-P1 at 720nm for $300
  • Canon 20D at 590nm that I picked up for $300.00!

Why you ask did I purchase all of these system?  Well I TEACH Infrared Workshops and as part of that I have loaner cameras so that my students can try different camera systems before they decide on what type of camera and what conversion they like the best!  But the real point that I am trying to make here is that YOU DO NOT have to spend a lot of money and that EBay is your friend!

Point and Shoot cameras are very inexpensive and are light and easy to carry.  This means that you will always have a IR system on hand.  Mirror-less SLR IR systems like the GH2 and OLY Pen systems give your the advantage of interchangeable lenses and are small and light.  DSLR IR systems have the advantage of being able to share lenses and accessories!  If you shoot Nikon, do not be afraid to buy a used Canon camera and a cheap lens and vice-versa!

Go back through this blog and read the posts on the 14 IR camera systems that I have tested!  You will notice that I tend towards smaller lighter and cheaper cameras!  There is a whole world out there full of people with IR systems that are upgrading to something newer and cooler (in their eyes!) who would jump at the chance to sell the old ones for funds to add to their new ones.

Beware of buying from friends in camera clubs as they are looking to recover ALL of the money they spent both for the camera as well as the conversion!  As I said EBay is your friend!


Dang, I Went And Did It Again…


Welcome the NEW Panasonic GH2 590nm Camera!

Or, How to spend money without really trying!

Panasonic GH2

Well, Spencers managed to receive, modify and ship back to me my Color GH2 camera system converted to 590nm Infrared in 3 days! This camera had made the best small color interchangeable lens system that I have ever owned.  But… I am returning to Canon and all of my L glass after 3 years of not being able to use it due to an extreme medical condition from spinal sugury that went very bad, so I decided to convert the GH2 to 590nm while I await its replacement to be announced (hopefully) soon.

I am glad to be able to use my Canon equipment again but will miss the lightness of the GH2 and lenses!

I decided on the 590nm conversion for this camera because over time I have learned through experience that I mostly use 590nm, 630nm and 720nm (occasionally).  This means that I can have no filters on my lenses for 590 and an inexpensive one for 630nm!  Plus there are lots of other lenses that I like to shoot with that I cannot attach filters to:

  • Pinhole Lenses (yes I have several variations for Micro 4/3)
  • Lensbaby with ALL of its options.
  • Holga Lomography Plastic Lens
  • 8mm Fisheye

This will give me greater artistic control in my Infrared world!

Plus there are many advantages of the GH2 over the E-PL1, most important is the fact that the GH2 has a built in electronic viewfinder!  Plus the body is 16 megapixel and has such advanced body functionality that it rivals the advanced Canon and Nikon bodies!

So, here it is sitting on my desk.  Other than taking 2 test images with it I have not had the time to take it out and really use it.  It will be several days before I can so an in-depth review of its Infrared capabilities will have to wait for my next post!

Stay Tuned!

Images from the Low Country Infrared Adventure!


Seven Gifted Attending Photographers Share Their Work!

WOW!  How else to describe the 3 day Low Country Infrared Adventure!  It was an amazing time both in the workshop and out in the field shooting. Both Jamie and I were very impressed with everyone there.  We had seven gifted photographers in attendance, 8 hours in the classroom split between 2 days and 17 hours out shooting in all of the BEST Infrared locations in the Low Country.  Talk about tired, I am still dragging around.

We had a total of 7 photographers in attendance.  There were several Nikon IR conversions, Canon, Panasonic and Olympus systems. Every spectrum was covered from UV to Deep IR.  I am going to show case images from each of the attendees here in the days to come as they send their images to me so stay tuned and re-visit to see the new additions!

______________________________________

Donald E Brown

Mark,
Been at it all morning processing images from this last weekend.  I am hungry and my eyes are hurting and it is all your fault!!!  I have tried many variations of this shot  from “Roadside View”  and it and some other variations are fast becoming my favorites. 

Anyway, enjoy the scenery from my roadtrip home.

Old Barn Version 1

Old Barn Version 2

Old Barn Version 3

Old Barn Version 4

Donald was shooting a 665nm converted Nikon DX2 and was an established Infrared photographer.  He added a lot to the workshop/excursion and was a lot of fun to shoot with!  Donald, these images are just breathtaking!

More please….

______________________________________

Vicki Wilson

Hi Mark and Jamie,

I had a great time in the workshop! Thanks for sharing the IR cameras and letting me try out different filter types.  This has opened up a whole new fun area of photography, I love it! Here are a couple of my photos from the workshop.  Thanks again!

The Path...

Of Boats Long Gone....

Capt Andrew

Vicki was shooting with a loaner IR camera!  My Olympus E-PL1 Full Spectrum mainly with the 630nm filter and the UG1 UV/IR filter!  Her excitement was infectious and she is going to convert a Nikon D90 to the same!  I expect to see a lot of fabulous IR work from her!

______________________________________

Dave Lindey

Jamie/Mark

I processed each in FAUX color and Monochrome. Couldn’t decide which to send. I processed a total of 120 images from the weekend. The attached represents a variety of what I shot over the weekend. I spent the past week experimenting with the post processing and will likely go bacl over a few because I learned a few things along the way. All images were shot with a Nikon D200 665nm conversion processed with Capture One, Adobe Photoshop CS5 and Nik Dfine 2.0, Viveza 2.0 and Silver Efex Pro 2. Select what you like to post. I did not sharpen the images at all.

It was a great weekend.

Walkway, Georgetown, SC

The Path Less Taken....

The Tug Susan RIchards

Brookgreen Gardens Pond

Dave, I am stunned by these images!  To say that they take my breath away is simply an understatement!  For you to be creating this caliber of ART after only shooting Infrared for a year is amazing. Please continue to share your work with us!  I can see now that I am going to have to create a guest gallery now……..

OK, as I said earlier, stay tuned for more images from the workshop!


You are invited to the Low Country Infrared Adventure!


Jamie Konarski Davidson & Mark Hilliard
present an exciting, new Photographic Workshop &
Excursion Series on Fine Art Infrared Nature & Landscape Photography!

By Jamie Konarski Davidson

Come along with two of the most accomplished Infrared photographers on the Southeast coast for this energizing study of Fine Art Infrared (IR) photography! Learn about equipment needed for Infrared photography, what subjects  generate stunning IR images, and how to capture & process breathtaking IR images using this new digital technology.

By J.M. Hilliard

We will teach both Faux Color & traditional B&W post-processing techniques using Photoshop CS5, Elements 9 and Nik software. We will have several loaner IR camera systems for you to share if you do not yet own one!

Explore with us the rustic southern beauty of the Low Country. Along with two intense classroom sessions on Infrared Photography and post-processing, we will be shooting breathtaking land and seascapes in Pawleys Island and Brookgreen Gardens. In historic Georgtown we will capture local nautical themes, including the shrimp boat fleet and an ancient working boat yard where you will never know what you will find!

Infrared photography has become wildly popular in the past two years. It allows us to create new, different and emotionally intense images of things we see every day. Combine this capability with the stunning locations that we will be visiting, and you will understand why we are so excited to share this adventure with you.

Even if you do not currently have a Infrared camera  plan on attending! We will have loaner cameras for you to use as well as Infrared Filters to convert your current camera to Infrared!  This promises to be a great photographic experience for all!

By J.M. Hilliard

Infrared Workshops & Excursions!


Basic and Advanced Infrared Workshops and Excursions are coming!

Seacoast Artist Guild in Pawleys Island, SC is sponsoring a 1 day Infrared Introduction workshop at The Lens Work Gallery  at the end of April.  You must be a member to attend. Please click on their link above to get more information.

Jamie Davidson and I are putting on a 3 day Low Country Infrared Adventure &  Workshop on July 8-10.  This will be centered in Pawleys Island but will include GREAT OUTINGS in and around the Low Country of South Carolina. It also will include two 1/2 day Advanced workshops that cover everything from equipment to printing but REALLY hit Post Processing FAUX COLOR and B&W Infrared Images!  More Info will be coming soon on this workshop.

Jamie and I  are also planing another similar Infrared Adventure in from Oct 30 thru Nov 2nd called The Inner Banks Infrared Adventure & Workshops that will take us down the Sound from Grenville, NC to the Outer Banks shooting shrimp boats and other nautical scenes! It also will include two 1/2 day Advanced workshops that cover everything from equipment to printing but REALLY hit Post Processing FAUX COLOR and B&W Infrared Images!  More Info will be coming soon on this workshop.

Lastly Vic & Lori Grbich and I are  in the beginning stages of planning a weekend Great 2011 Grist Mill Excursion this Fall to Pitkins, SC!  If you have read any of my posts here about grist mills and Infrared then you KNOW how excited I am about this trip!

Stay tuned for Info!

CNPA Annual Meeting Infrared Happenings…


WOW, Infrared Photography Is Growing!

630nm Faux Color Infrared, Carson Elizabeth

I just returned from the CNPA, (Carolina’s Nature Photography Association) 2011 Annual Meeting in Charlotte, NC this past weekend. I was REALLY surprised over all of the Infrared activity shown there!  While there were NO speakers pondering Infrared in Nature photography, there were lots of people interested (CNPA, take note of this!).  The members sale tables had several IR systems for sale that didn’t last the first day!

I was approached by at least 40 people who not only want to be involved with Infrared (or already are) but who wanted more workshops and excursions!  Needless to say this was very exciting for me!  I love the fact that we are getting a serious following now within CNPA!

I think that I will put together our next workshop/excursion for mid April (lets get some leaves on the trees)! In the meantime I have created a Face Book users group called Infrared Photography Group.  Please drop by and sign up for it. I have added a user gallery, sales/swap section, meeting notifications and general informational postings.  This will be a good place to trade information and such in a timely fashion until I can get something a little better and perhaps attached to the CNPA site directly.  Either way please keep checking here and on the Infrared Photographers users group on Face Book for up to date information!

Obscure Infrared Subjects (Revisited)


Turn A Blind Eye

Faux Groin Wall, Dead Of Winter, Dark Overcast Sky!

Summer and Fall are gone… Winter has arrived with its lifeless trees and high contrast scenery. But do not despair! With Infrared, all things are possible! You will be surprised at the plethora of great subject matter out and about. You do not need bright green leaves to generate world class Infrared images! You do NOT need bright sunny days to take advantage of good Infrared photography! Read on, and I will share with you some secrets to great Infrared photography in the off season and bad weather!

What you need to do, or rather see is your subject matter in terms of contrast or color, yes color! Start thinking with Faux Color post processing in mind. Take the image to the left of a groin sea wall on Pawleys Island, SC. It was a dark over cast day, The ocean was full of action and dull green/brown. The sky was basically full over cast with a few holes. Knowing that Infrared would bring out the details in the sky that the human eye could NOT see, I knew that it would be spectacular! The ocean itself was very rough but the spray from the waves in conjunction with the brown groin rocks would produce impressive blues and reds if processed in Faux! I set up with a FAST shutter speed for this image. I did not want a smooth silky ocean surface but rather the spray and wave action was desired. I planed before I even got the camera out to take the image with Faux Color post processing.

Snowy Mesa, Deep Winter, 665nm

Antique Caboose, 665nm, Winter

On the contrast side of the artistic equation, think in terms of Monochrome processing rather than Faux Color. Look for both HIGH contrast and LOW contrast scenes! Both work very well. In fact, If you can find an image that has both high and low contrast components all the better! Snow, trees, buildings and rocks can be put together to generate ultra high contrast images. If the weather or lighting conditions are really bad, look to inside images like the caboose image to the right! For this image, the sun was just too strong and shadows to intense for a good image of the caboose from the outside. So I got a chair and stood up to shoot through a window of the interior! I used an external flash unit to even the lighting of the image so that I wouldn’t see a bright light line and dark walls (yes, normal flash units emit Infrared!). I do not use flashes often with Infrared, but once in a while…..

Old Car, Rt. 66, 665nm

Ok, back to contrasts. How about a subject that has both high and low contrast components? The intentional use of scenes with both high and low contrast areas can create a very ethereal composition. Take the image to the left of the old rusted car. The car itself would have looked good in Faux Color but I was looking for a composition that drew the viewer in to an endless scene. So I used the snow covered grasslands (Painted Desert) and the snowy mist in the air to draw your eyes off into infinity but the car to keep you rooted in the foreground! This is NOT what you would call a normal Infrared subject, but it works very well!

Infinity, 665nm, Winter Storm

Ultra low contrast images (fog and snow) can also work very well in an artistic sense. What they tend to do is portray an image that goes on forever! I actually have more fun with low contrast image than the others! Here (right) is an example of one such scene. Again, in the Painted Desert but this time the misty snow is the subject. The old telephone poles are just a supporting component that draw your eyes deeper into the image! The key to these types of images are to look for formless compositions. On foggy or snowy mornings grab your camera and head out! If you are lucky enough to have these conditions in the middle of they day then look for compositions where there is a brighter spot from the sun shining through!

Rainy Sidewalk Reflections, 720nm

Rain can also be used to your advantage with these types of Infrared images as well. In fact, even (especially) in the summer, rain can generate some very good images that offer the added benefit of puddles for reflections! You can also look for compositions only within the reflections of the puddles. This works very well on the beach also during low tides when there are tidal pools left on the beach.

While we are discussing rain, I do not want you to forget the storm itself. Since Infrared brings out details in the sky and clouds that you are unable to see yourself, you need to consider the storm clouds as a worthy subject! If I lived in the plains of our country I would spend most of my times chasing storm clouds with my Infrared system! Plus both Black & White as well as Faux Color images of storms look great! Below you will see two versions of the same image taken with a 720nm Olympus E-P1 camera system and the Olympus M/Z 9-18mm lens. The storm was rare for us here on the coast in that it had tremendous form and spin. It actually formed 4 water spouts (lower right).

Giant Storm & Water Spouts, Pawleys Island, 720nm Faux Processing

Giant Storm & Water Spouts, Pawleys Island, 720nm B&W Processing

I think that I like the Faux image the best for this, but it is really a hard choice! The subject really is the storm, but the church in the foreground adds scale which helps the image. The point here is to not lock yourself into images with just green leaves, moody skies and water (Infrared Triad). Winter is just as good for Infrared photography as is Summer. CARRY your Infrared system with you as you progress through your day because you NEVER know what will pop up!

If there was EVER a reason for a new camera, Infrared is it! DSLR Infrared conversions are great, but due to the size of the camera and lens you are not likely to have it with you all of the time. Hence, I strongly advise the purchase of an Olympus E-P1, L1 or 2 PEN camera to have converted to full time Infrared. It is small and light. You will not mind having it in your car or pocket! It takes INCREDIBLE images and you can carry it everywhere! If you have it converted to Full Spectrum it can and will also shoot normal color on top of Infrared!

I always say, “If I cannot get you to spend your money on me, then I am almost as happy helping you spend it on you!”

Observations On Shooting Normal COLOR On The Full Spectrum IR Conversion E-PL


Sometimes We Just Need To Shoot In COLOR !

If you are lucky enough to have a Full Spectrum Infrared Conversion then you have the ability to shoot both in Infrared and Color!  To understand the options for using this system for color you have to know what type of UV/IR cut filter was removed from your camera during the conversion.

The Old Man, Olympus E-PL1 with B+W 486 UV/IR Cut Filter

There are two types of UV/IR cut filters (hot mirror) installed in modern digital cameras today. If you have a camera like the Olympus E-PL1 that can fully support the Full Spectrum Infrared Conversion, then you have the ability to shoot in both Color and Infrared by simply changing the filter on the lens that you are currently using! That being said, you MUST have a good understanding on the custom white balance function in your camera and how to set it for the spectrum you are trying to shoot in. As part of this understanding, you must know what type of internal UV/IR cut filter your camera had removed then replaced with a piece of clear glass! This knowledge will enable you to choose the proper type of external cut filter to purchase and use for those times you wish your camera to take normal color images!

B+W 486 & LDP CC2 UV/IR Cut Filter

The first type is basically clear glass with a thin rosy sheen on it’s surface. The color comes from very thin (molecules) layers that allow visible light to pass through but capture and reflect Infrared light back and forth between them. It also is designed to allow more visible light and a little Infrared light through to increase overall camera sensitivity. This is what the B+W 486 and LDP CC2 filters are. It works well with the Olympus E-PL1 full spectrum IR conversion but the quality that you achieve is directly related to how well you set your custom white balance. In some instances when I am shooting with a flash, my images come out dark blue but without the flash they have the proper colors! If I would re-set a new white balance then I could then get correct colors using a flash.

LDP CC1 UV/IR Cut Filter

The  second type of UV/IR cut filter installed is aqua colored glass with the rosy sheen on one side. My research into this has shown that this type of IR cut filter stops 100% of the IR light and cuts down the visible light in the blue end which generates less camera sensitivity but better color control. What this means to you is that the camera is less sensitive to light which will require an extra stop or two of exposure to take the same image that you could generate with the other filter.

Olympus E-PL1 Internal UV/IR Cut Filter Back

Olympus E-PL1 UV/IR Cut Filter Front

I called Spencer’s Camera out in Utah and asked Clarence to send me one of the Olympus UV/IR cut filters that they had removed from one of my several Olympus PEN conversions. I was surprised to see when it arrived that it was the aqua type! Since I have been using the B+W 486 UV/IR cut filter with this camera to take normal color images I realized that perhaps my  white balance issues were due to this UV/IR cut filter choice!

I located an external 58mm version of this filter from LDP called the CC1 UV/IR cut filter which I have ordered. I hope to have this new filter in hand the middle of next week for testing. Here is a chart from LDP which shows the 2 types of filters. Remember, the CC1 is the aqua and the CC2 is the gold.

LDP CC1 & 2 Filter Chart

My Expectations

  • I expect that the CC1 (aqua) filter will solve the touchy white balance issues when shooting with a flash unit with visible color.
  • White balance should become easier.
  • Better colors.
  • Less money! That is right, the LDP CC1 filter costs a lot less than the 486!

So watch here for my findings after the new filter arrives!

Quick Update: Olympus PEN’s as Infrared Converted Cameras


Olympus E-PL1

Olympus E-P1

Just a quick update.  I am starting to see a LOT of converted Olympus PEN E-P1 and E-PL1 cameras in Infrared out and about.  I have seen 4 E-PL1’s modified to Full Spectrum Infrared, one E-P1 modified to 720nm and one E-P1 converted to 850nm.  Everyone that I have talked to about the functionality of these cameras for Infrared has agreed that they are the best IR platform they have EVER used!  Funny, you would think that you would get some negative comments!  Well there was 1 semi negative comment where a very practiced IR photographer just could not get used to the mirror-less camera system and went back to a Canon 20D.  She like the IR results from the Pen just fine, just not the functionality of the body!

Remember, so far the only company doing the conversion is Spencers Camera out in Utah.  They have done a good job for me 3 times now!

VF-2 Electronic Viewfinder

For me the E-PL1 is a better choice due to its ability to use the VF-2 Electronic Viewfinder.  This makes the camera much more usable in bright sunlight (which is when you really will be out taking Infrared photographs!) It does add about $250 to the overall price of the camera but was worth it for me.  I own and have tested the following lenses with both a E-PL1 Full Spectrum conversion and a E-P1 720nm conversion and have found NO HOT SPOTS:

Olympus Micro 4/3 Lenses, 14-150, 9-18, 14-42, 20

Olympus 14-42mm m 4/3 Kit Lens

Olympus 9-18mm m 4/3 lens

Olympus 14-150mm m 4/3 lens

Panasonic 20mm m 4/3 pancake lens

Panasonic 45-200mm m 4/3 lens

For the Full Spectrum E-PL1 I have tested with the following filters attached:

B+W 486 UV/IR Cut

Tiffen 047B In camera Faux Color

B+W 041 570nm

B+W 090 590nm

B+W 091 630nm

B+W 092 720nm

B+W 093 830nm

B+W 099 550nm

There are NO hot spots for these filters on all of the lenses listed above.  You have to realize that I invest in TOP QUALITY filters.  I feel that anything you place in the optical path must be made with the best quality glass.  Most of the filters listed above are very affordable (under $30) until you get into the non visible filters 091 & 093 plus the UV/IR cut 486.

There is one other important thing that you must consider whey using any of the WIDE ANGLE lenses, you MUST use a lens shade to stop lens flare caused by sunlight coming into the lens at an extreme angle from the side.  Any sunlight in front of the lens will cause flare no matter what you do, but this is also true of normal color photography!  Olympus does NOT include any lens shades at all and you must purchase them as an accessory (BAD OLYMPUS, GO TO YOUR ROOM!)