New Fuji 55-200mm lens for IR!


Finally, a LONG X Lens for the Fuji Family!

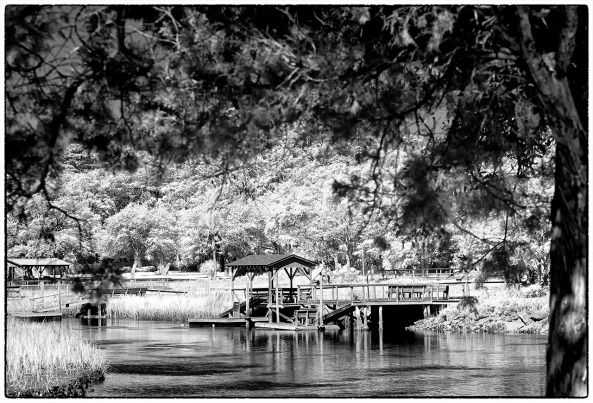
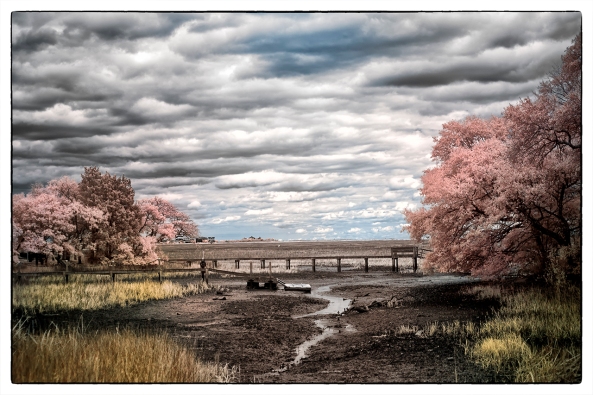
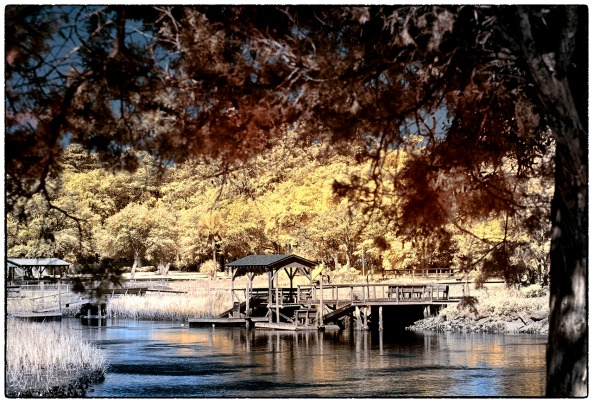
Pawleys Marsh, Fuji X Pro 1 720nm IR conversion w/ the new 55-200mm lens.

Pawleys Marsh, Fuji X Pro 1 720nm IR conversion w/ the new 55-200mm lens.

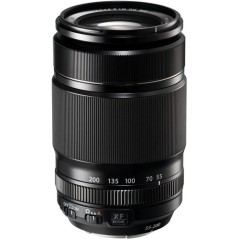
Fuji X 55-200mm

Fuji X 55-200mm

Yes, the new Fuji 55-200mm lens arrived for my fuji camera systems!  I am currently shooting with a color X-E1, a color X Pro 1 and a IR converted (720nm) X Pro 1.   I know how well the 55-200 works on the color bodies but what I really needed to know how did it work with the IR system!  Would it give hot spots as so many of the Fuji lenses do?  This post is the report of my findings.  The final verdict is that it works very well and as long as you do not go higher than f/16 there are no hot spots to worry about at any zoom range! To me this is a really big deal.  

So far only the 14mm and 35mm Fuji lenses are usable in infrared. So the addition of another lens really helps.  

I am going to give you some examples of how this lens actually does at both the wide and long ends of the zoom range wide open and closed down so that you can get a feel of the usable Infrared range that you can use.  Next week I will do a posting using the lens for color work only.

Pawleys Marsh, Fuji X Pro 1 720nm IR conversion w/ the new 55-200mm lens.

Pawleys Marsh, Fuji X Pro 1 720nm IR conversion w/ the new 55-200mm lens.

OK, let’s take a look at the good and bad of the 55-200 in IR, the Wide end:

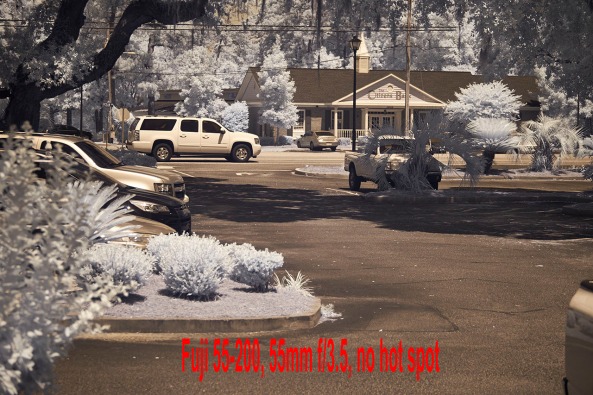
55-200mm @ 55mm, f/23.5 No hot spot

55-200mm @ 55mm, f/23.5 No hot spot

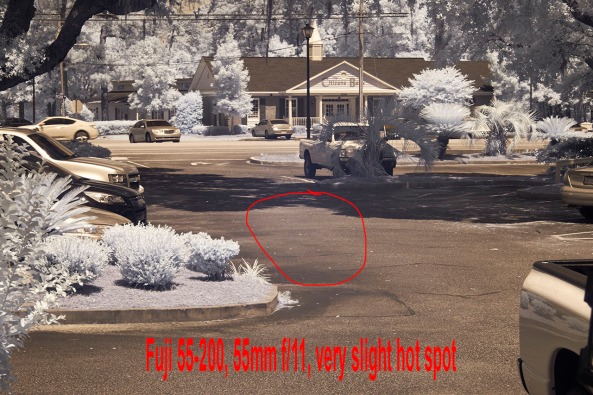
55-200mm @ 55mm, f/11  Small hot spot

55-200mm @ 55mm, f/11 Small hot spot

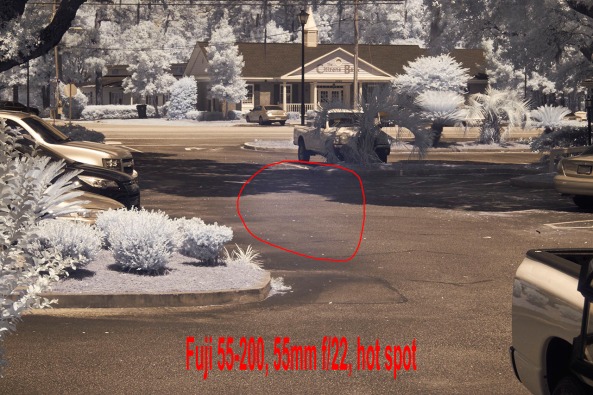
55-200mm @ 55mm, f/22 Bad hot spot

55-200mm @ 55mm, f/22 Bad hot spot

As you can see as you get to f/11 we start to develop a small hot spot, but nothing that cannot be fixed.  Above f/11 the lens becomes unusable at the wide end.

Now, let’s take a look at the long end of the zoom range:

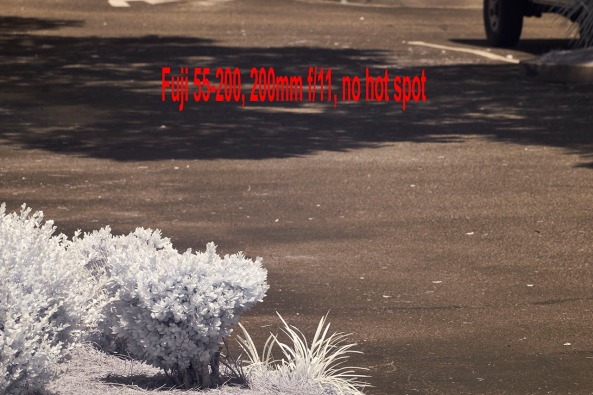
55-200mm @ 200mm, f/11 Bad hot spot, NO HOT SPOT

55-200mm @ 200mm, f/11 Bad hot spot, NO HOT SPOT

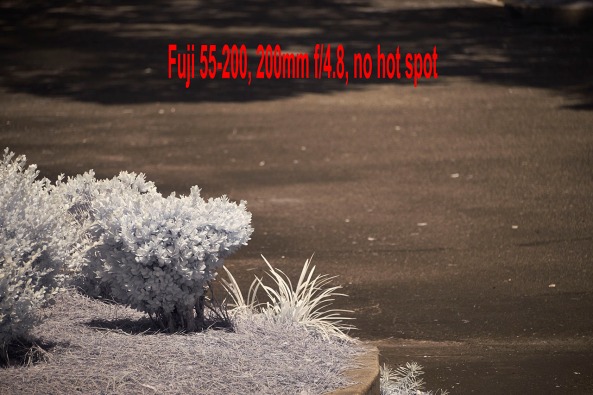
55-200mm @ 200mm, f/4.8 Bad hot spot, NO HOT SPOT

55-200mm @ 200mm, f/4.8 Bad hot spot, NO HOT SPOT

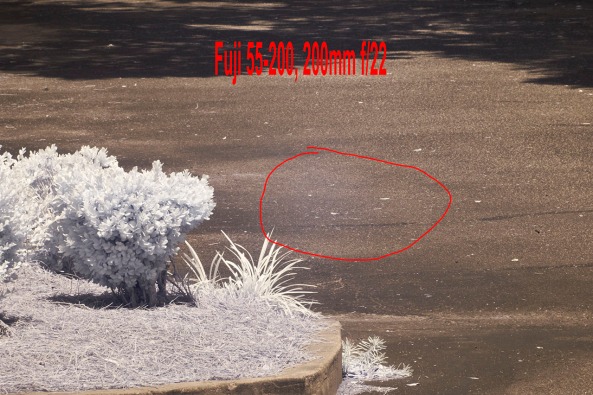
55-200mm @ 200mm, f/22 Bad hot spot, SMALL HOT SPOT

55-200mm @ 200mm, f/22 Bad hot spot, SMALL HOT SPOT

The difference at the long end of the zoom is amazing and is usable over the entire range of the aperture!  This is great news for us IR shooters.

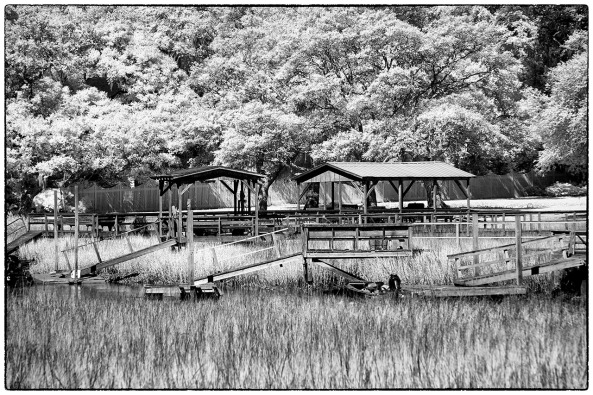
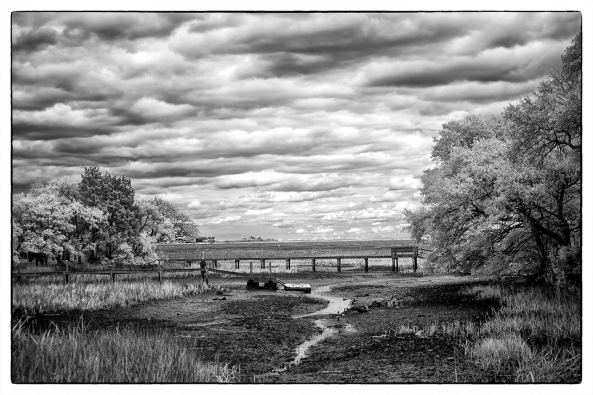
Pawleys Island Marsh, 200mm B&W Post Processing

Pawleys Island Marsh, 200mm B&W Post Processing

There is starting to be a large number of IR photographers out there who are using converted Fuji X Pro 1 camera systems.  There are currently 2 conversion companies out there who can do the conversion.  I HIGHLY recommend the X Pro 1 as an Infrared platform and with the addition of the 55-200mm lens to our shooting arsenal we are way ahead of the game!


A Simple Tutorial on Infrared Post Processing…

from my fine art photography blog

Murrells Inlet Marsh, X Pro 1 720nm IR Faux Color

Murrells Inlet Marsh, X Pro 1 720nm IR Faux Color

The Fuji X Pro 1 has turned out to be one of the best Infrared camera systems that I have ever used… period!  The only good Fuji lenses for Infrared have proved to be the 35mm f/1.4, the 18mm f/2 and the new 14mm.  The Viogtlander 75mm f/1.8 has also proved to be a STUNNING lens also!  So, the camera has proven its infrared capability, now it is time to discuss in detail the recipe for post processing!  It is all quite simple but there are a few requirements that you must understand in order to follow my workflow with understanding.

Needed:

  • Photoshop CS5 or CS6
  • Nik Filters, Viveza, Define Silver EFX Pro plugins for Photoshop, NOT LIGHTROOM.  (You can now purchase the entire library of Nik filters for $149)
  • Kromography False Color Action which can be downloaded here from the right menu bar under the box menu.  You can simply  click on it to download to your computer then drag it to photoshop to install.
  • A converted Infrared camera system capable of generating enough color data to make Faux Color images.  This means 720nm, 665nm, 630nm and 590nm conversions.
  • The ability and desire to experiment!

As you move your RAW (shoot only RAW for IR because of the ability to shift the white balance easily) onto your computer you should automatically tell yourself that you are going to process each selected image in Faux color and B&W.  Sometimes you will notice that the un processed image looks great also (wonderful bronze tones) and decide to do a version like this as well!

Lets talk about the RAW conversion process a little bit.  Photoshops ACR built in RAW converter will NOT apply the white balance correctly and your images will appear deep red.  For this reason I use Capture One version 7 from Phase One.  It is simply the BEST RAW converter that I have ever used.  You can download a trial version and decide for yourself if what I am telling you is true!

My Initial Editing Steps:

  1. Move images from my camera to my computer with an intelligent download tool that renames them with a meaningful name and create an intelligent directory tree for my RAW Library.  For this I have tested dozens of tools and found that Ingestimatic is the best and lowest cost one out there! You can find them here.
  2. Visually edit the RAW files by deleting the images that are simply no good.  Do not clutter up your computer with these useless files.
  3. Batch process my RAW conversion choices and adjust the exposure, contrast and angles.  Capture One will allow this and place the converted image files into a storage directory for later editing.
  4. Within Photoshop, open  each converted image one at a time for post processing
  5. Run Nik Define 2.0 in its default mode on the image for noise reduction, Save.
  6. Run Nik Viveza and without using any selection points increase the structure around 10% and the contrast about 5%, Save.
  7. Having installed the channel swap action that you downloaded here, run it on your image.  The last thing it will do is to open a Hue/Saturation window with the Master channel selected.  Simply select the CYAN channel  and vary the HUE a little bit to bring the sky to a normal blue rather than a blue/green.  Then select the RED channel and adjust the saturation up to a value you like, and repeat with the YELLOW and MAGENTA channels.  When you are happy with the results click on DONE to move on.  REMEMBER:  This is to only get the colors of the FAUX COLOR IR image into the ball park!  The real adjustment will happen next.
  8. Run Nik Viveza again.  Here is where you will use your control points to slightly adjust the colors and contrasts of various image elements to bring out a stunning, etherial work of art!  LOOK closely at your image, decide what you wish to adjust (Hue, saturation, contrasts and de-saturation). MORE ON THIS LATER!
  9. Run Nik Define one more time.
  10. Flatten the image, crop to taste, correct any imperfections (healing tool and content aware fill).
  11. Save the image with a meaningful name in a planned and thought out master image library.
  12. With the finished Faux Color image still open in Photoshop, now run Nik Silver EFX Pro to do your B&W conversion.  There are several built in recipes in this filter that can be used as a starting point.  My favorites are:
  • High Structure Harsh
  • High Structure Smooth
  • Full Dynamic Range Harsh
  • Full Dynamic Range Smooth
  • Fine Art Process
  • Wet Rocks (once in a while)

Save your image again with a NEW file name that reflects the difference in your master image library tree!

Murrells Inlet Salt Marsh, X Pro 1 720nm IR

Murrells Inlet Salt Marsh, X Pro 1 720nm IR

Remember:  Process ALL IMAGES as both Faux Color and B&W.  You really do not know what you are going to get till you do so.

All of this really is VERY SIMPLE and once you have done it a few times it will become second nature to you.  Soon you will be a post processing Infrared God or Goddess!  Congratulations

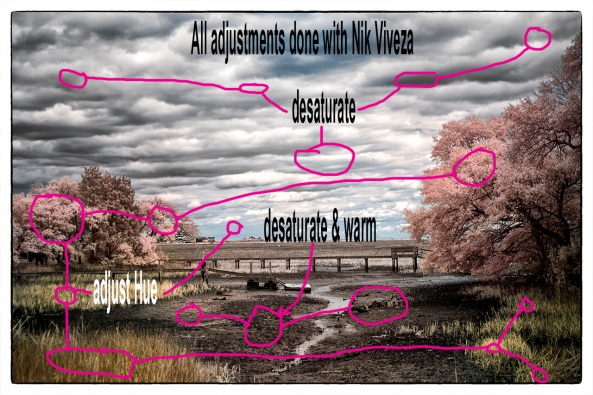
No, let’s take a look at the image below.  Notice the areas that I have circled as places where I desire to change the colors, contrasts and saturations (both plus and minus). Also consider that this is a 720nm converted camera and as such has a very limited color range (light pinks and warm tones and blues).

Annotated Faux Color, X Pro 1 720nm IR

Annotated Faux Color, X Pro 1 720nm IR

It is in this area and others like them (similar color values that are the same) that we are going to place control points on and change these values!  If you notice that the areas around them also change a little you can place what we call anchor points which are simply control points with no adjustments to bring those areas back to where you wanted them!

You will find this ENTIRE process from the initial loading into photoshop to finish will just take 4 or 5 minutes or less as you become more practiced!

Here are a few more images for you to consider that were taken on the 720nm Fuji X Pro 1 camera system:

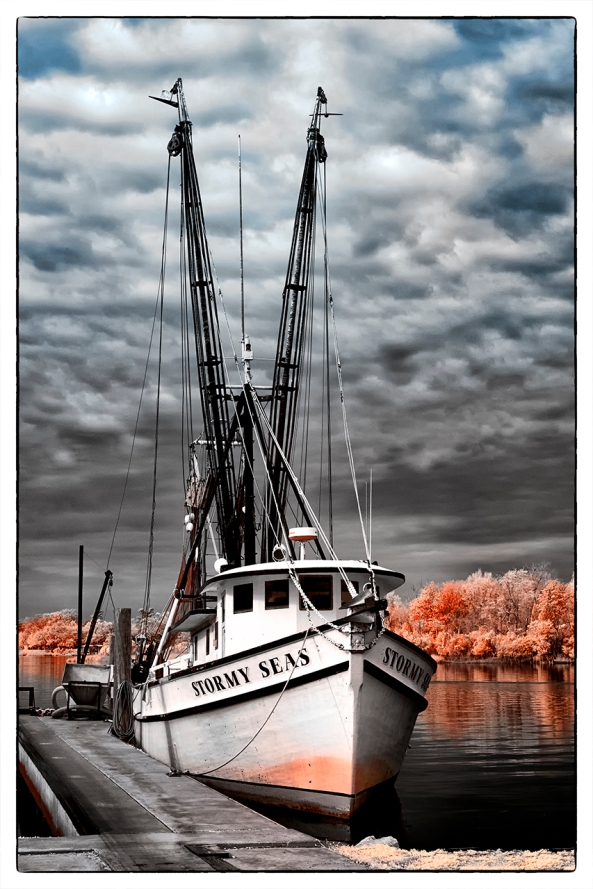
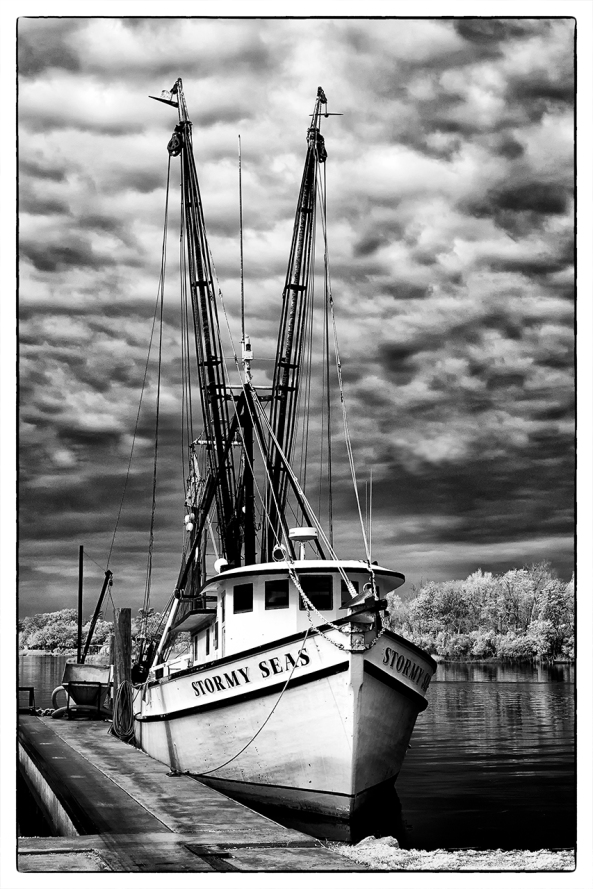
Stormy Seas Faux Color, X Pro 1 720nm IR

Stormy Seas Faux Color, X Pro 1 720nm IR

Stormy Seas B&W, X Pro 1 720nm IR

Stormy Seas B&W, X Pro 1 720nm IR

Sometimes Faux Color images simply do not work, then you still have the great B&W ones to work with!

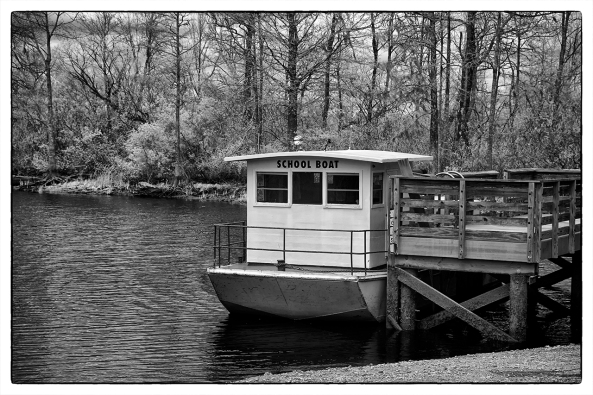
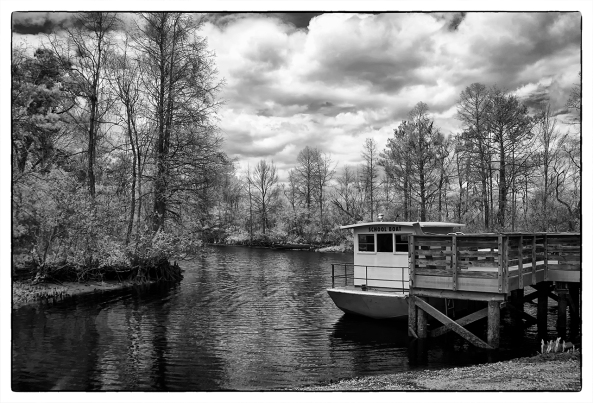
SC School Bus Boat, X Pro 1 720nm IR

SC School Bus Boat, X Pro 1 720nm IR

SC School Bus Boat, X Pro 1 720nm IR

SC School Bus Boat, X Pro 1 720nm IR

Was this information helpful?  Please let me know one way or the other!

1st Official Fuji X Pro 1 720nm Converted IR Post!


Here it is…

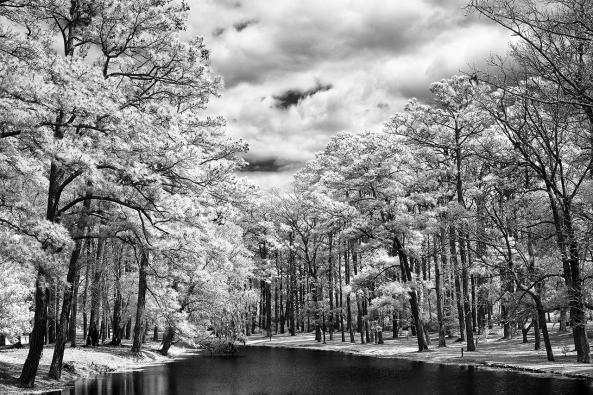
Fuji X Pro 1, Brookgreen Gardens, 720nm B&W processed.  Fuji X 35mm lens.

Fuji X Pro 1, Brookgreen Gardens, 720nm B&W processed. Fuji X 35mm lens.

frontnolensWell, it arrived!  After months of consideration after I got my X-E1 I finally decided to send off the X Pro 1 for  Infrared conversion.  It went to Dan at LDP (maxmax.com) and the cost was $500.00.  YIKES!  yes I said $500.00!  Dan explains that the X Pro 1 is the most difficult conversion that he does!  It required him 1.5 days to do the conversion and lots unsoldering/soldering to get to the sensor.  Still, better than sitting on the shelf or an attempted sale on Ebay, plus  I really like the camera and the hybrid viewfinder is just perfect for IR.

I had to decide between 720nm and 850nm so decided to go for the 720 in order to have a little color ( I really like the bronze tones right out of the camera at 720nm).  The total time for shipping – conversion – shipping was 8 days, door to door.  Very fast!

Importantly, the Fuji X Pro 1 camera White Balances perfectly. For these tests I white balanced on a green shrub in front of my gallery.  The process to do so on the camera is simple and fast!

The scope of THIS post is to talk about the conversion itself and to give you some sample images testing each of my normal Fuji and Voigtlander lens set that I use.

  • Voigtlander Heliar 75mm f/1.8 Lens
  • Voigtlander Ultra Wide-Heliar 12mm f/5.6
  • Fujifilm XF 35mm F1.4 Lens
  • Fujifilm XF 18-55mm F2.8-4.0 Lens Zoom Lens
  • Fujifilm XF 18mm F2.0 Lens
  • Fujifilm XF 60mm F2.4 Macro Lens

My first image out of the camera was with the Fujifilm XF 35mm F1.4 Lens.  It is stunningly sharp with great contrasts and tones without any processing at all! This is simply a perfect IR image right out of the camera.
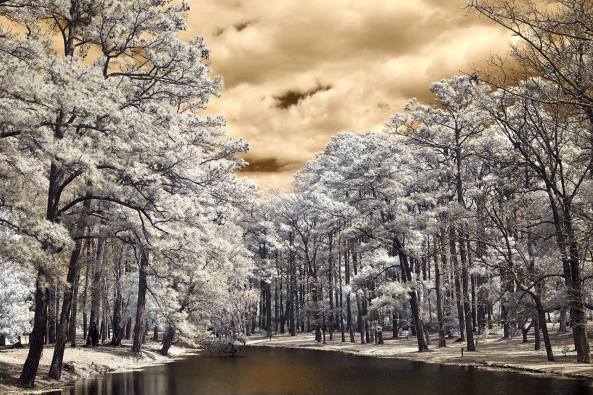
Fuji X Pro 1, Brookgreen Gardens, 720nm RAW un-processed.  Fuji X 35mm lens.

Fuji X Pro 1, Brookgreen Gardens, 720nm RAW un-processed. Fuji X 35mm lens.

OK, the original hot mirror can tell us a lot about the capability of the Fuji body to take IR with no conversion.  The strength of the internal filter from the X Pro 1 is quite strong!  It is actually 2 filters sandwiched together.  They are very much like the B+W 486 IR blocking filter and the LDP CC1 IR blocking filter back to back.  The 486 is a pink/gold  filter that extends a little further into the visible light spectrum before falling off and allows a little less IR to pass through.  The CC1 filter is wider at the UV end.  The two filters together will pass light to the sensor from about  300nm to 700nm.  You can see this in the image below. This is the same filter arrangement (hot mirror) that we normally see in the Canon DSLR line and on the Panasonic Micro 4/3 camera line.
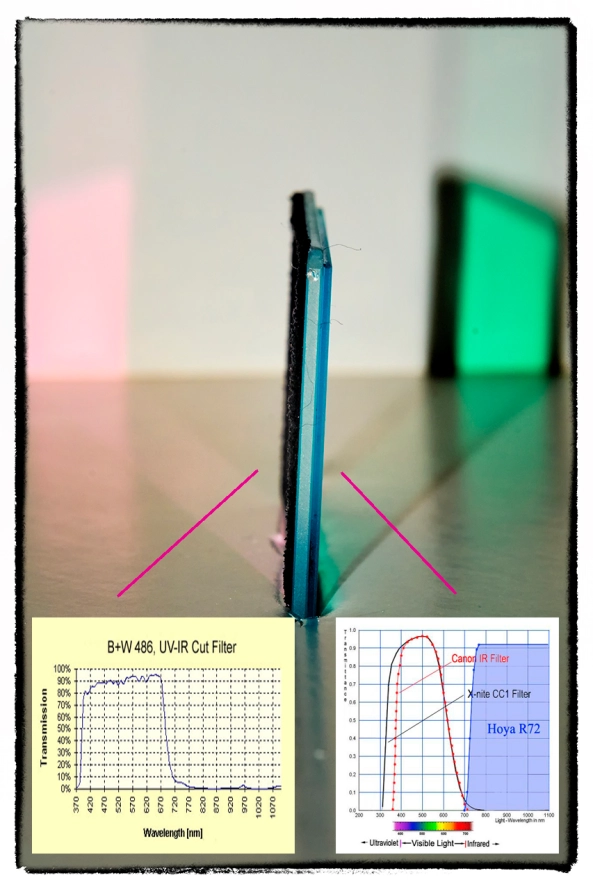
X Pro 1 Hot Mirror showing both Wide bandpass side (gold tint) and the Lower UV side (Aqua)
X Pro 1 Hot Mirror showing both Wide bandpass side (gold tint) and the Lower UV side (Aqua)

X Pro 1 Hot Mirror showing the Wider bandpass side (gold tint)
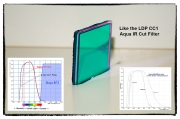
X Pro 1 Hot Mirror showing the Wider bandpass side (gold tint)

X Pro 1 Hot Mirror showing the Lower UV side (Aqua) similar to the CC1 filter from LDP

X Pro 1 Hot Mirror showing the Lower UV side (Aqua) similar to the CC1 filter from LDP

If you were to look at the 486 and CC1 filters they are the same general colors and pass band to what we actually see here!  So , what does this all mean to you?  If you decide (and convince Dan) to have a full spectrum conversion done on your X Pro 1, you can convert it back to a normal color camera by stacking both of these filters (B+W486 and the LDP CC1) on the end of your lens.  The full spectrum Infrared conversion is one where the hot mirror (IR blocking filter) is removed from in front of the sensor and replaced with a piece of clear glass.  Then, the camera is programmed to the specific UV or IR band with the addition of the appropriate filter on the end of the lens.

Normally, the hot mirror can bee seen as the colored layer of glass under the lens as shown here where you can now see the 720nm filter installed.
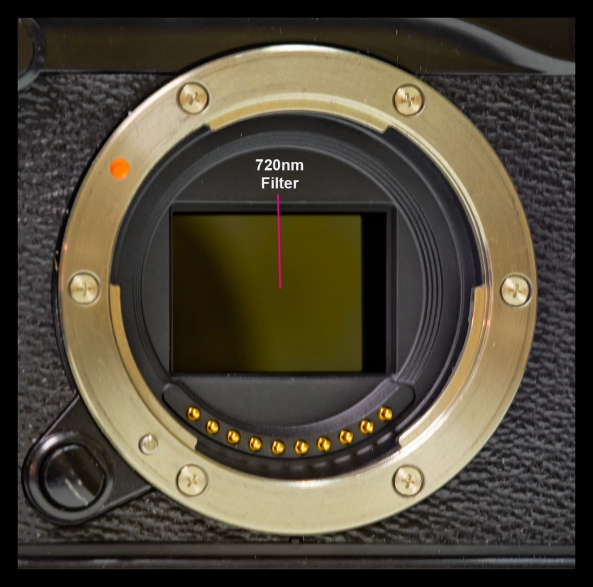
Inside the X Pro 1 showing the 720nm filter.

Inside the X Pro 1 showing the 720nm filter.

Lenses that Work/Don’t Work with the X Pro 1 720nm IR conversion…

Lens Hot Spots

As you may know (or guessed), not all lenses work well in the Infrared spectrum.  This is due to many things, but most commonly, the coatings on the lens elements and the coatings on the internal lens barrel and how they reflect IR light energy.  The common failure then is in the form of HOT SPOTS in the center of the image captured by the camera.  These are always dead center in the middle of the image and present as large round white areas.  Sometimes, they can be overcome by using a wider aperture, but not always…

Lets talk about the lenses that I tested that work (or in 1 case mostly work)…

Fujifilm XF 35mm F1.4 Len:
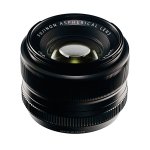
Fuji X 35mm Lens

Fuji X 35mm Lens

WOW, what can I say?  This lens works perfectly in the 720nm spectrum at all apertures!  The camera auto focuses perfectly and fast, the images are sharp and there are no hot spots at any aperture!  Lets take a look.  This first image is raw out of the camera.  I have done not post processing for B&W or Faux Color but there is enough color in the 720nm spectrum to have some interesting Faux Color results.  These types of images will be covered in another post next week and we will spend a lot of time and effort teaching and going through each step in the recipe used to create them in Photoshop CS6 and the Nik filter set.

Fuji X Pro 1, Brookgreen Gardens, 720nm RAW un-processed.  Fuji X 35mm lens.

Fuji X Pro 1, Brookgreen Gardens, 720nm RAW un-processed. Fuji X 35mm lens f/8

Next, is the same image post processed using CS6 and Nik’s Silver EFX Pro for B&W…

Fuji X Pro 1, Brookgreen Gardens, 720nm B&W processed.  Fuji X 35mm lens.

Fuji X Pro 1, Brookgreen Gardens, 720nm B&W processed. Fuji X 35mm lens f/8

Voigtlander Heliar 75mm f/1.8 Lens:
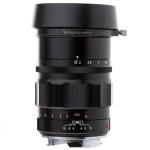
vt7518bThis lens from Voigtlander is one of the sharpest, easy to use lenses that I own.  The fit and finish on this lens is something to behold.  The lens has an included clamp on lens hood that works very well.  The focusing is so smooth that it is scary… It is a PERFECT match for the Fuji X system (X Pro 1 and the X-E1) and works just as well here in Infrared!  I was very happy to discover this in my tests at 720nm!  There are no hot spots at any aperture.  It takes Take a look:
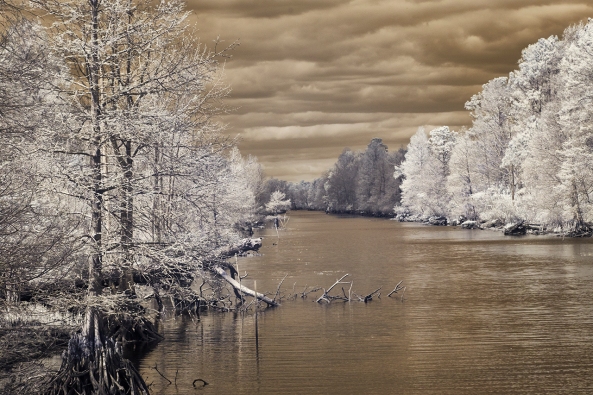
Voigtlander Heliar 75mm f/1.8 Lens at f/11.  Raw

Voigtlander Heliar 75mm f/1.8 Lens at f/11. Raw (notice the nice bronze coloring)
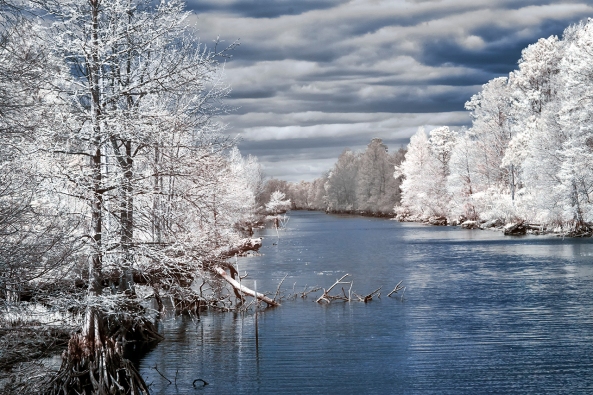
Voigtlander Heliar 75mm f/1.8 Lens, f/8 Faux Color Post Processing
Voigtlander Heliar 75mm f/1.8 Lens, f/8 Faux Color Post Processing

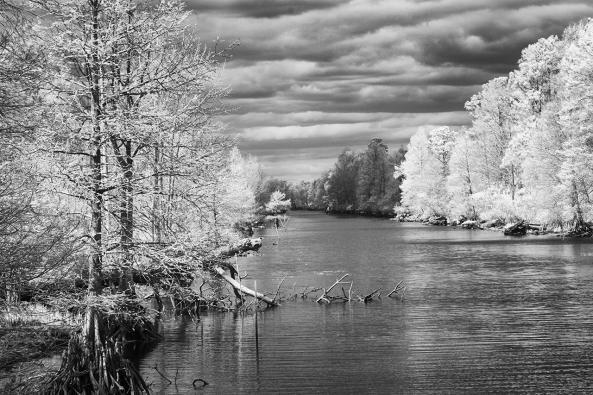
Voigtlander Heliar 75mm f/1.8 Lens, f/8 B&W Post Processing

Voigtlander Heliar 75mm f/1.8 Lens, f/8 B&W Post Processing

Fujifilm XF 18mm F2.0 Lens:
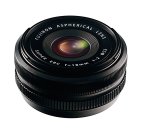
Fuji X 18mm lens.

Fuji X 18mm lens.

This lens works well as long as you do not go beyond f/8.  Past that it generates very discinct hot spot in the center of the image.  While this can be overcome in post processing  with Nik’s Viveza, it is still slightly disappointing…  Still, when used at f/8 or wider the lens generates pleasing sharp images that make it worthwhile to carry in your camera bag!  Here are the RAW test samples for you to consider.
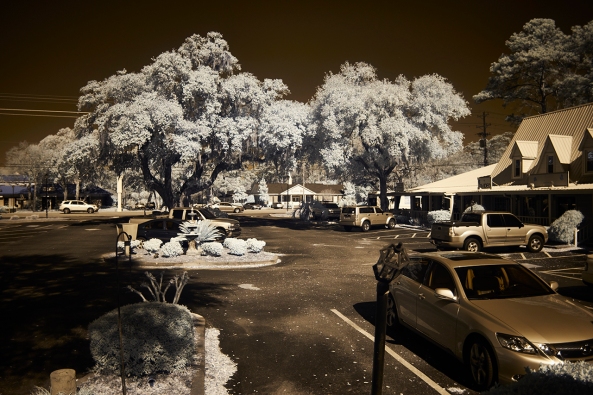
Fujifilm XF 18mm F2.0 Lens at f/2
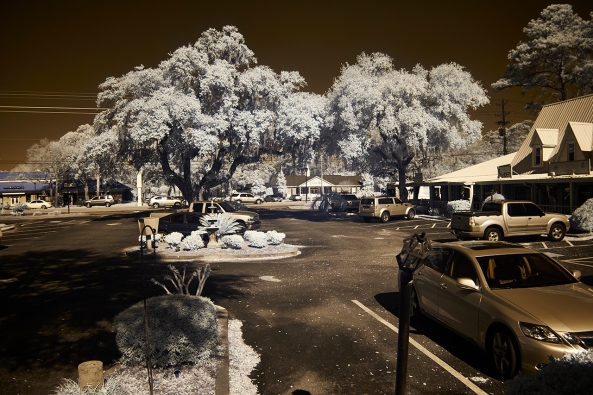
Fujifilm XF 18mm F2.0 Lens at f/2

Fujifilm XF 18mm F2.0 Lens at f/4
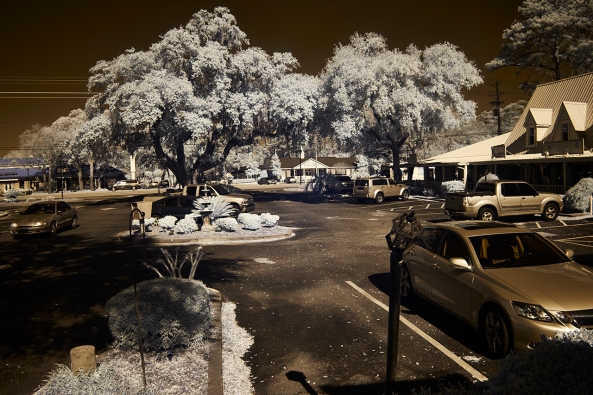
Fujifilm XF 18mm F2.0 Lens at f/4

Fujifilm XF 18mm F2.0 Lens at f/5.6
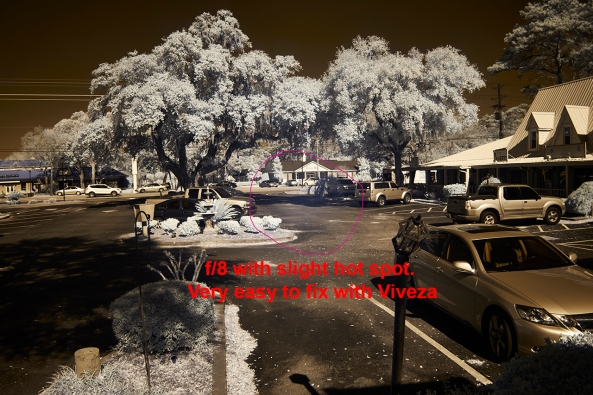
Fujifilm XF 18mm F2.0 Lens at f/5.6

Fujifilm XF 18mm F2.0 Lens at f/8
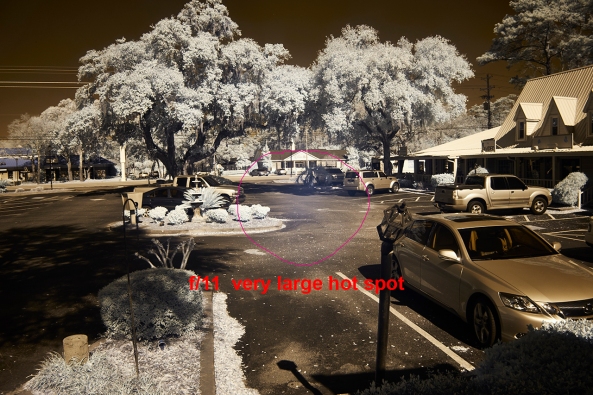
Fujifilm XF 18mm F2.0 Lens at f/8

Fujifilm XF 18mm F2.0 Lens at f/11

Fujifilm XF 18mm F2.0 Lens at f/11

Voigtlander Ultra Wide-Heliar 12mm f/5.6
Voitlander 12mm

Voitlander 12mm

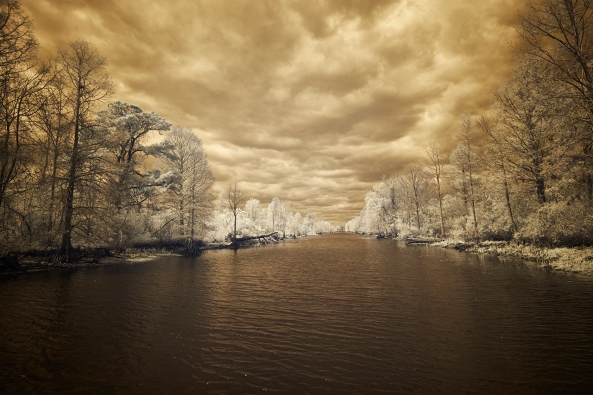
Another great lens from Voigtlander.  This one has a built in lens hood and while it will take screw in filters they need to be wide angle versions.  It also has that super smooth focusing feel but since it is so ultra wide at 12mm you can focus it pretty much at infinity and it will always be in focus.  I love this lens on the X Pro 1 and X-E1.  For 720nm Infrared, it works great until you hit f/22 then it gives a faint hot spot.  This is just fine with me as I rarely go beyond f/11 or f/16.

Take a look at the samples:
Voitlander

Voigtlander Ultra Wide-Heliar 12mm f/5.6 at f/8 RAW
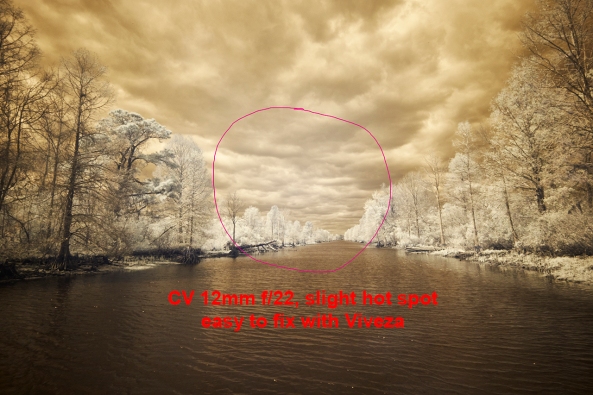
Voigtlander Ultra Wide-Heliar 12mm f/5.6 at f/22 RAW with hot spot

Voigtlander Ultra Wide-Heliar 12mm f/5.6 at f/22 RAW with hot spot

Fujifilm XF 18-55mm F2.8-4.0 Lens Zoom Lens:
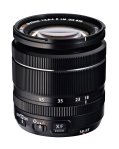
Fuji 18-55

Fuji 18-55

This lens is such a disappointment to me…  It is without a doubt my favorite walk around Fuji lens on the X-E1 camera. I hardly ever take it off.   Sharp and clear with great contrast.  That being said it is all but USELESS for Infrared!  There is a major hot spot problem at ALL focal lengths at ANY aperture past f/4.  At f/4 it did take nice images but as you understand, useless for landscapes.   Bummer…..  I am beyond disappointed over this one.

Fujifilm XF 60mm F2.4 Macro Lens:
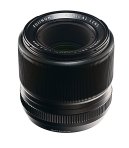
Fuji 60mm

Fuji 60mm

I am going to initially tell you to simply forget this lens for Infrared.  It has a seriously bad hot spot at all apertures.  I will also share with you that I might actually have a bad copy of it.  It gives a terrible hot spot on my X-E1 when shooting in color as well, especially when using a flash.  I think that I am going to send it back to Fuji for repair and see what they think.  Depending upon that I might re-evaluate it for Infrared later on!

Ok this is all for the initial post.  

The next post will focus on post procseeing and what can be acheived artistically with this new Infrared Fuji X Pro 1!

Please let me know what you think!
Italy, 2012, Post #2


Speciality 590nm Post Processing to OVERCOME Difficult Images!

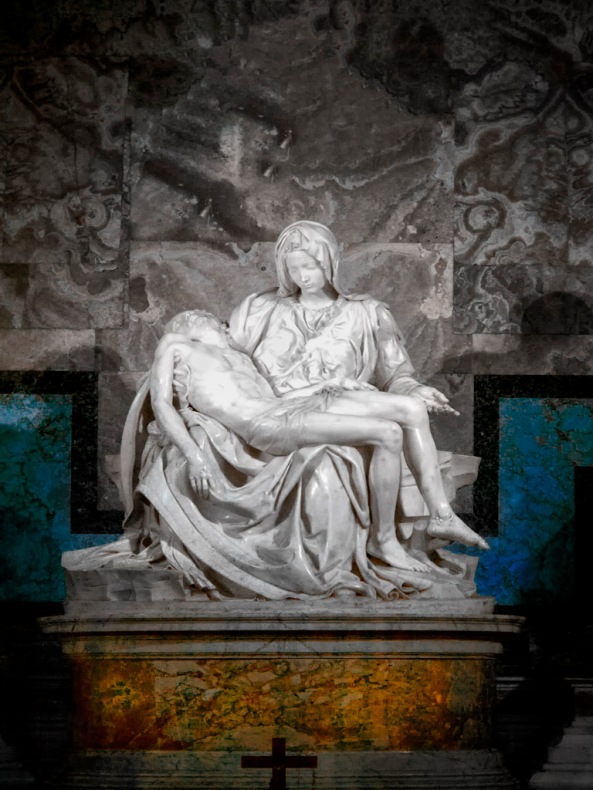
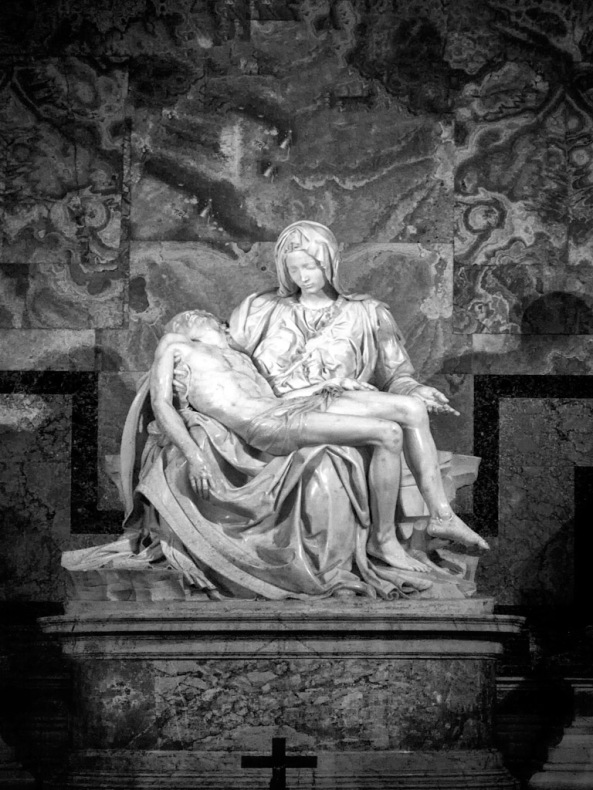
Michelangelo's "Pieta" in Saint Peters Basilica, Rome, 590nm Faux Color Infrared.

Oh my, where to start… Hmm well I think that there is no need to proceed in any order so I will tackle the most important images in order rather than by location!

Looking at the image of the Pieta above the first thing that comes to mind is the full beautiful saturated colors.  One would look at this and never realize that this is a Faux Color Infrared image!  It is indeed a 590nm IR images taken on the Panasonic GH2 with the 14-140mm lens, INDOORS, THROUGH PROTECTIVE GLASS at a super high ISO of 1250, 1/60 s, f/5.6 HANDHELD. It is in fact not a scene that one would normally consider for Infrared.  This is EXACTLY why I did choose it.  Color was nice, but everyone shoots it in color.  I desired something different and new.  I cannot imagine that it has EVER been photographed in Infrared!

Post processing for this one took considerably longer than the standard 30 seconds with CS5 and the Nik filters.  There were also several problems with the scene that I had to overcome!  First and foremost was the Plexiglas shield between the public and the statue.  It was not exactly clear and there were literally thousands of people standing there shooting wildly all of them using their flashes which were just bouncing off the plastic making it more difficult to see through.  Also there was a large window just over the head of Mary which had the sun directly behind it.  Ok how I did this image:

  • I took my time moving up through the crowd until I got to the rope divider and placed myself directly in the center of the plastic so that I would not cause issues from photographing from an angle.
  • I made sure to have the flash turned off (its normal condition).
  • I set the ISO to 1250 so as to have a f/5.6 aperture at at least 1/60s shutter.
  • I chose a zoom range of 24mm so as to overcome lens bending issues.
  • I then choose the composition in the Portrait mode and set my exposure ON THE WHITE STATUE set to Zone 7 and 8.
  • I took a LOT of pictures as I needed to overcome camera shake, other folks flash reflections bouncing back at me and reflections in the plastic.  By a lot I mean 20 or so images…

Things to consider when shooting through plexiglass:

  1. Your overall contrast will be greatly reduced so PERFECT EXPOSURE is a must!
  2. Flash bounce back from others cameras will KILL your image.
  3. Low shutter speed will require a solid support.

Still, knowing all of the issues I knew that I could overcome them in Post Processing, so I simply set everything up and shot away with the thousand other tourists!

I trusted my ability to set the exposure perfectly on the white statue in the spot meter mode of the camera and then wisely selected ZONE 7 & 8 by dialing in the appropriate positive exposure compensation.  I also knew that I could hold the camera quite still and trusted in its built in image stabilizer to help.  I used the LENS HOOD to cut down on flash reflections striking my lens objective and causing further loss of contrast (you do this also… right?)

After getting back home I went through my 20 images and selected the absolute best version to move into the post processing phase.

My Post Processing Recipe:

  1.  Using Capture One RAW converter I made sure that the image was straight.  I adjusted the contrast up about 10% and adjusted the exposure so that the RED channel was from edge to edge in the histogram. I also insured that there were no hotspots on the statue.
  2. After converted to a 16 bit TIFF image I opened it up in CS5
  3. I cropped the image to my master image size of 8.5″ x 12.5″ at 300 dpi.
  4. I ran Nik Define 2.0 and manually chose measurement points on the statue and the marble wall behind it.
  5. I ran Nik Viveza and increased contrast up again by 10%, structure up 10% and brightened the overall image a few percent.
  6. I used the lasso selection tool and selected the window behind the statue and then via edit > fill with content aware allowed CS5 to remove the window and replace it with more marble from around it. I had to reselect the edges a few times  and go through the process again to make sure that the marble blended perfectly!
  7. I now ran the Channel Swap Action that you can download from here.  At the end of the action it pops up a window with the color channels.  From that window I selected RED and made saturation and hue adjustments, Yellow with saturation and hue adjustments, Cyan  for saturation and hue adjustments (cyan is the most important adjustment, this is where you overcome the blue/green sky during the channel swap by adjusting the hue control towards the blue end!) then selected OK to end the action.
  8. I ran Nik Define 2.0 again to clean up some noise generated by the channel swap action.
  9. I now ran Nik Viveza AGAIN and using selection points I started at the top of the image and worked my way down to the bottom adjusting BRIGHTNESS, CONTRAST, STRUCTURE, RED, GREEN & BLUE levels and finally SHADOW adjustments.  All in all I placed about 100 selection points in the image to get it just right.  As you can see, this recipe is much more detailed than that which I usually use for normal Infrared post processing!
  10. I ran Nik Viveza AGAIN and darkened the four corners to force the viewers eyes into the image center.
  11. I ran Nik Color EFX Pro and chose the Vignette: BLUR filter and adjusted the outside edges of the image to be slightly blurry.
  12. Flatten and save image as a PSD file with a name that is meaningful!

That is it.  The entire process took about 20 min from start to end and I feel that the process was very much worth the time investment.

Here is a B&W version generated by Nik Silver EFX Pro 2 for you to compare.  It looks good, but the color image just grabs me by the throat and screams, LOOK AT ME!

Michelangelo's "Pieta" in the Saint Peters Basilica, Rome, 590nm B&W IR

What do you think?  Please give me some feed back on how you feel the images look and feel to you!

Italy, 2012, Post #1


Or, How I Spent My Summer Vacation…

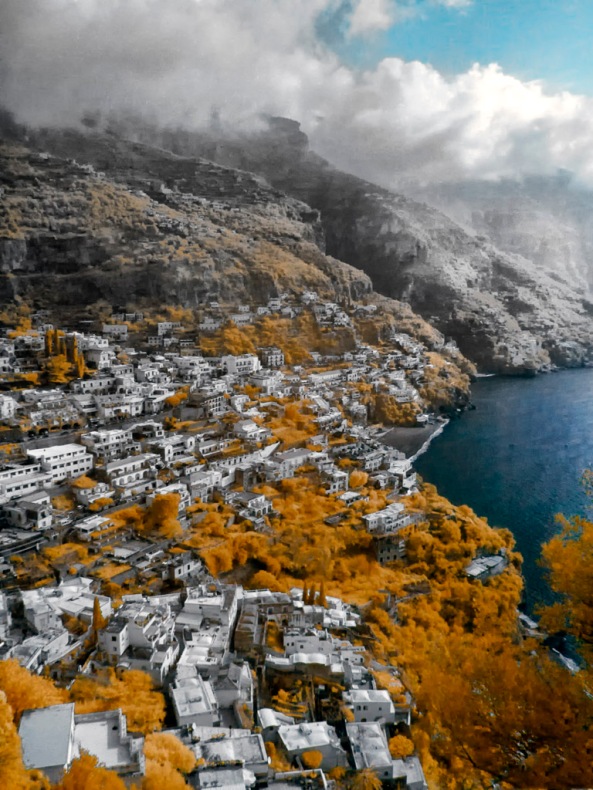
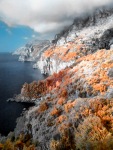
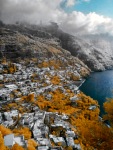
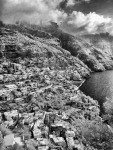
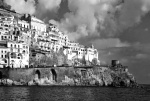
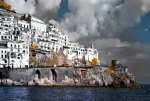
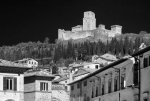
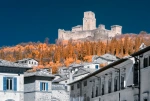
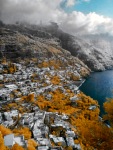
Amalfi, 590nm Faux IR

Ellen (my wife) and I decided that it was time to take a trip somewhere to “get away” for a short while.  We decided that a trip to Italy was just what the doctor ordered!  Last year we went to Greece but booked an inexpensive hotel in the center of Athens then took day trips to various places in Greece.  We learned that this was NOT the way to go.  So for Italy we booked a total package trip through Gate 1 which included 5 star hotels, ground transportation, guides and entry fees for the following cities:

  • Venice, 2 days
  • Pisa, 1 day
  • Florance, 2 days
  • Assisi, 1 day
  • Rome, 3 days
  • Pompeii, 1 day
  • Sorrento, 2 days
  • Amalfi, 1 day

The hotels were amazing and the ground transportation was luxury buses.  All very well planed and executed!  The only real drawbacks were the food costs and the amount of walking required to tour the various locations. This was a group tour which had 35 people plus one full time guide.  Everyone was from the USA except for the guide who was from Rome.  She was very good and kept us all very organized. There was another professional photographer in our group besides me who specialized in Pin Hole Photography using home made wooden cameras shooting film!  I had several hours of very good conversation with him. I would not hesitate to use Gate 1 again in the future.

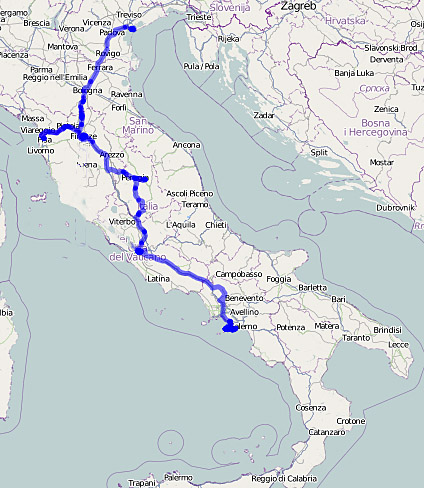
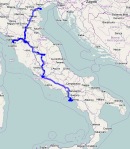
GPS track of our path through Italy

As you can see from the rough GPS track above we covered a lot of the country.  I took along a small GPS device to generate a bread crumb track so that I could TAG all of my images for location as well as keep a detailed plot of our movements.  It worked very well and had enough memory for several months of movement and a 44 hour battery life! The unit I decided on was from Ostarz and called the X-1000 Travel Recorder XT.  It is TINY and has a bluetooth interface for uploading the date to your computer system.  I am very pleased with it so far and it has worked flawlessly.

Each of the cities that we visited were interesting in their own way and all were different!  Below I will give you a basic overview of each and what I liked about it!

  • Venice.  A very unusual city of boats.  The water scenes were amazing and I loved every moment here.  I only took a few IR shots here and a ton of color images!  We visited ALL of the major attractions here plus took a water taxi to the island of Murano where we watched artisan master glass blowers create their wares!  All in all a most enjoyable destination that I would have enjoyed another day at.
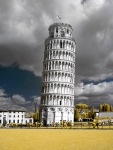
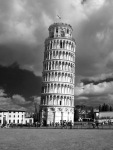
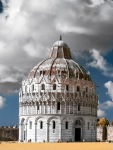
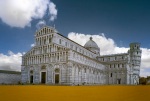
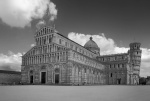
  • Pisa. We were told that we would not enjoy this location because it was boring and full of gypsies.  NOT TRUE!  The basilica which is made up of the Battistero, the Duomo and the Leaning Tower were amazing both inside and out.   Amazing photography!  There was another big plus here in that we found a McDonalds and Ellen was able to have her first cup of normal American coffee!  Color her happy!
  • Florance.  A city of the arts full of splendor.  I really enjoyed walking along the river taking photographs both during the day and night!  Very interesting buildings and statues!
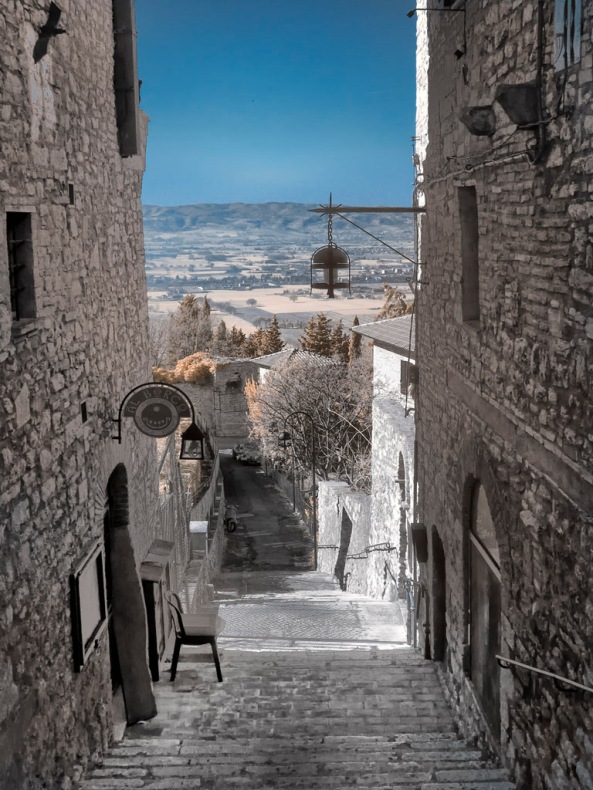
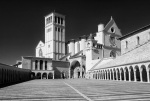
  • Assisi.  Here I would have liked to spend another day!  Amazing is the only word for it.  The basilica of Saint Francis was amazing and full of world class photographic opportunity.  I took a LOT  of Infrared images here…
  • Rome.  BIG, 4 million residents.  The Vatican was amazing.  We visited there both during the day as well as at night.  The Chapels and Museums there left me stunned.  We took a walking tour of all of the famous fountains, ruins and basilicas.  I took a lot of Infrared here.  I would have been happy with 2 days here instead of 3.
  • Pompeii.  HUGE ruins.  Interesting.  No good for color photography due to the time of day so I basically shot Infrared all day.  After the first 2 streets everything started to look the same.  
  • Sorrento.  What can I say about Sorrento… AMAZING! More time please!  Lovely town in the south.  Had a GREAT time here.  Lots of images in both color and Infrared!
  • Amalfi.  OMG!! This was the highlight of the entire country for me!  Amazing, scary, rough, tall cliffs with twisty turnie tiny roads.  Shere cliffs that have been terraced with small towns built on them! Ohhh, could have spend a week here alone!

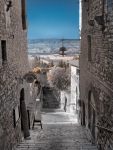
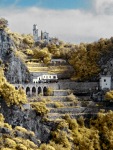
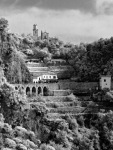
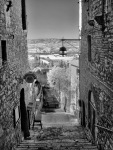
An Assisi street. 590nm Faux Color

For the trip I decided to travel light.  I took my Panasonic GH2 590nm IR camera with the 14-140mm lens & the 8-18mm lens (which I never used) along with my Fuji X100 color camera system.  I learned after my Costa Rica trip several years ago that heavy DSLR systems just sucks the life out of any vacation trip…  I had ordered the new Fuji XPro 1 camera system with the 35mm and 60mm lenses for this trip but it did not arrive in time for it (in fact I still don’t have it and they are telling me the end of March!).  The little X100 works great though and due to its small size and silent operation it made for some easy street photography as well.
I will add further images of the trip along with technical details on how they were taken and processed in my next post.  I will also include my thoughts on travel photography. I will also be including some color images as well so that you can see and understand the differences in impact for each.  Some images simply work better in IR or Color and until you have processed them you will not know!
It is going to take me weeks to wade through all of the images that I took.  I am working on the Infrared ones today and will include a small gallery below to share some of them with you.  Please click on each image to bring up a larger view!

Panasonic GH2 590nm Review Part 2, White Balance Revisited


Proper White Balance Makes Such A Difference!

The Gray WB Card

OK, I realize that in terms of actual helpful posts that it has been a long time.  With advertising for workshops and camera sales, things have been a little stale around here.  But all is not lost!  I have been out and about for 2 days shooting the GH2 (590nm) and playing with different white balances.  Todays post is about setting your WB on the GREEN grass and how it affects the image.  In the first review, I detailed the differences in setting WB on the grass vs. a Gray card, so I will not repeat that prices here.  With this camera (GH2) the choice of how you WB makes a MAJOR difference.  This weekend i simply forgot to bring along the Gray card so all of the work was done on the grass!  In my defense, it just seems to go against all of my advice on WB that I have given you in the past.  Green grass has always been the main source of WB and generally would produce really nice monochromatic tones in the LCD of your camera when properly done in the leaves and a nice bronze in the blue areas of the sky.  I would even Post Proces RAW files to take advantage of this from time to time.  But with a Gray card, the sky takes on a sickly greenish cast that just looks terrible on the LCD, but when you get the RAW file on the computer you get such vibrent gold tones!  What a difference it made…

The image below is an example of forced processing in Viveza caused by a Green grass WB.  It still looks good but it had to be forced in Post Processing….

I simply must remember to bring along the Gray card in the future!

Bellimatrix, 590nm, WB on Green Grass

I have to honestly admit that the Gray card works much better with the GOLDIE (590nm) conversion on the GH2 that it has any right to!  NONE of my other IR camera systems seems to be affected like the GH2 in this regard! I just HATE the way the RAW images look straight out of the camera with the Gray card, but in terms of Faux Color IR the difference is stunning!  The RAW images take on a greenish cast when done on the Gray card vs. the nice bronze & monochrome elements when balanced on the grass.  If you are looking for some interesting bronze tones straight out of the camera then you need to WB on the grass, but if you are shooting primarily for Faux Color then choose the Gray card. By doing so the yellows and golds seem to come naturally during the channel swap rather than being forced in Nik’s Viveza.

For B&W Post Processing, WB had an effect on the overall output, but much less so than when working in Faux Color.  You will notice tonality changes between the WB versions in the mid tones!

Bellimatrix, 590nm, B&W Processing

Still, you can achieve both if you desire in photoshop.  The choice is yours but to me it just makes sense to get the best results straight out of the camera!

The Hammond & Gilbert Mills In Rhode Island


The Gilbert Stuart Museum & Mills

In Color, Infrared and B&W

The Hammond & Gilbert Mills

The Hammond & Gilbert Mills

The Hammond Mill, Selective Focus

I would like to draw your attention to a specific Grist Mill in Rhode Island!  This is the Hammond and Gilbert Mills at the Gilbert Stuart Museum.  What is so unusual about them is the fact that they are 50 feet apart on the same creek feed!  The Gilbert Mill was a Snuff Mill with living quarters for the family above the mill.  The Hammond Mill is and was a standard Grist Mill.  Both Mills are in AMAZING condition and the location just screams “Photograph Me“!    Location is a little in the back country but well worth the drive.  If you would like directions then download the Mills GPX file in the download window to the right!

The Gilbert Mill

The Mills are full of promise!  Look for detail shots as well as wide angle shots.  If you arrive mid day then you will likely be only able to shoot in Infrared (hey, not exactly a bad thing, you think?)  I think that early morning would be the best.  There is a nice standing pond behind the mills for reflection shots and the water path below the mills is actually a fish ladder to aid in migration! As I said, VERY PRETTY!

I shot these images using a Panasonic GH2 Micro 4/3 camera body (Color) and the Pansaonic 14-140mm lens.  For the Infrared shots I used my Olympus E-PL1 Full Spectrum Infrared camera body with the Olympus 14-150mm lens and an external (on the lens) B+W 091 630nm IR filter.  Since the previous post has a lengthy description and recipe for post processing these IR images I am going to leave the same out of this post!

Again, I am going to place all of the images of these amazing mills in a photo album below and all you have to do is to click on any image to bring up the slide show!

_____________________

_____________________

I hope that you enjoy this collection of a VERY unusual Mill!  

Please let me know what you think!
Photographic Notes Page


I have added a new Photographic Notes page!

Plan and turn this SUBJECT into...

This is a new section designed to document and teach basic photographic planning, destinations, composition while also providing subject location information!  The data here is neither Infrared or Color specific… Rather it is Photography specific!  It is how I plan and document my photographic journeys. I hope that you enjoy and are able to use this information. To access it simply click on the NOTES menu button on the top of this page then select the drop down menu item that interests you!

I normally keep my notes on an Apple iPad (1) using an application called Penultimate which is the best and most versatile note and image writing tool that I have found for the Apple family of portable devices.

INTO THIS!

Fine Art B&W IR Post Processing


A Well Done B&W Conversion Is Something Truly Wonderful To Behold!

630nm B&W IR, Rock Run Mill

I LOVE B&W photography!  Add Infrared into the equation and you have a winning combination what will draw your viewer in while holding them captive…. As long as you get the right combination in your B&W conversions!  Seriously, this is not all that hard but you would be surprised how often it is done badly!  A well done B&W conversion is something truly wonderful to behold!  But… There are several steps in the process that one should follow in order to create art on this level.

They Are:

  • A worthy subject!
  • Good cross image contrasts.
  • Good Exposure
  • Photoshop CS5
  • Nik Software’s Define 2.0, Viveza 2.0 & Silver EFX Pro 2
  • Good Faux Color Post Processing
  • Separate adjustment of image contrasts in the fore, mid and background
  • Choosing the right Silver EFX model or creating one of your own.

The purpose of this post is to take you through the process to create these types of B&W Infrared images as I do it.  I am not saying that my way is the best, only that it is the best that I have come up with that works for me!  There are dozens of B&W converters out there and hundreds of ways to accomplish the same within photoshop.

Let us take the top image as a case in point.  This is the Rock Run Mill in the Cumberland/Maryland Gap that I took on my recent “Great Grist Mill Trip” a couple of months ago.  I came back with hundreds of grist mill images that grab me by the throat and smack me around with their emotional impact (what more can you ask of an image?) , but this is one of my favorites!

I stood there in front of the mill for several moments just taking it in. I really looked closely at it all of the while deciding how I wanted to capture it.  Yes I photographed it in color, but my main intent was to focus on Infrared.  I examined it from all angles, looking at the fore, mid and backgrounds, the sky and trees.  I wanted, no desired to create an emotionally charged image that would grab my viewers and hold onto them.  I wanted them to feel what I did standing in front of it!

So, I settled on this view and angle.  The sky was moody, the mill with the brickwork  and large water wheel in front the the tree line made for an amazing composition.  I even used a tripod for this image wanting the best capture possible.  I decided upon the B+W 091 630nm filter (no surprises there) because of the combination of stunning Faux Color and B&W it would provide.  I set my exposure with a spot meter on the top quadrant of the black water wheel and set that at Zone 3 in order to establish detail in the holding buckets.  What!?!  You don’t know what Zone 3 is?  OK, I will cover that in a future post but for now, know that it is a term in controlling perfect exposure.  Everything else fell into place once I decided upon the exposure.

This is the image that I captured in Faux Color after post processing (see post on 590nm for detailed instructions on how I do this):

630nm Faux Color IR, Rock Run Mill

As you can see, the Faux Color image in itself is a stunning emotionally charged capture.  The post processing was a little more complicated due to the driveway and parking lot which was made up of tar and patches of stone.  This caused about 30 more seconds of processing with Nik’s Viveza… Oh well!  I really do like this image all by itself but I KNEW that I could do so much more with it in B&W!  So after saving this image as you see it, I continued on with my B&W post processing.

The order to things in the overall process is:

  1. Raw conversion into a 16 bit Tiff image.
  2. Crop to master image library size in Photoshop.
  3. Run Nik Define to control noise in the sky
  4. Run Nik Viveza to increase saturation, contrast & structure over the ENTIRE image.
  5. Run the Komography Faux Color Photoshop action (you can download it here on the right menu).  Within the Hue and Saturation window at the end of the action select the RED channel and bring up the saturation to start the color adjustment of the trees.  Select the Yellow and do the same.  Select the Cyan and adjust the HUE to bring the sky back to a normal blue!
  6. Run Nik Viveeza again to adjust fore, mid & background contrast.  Adjust individual element colors and structure.  Remove all saturation in the foreground parking lot and selected mill items.  Remove all saturation in the clouds.  Adjust the blue sky hue.  Adjust the color and structure of the building and wheel.
  7. Flatten and save.
  8. Run Nik Silver EFX Pro 2.0.  Adjust the individual elements after you select the B&W model.  For this image I chose the Wet Rocks option then using control points adjusted various image elements within the filter to get the overall look and feel to the image.  I spent about 5 min within this filter. I decided upon the Wet Rocks model because for this image I wanted a crisp or almost HDR effects!  Plus the model also gives rich blacks and highlights.  I could have simply adjusted the image the same way by taking control of the sliders within Silver EFX but have learned that several of the models give the results I like very quickly and easily!
  9. Flatten and save.

Here is the Nik Silver EFX Pro 2 window to show you some of the options that are at your control.  If you want to seriously create stunning B&W work then this is the way to go!

Nik Software's Silver EFX Pro 2.0

All done.  The overall time that I spent on this image was about 7 min!  I could have spent a little more to do little things like cloning out the cars to the right but I decided to leave them there as a subtle contrast of old and new!

What do you think?  Please let me know!

Images from the Low Country Infrared Adventure!


Seven Gifted Attending Photographers Share Their Work!

WOW!  How else to describe the 3 day Low Country Infrared Adventure!  It was an amazing time both in the workshop and out in the field shooting. Both Jamie and I were very impressed with everyone there.  We had seven gifted photographers in attendance, 8 hours in the classroom split between 2 days and 17 hours out shooting in all of the BEST Infrared locations in the Low Country.  Talk about tired, I am still dragging around.

We had a total of 7 photographers in attendance.  There were several Nikon IR conversions, Canon, Panasonic and Olympus systems. Every spectrum was covered from UV to Deep IR.  I am going to show case images from each of the attendees here in the days to come as they send their images to me so stay tuned and re-visit to see the new additions!

______________________________________

Donald E Brown

Mark,
Been at it all morning processing images from this last weekend.  I am hungry and my eyes are hurting and it is all your fault!!!  I have tried many variations of this shot  from “Roadside View”  and it and some other variations are fast becoming my favorites. 

Anyway, enjoy the scenery from my roadtrip home.

Old Barn Version 1

Old Barn Version 2

Old Barn Version 3

Old Barn Version 4

Donald was shooting a 665nm converted Nikon DX2 and was an established Infrared photographer.  He added a lot to the workshop/excursion and was a lot of fun to shoot with!  Donald, these images are just breathtaking!

More please….

______________________________________

Vicki Wilson

Hi Mark and Jamie,

I had a great time in the workshop! Thanks for sharing the IR cameras and letting me try out different filter types.  This has opened up a whole new fun area of photography, I love it! Here are a couple of my photos from the workshop.  Thanks again!

The Path...

Of Boats Long Gone....

Capt Andrew

Vicki was shooting with a loaner IR camera!  My Olympus E-PL1 Full Spectrum mainly with the 630nm filter and the UG1 UV/IR filter!  Her excitement was infectious and she is going to convert a Nikon D90 to the same!  I expect to see a lot of fabulous IR work from her!

______________________________________

Dave Lindey

Jamie/Mark

I processed each in FAUX color and Monochrome. Couldn’t decide which to send. I processed a total of 120 images from the weekend. The attached represents a variety of what I shot over the weekend. I spent the past week experimenting with the post processing and will likely go bacl over a few because I learned a few things along the way. All images were shot with a Nikon D200 665nm conversion processed with Capture One, Adobe Photoshop CS5 and Nik Dfine 2.0, Viveza 2.0 and Silver Efex Pro 2. Select what you like to post. I did not sharpen the images at all.

It was a great weekend.

Walkway, Georgetown, SC

The Path Less Taken....

The Tug Susan RIchards

Brookgreen Gardens Pond

Dave, I am stunned by these images!  To say that they take my breath away is simply an understatement!  For you to be creating this caliber of ART after only shooting Infrared for a year is amazing. Please continue to share your work with us!  I can see now that I am going to have to create a guest gallery now……..

OK, as I said earlier, stay tuned for more images from the workshop!