Please visit my newer educational Blog
At:
http://www.markhilliardatelier-blog.com
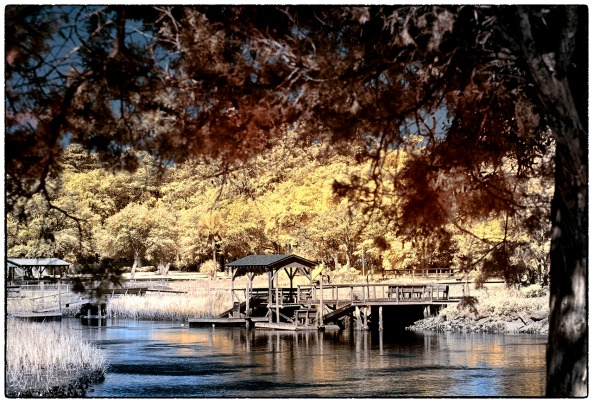
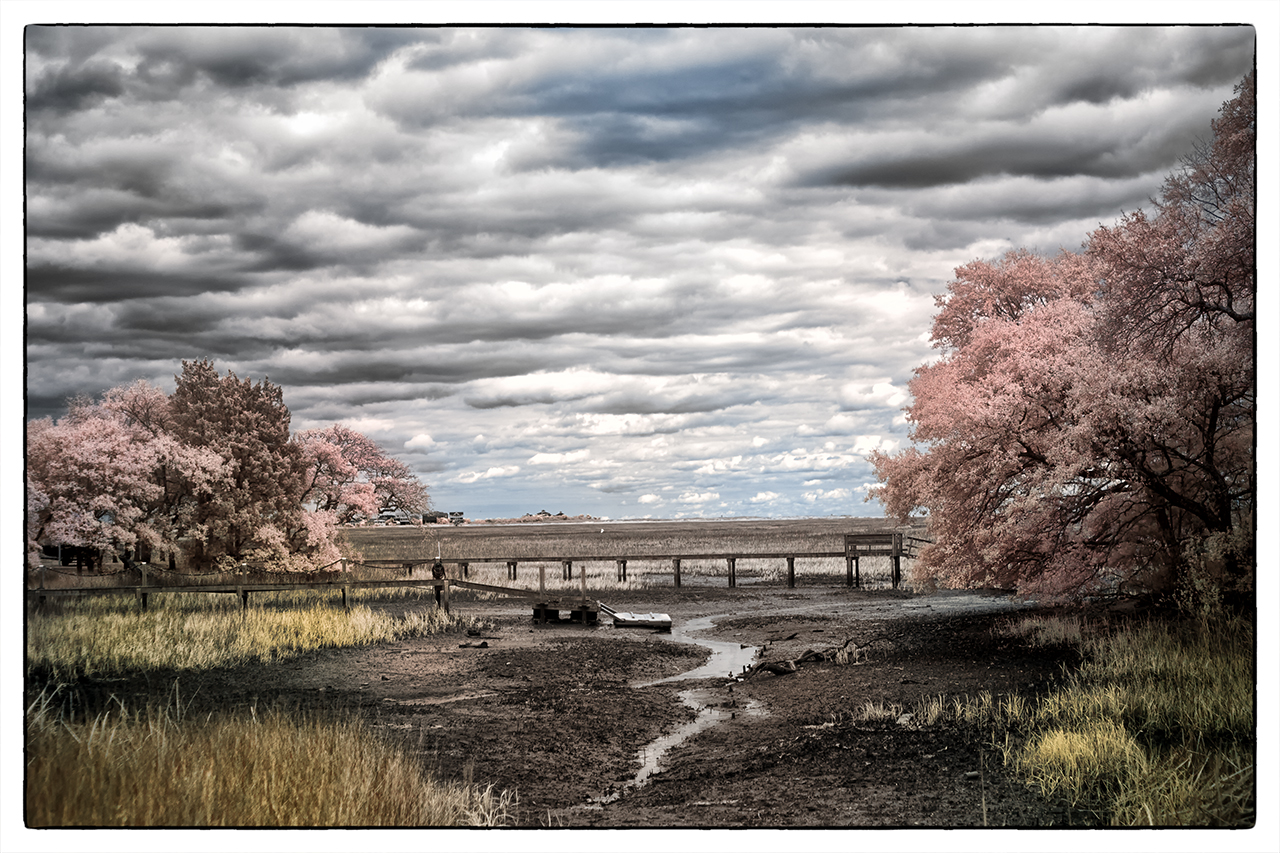
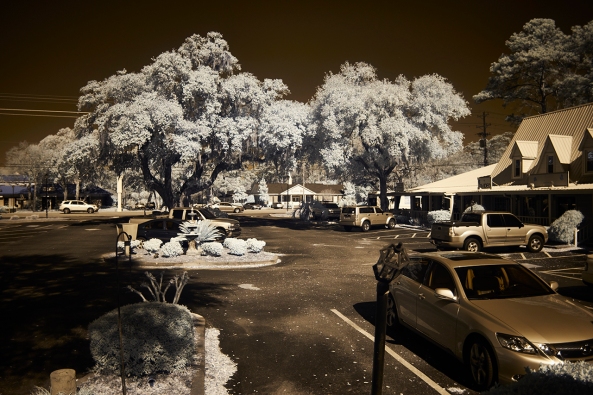
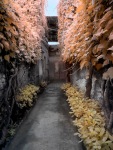
Pawleys Marsh, Fuji X Pro 1 720nm IR conversion w/ the new 55-200mm lens.
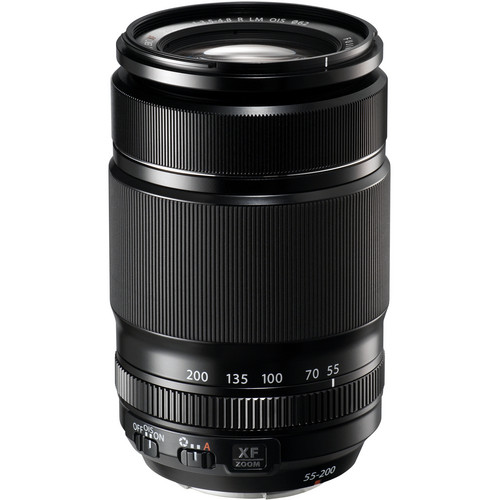
Fuji X 55-200mm
Yes, the new Fuji 55-200mm lens arrived for my fuji camera systems! I am currently shooting with a color X-E1, a color X Pro 1 and a IR converted (720nm) X Pro 1. I know how well the 55-200 works on the color bodies but what I really needed to know how did it work with the IR system! Would it give hot spots as so many of the Fuji lenses do? This post is the report of my findings. The final verdict is that it works very well and as long as you do not go higher than f/16 there are no hot spots to worry about at any zoom range! To me this is a really big deal.
So far only the 14mm and 35mm Fuji lenses are usable in infrared. So the addition of another lens really helps.
I am going to give you some examples of how this lens actually does at both the wide and long ends of the zoom range wide open and closed down so that you can get a feel of the usable Infrared range that you can use. Next week I will do a posting using the lens for color work only.
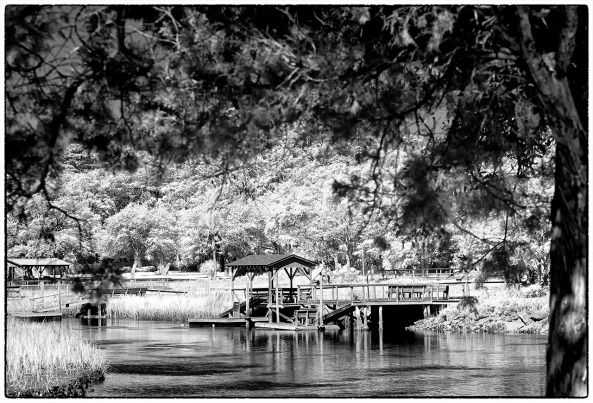
Pawleys Marsh, Fuji X Pro 1 720nm IR conversion w/ the new 55-200mm lens.
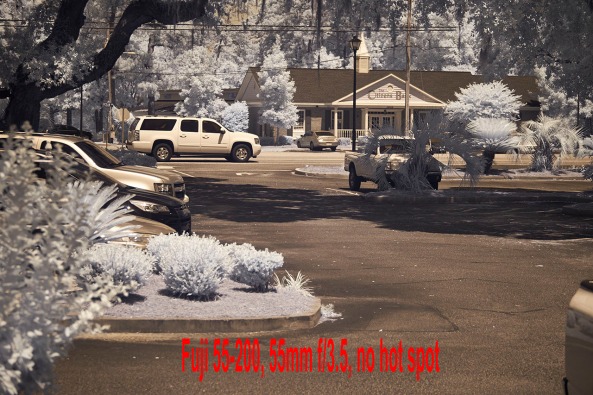
55-200mm @ 55mm, f/23.5 No hot spot
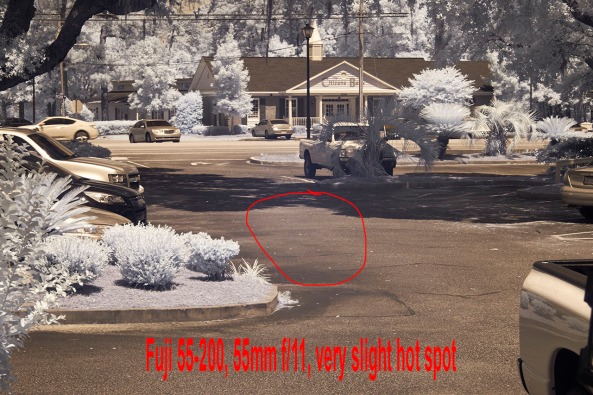
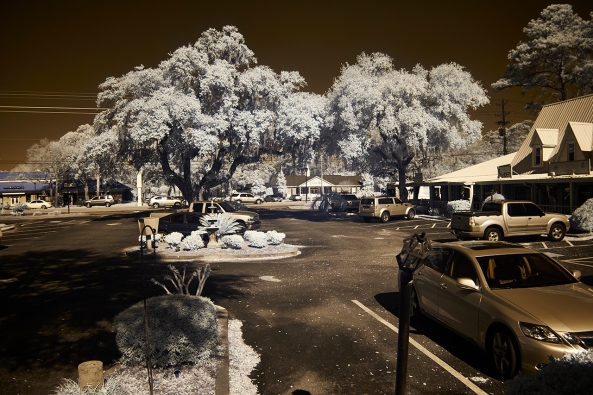
55-200mm @ 55mm, f/11 Small hot spot

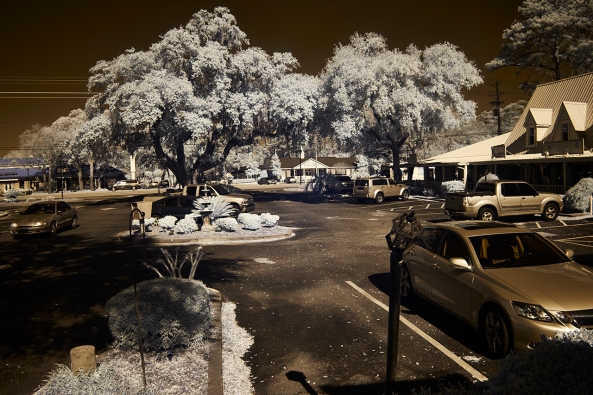
55-200mm @ 55mm, f/22 Bad hot spot
As you can see as you get to f/11 we start to develop a small hot spot, but nothing that cannot be fixed. Above f/11 the lens becomes unusable at the wide end.
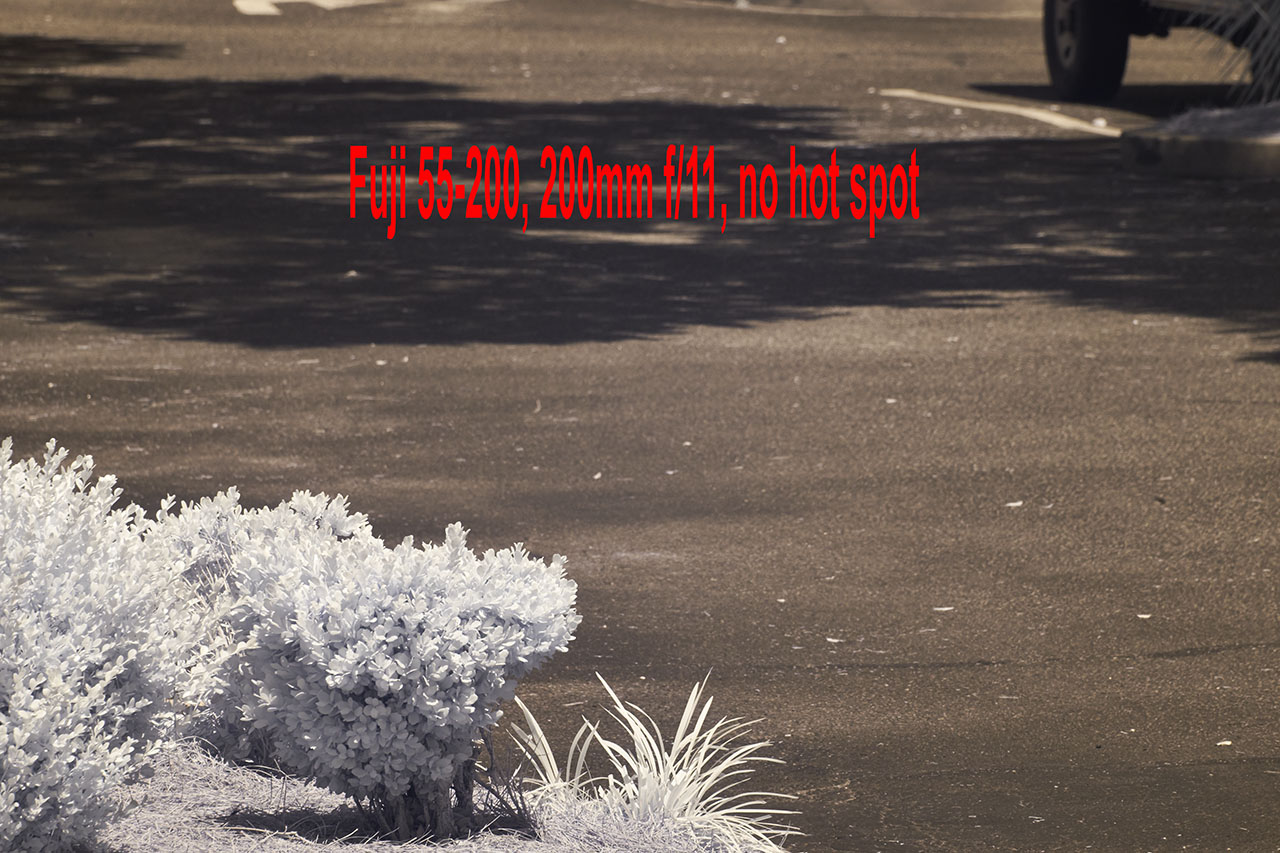
55-200mm @ 200mm, f/11 Bad hot spot, NO HOT SPOT
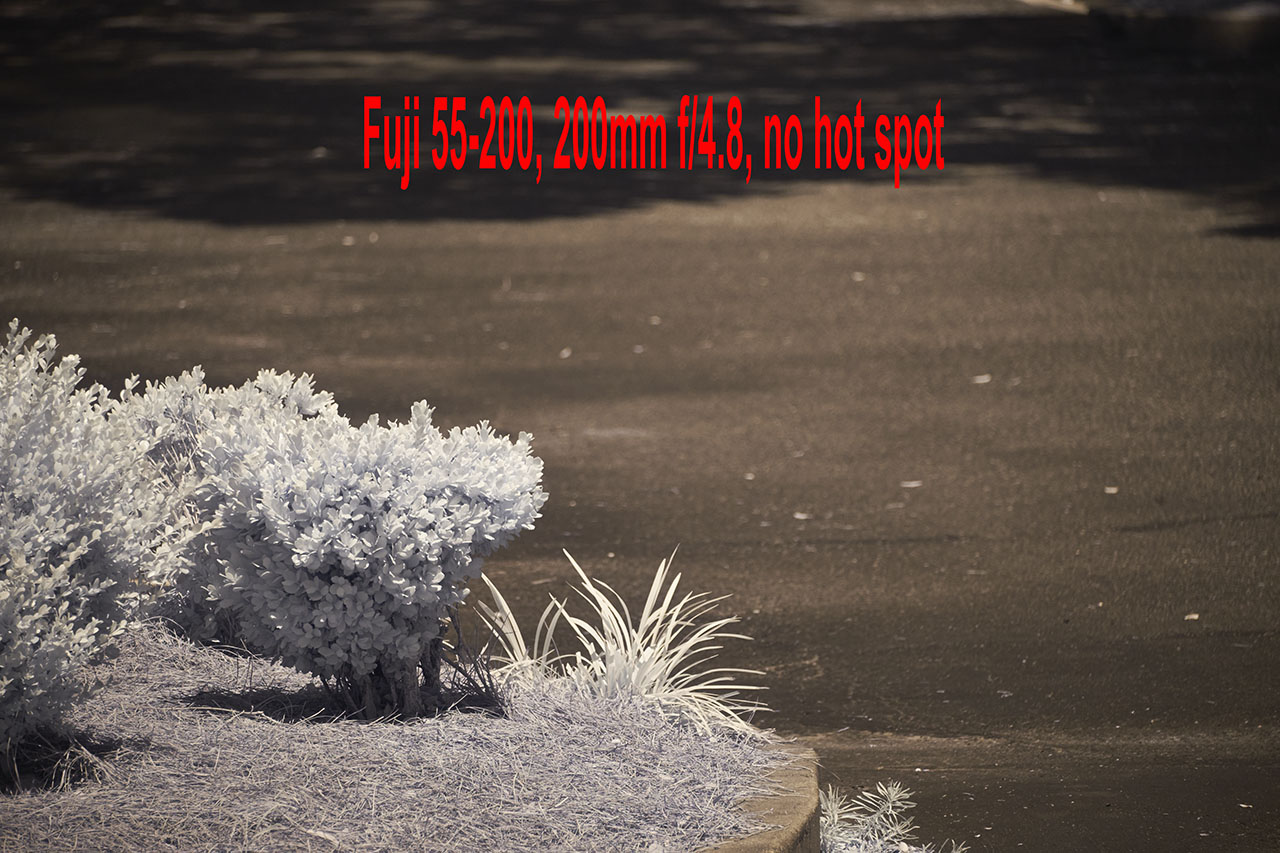
55-200mm @ 200mm, f/4.8 Bad hot spot, NO HOT SPOT
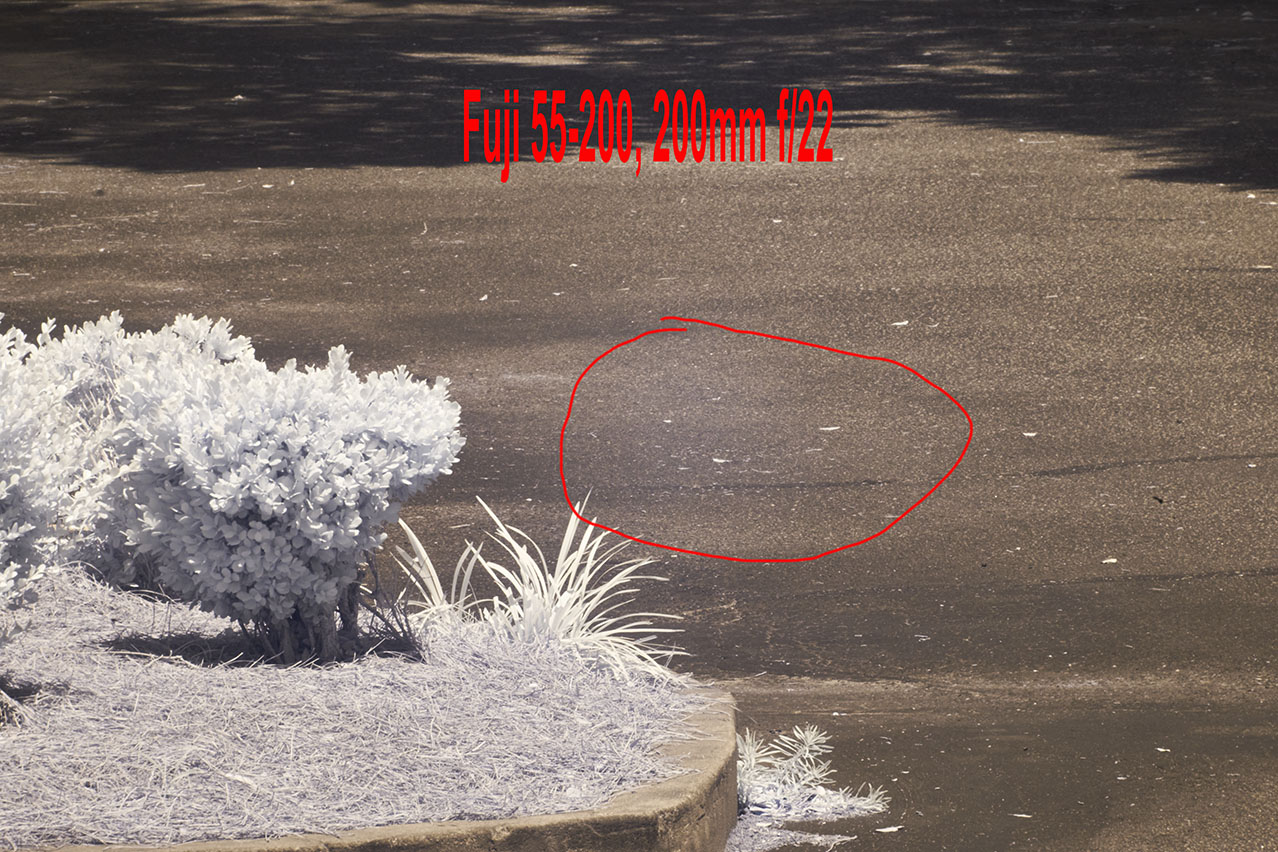
55-200mm @ 200mm, f/22 Bad hot spot, SMALL HOT SPOT
The difference at the long end of the zoom is amazing and is usable over the entire range of the aperture! This is great news for us IR shooters.
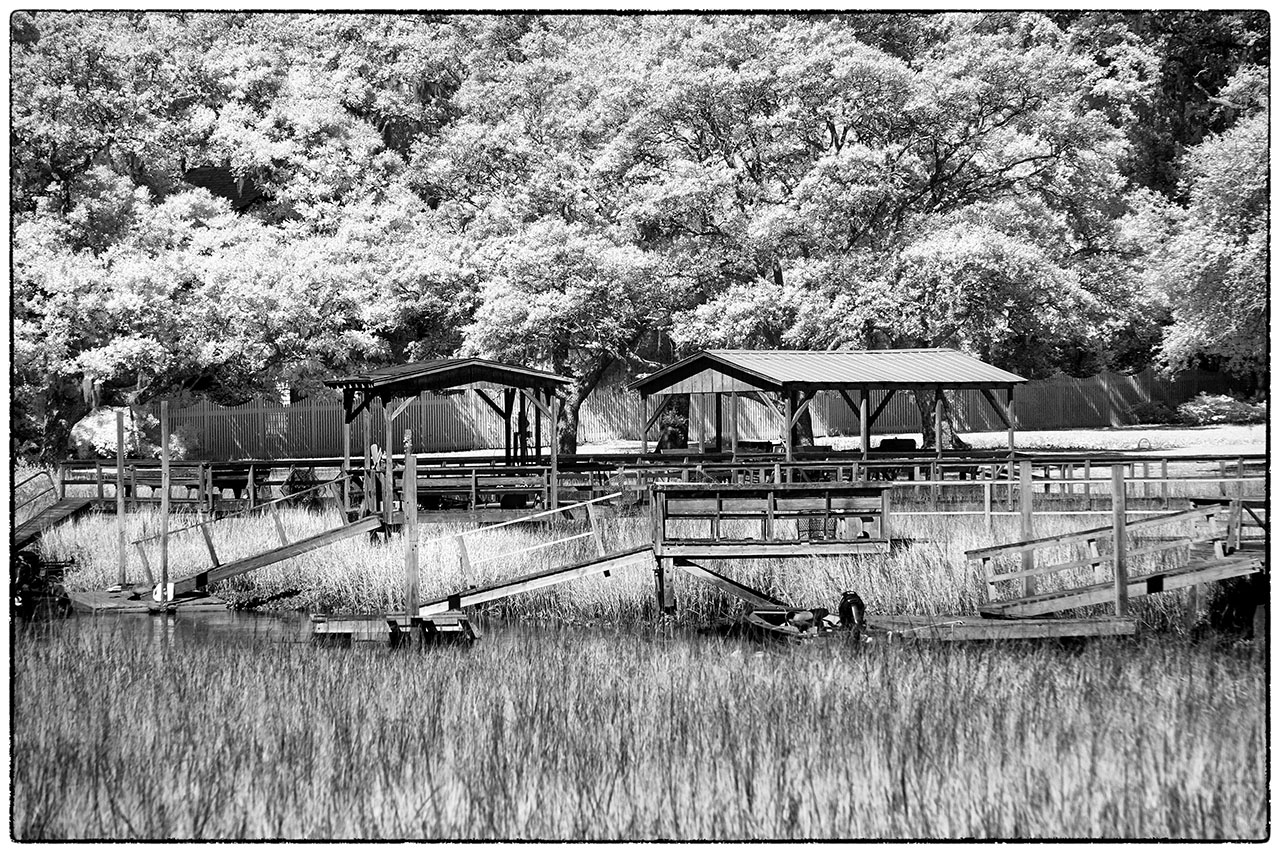
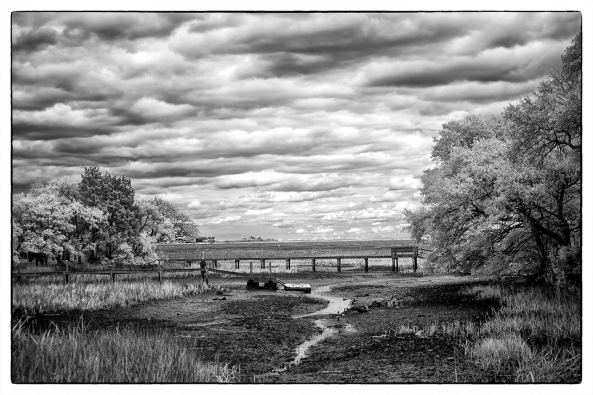
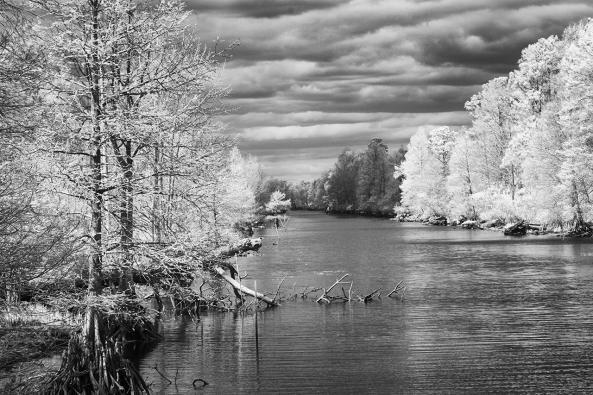
Pawleys Island Marsh, 200mm B&W Post Processing
There is starting to be a large number of IR photographers out there who are using converted Fuji X Pro 1 camera systems. There are currently 2 conversion companies out there who can do the conversion. I HIGHLY recommend the X Pro 1 as an Infrared platform and with the addition of the 55-200mm lens to our shooting arsenal we are way ahead of the game!
from my fine art photography blog
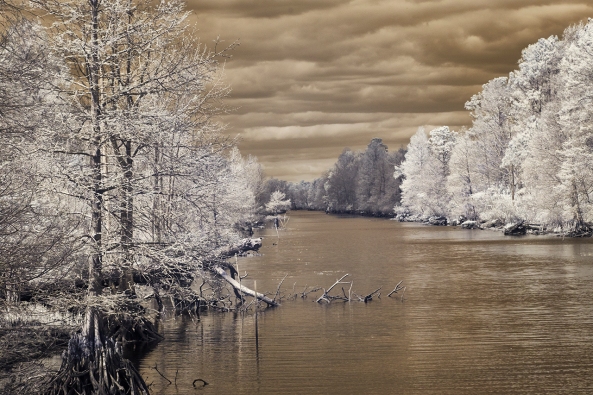
Murrells Inlet Marsh, X Pro 1 720nm IR Faux Color
The Fuji X Pro 1 has turned out to be one of the best Infrared camera systems that I have ever used… period! The only good Fuji lenses for Infrared have proved to be the 35mm f/1.4, the 18mm f/2 and the new 14mm. The Viogtlander 75mm f/1.8 has also proved to be a STUNNING lens also! So, the camera has proven its infrared capability, now it is time to discuss in detail the recipe for post processing! It is all quite simple but there are a few requirements that you must understand in order to follow my workflow with understanding.
Needed:
As you move your RAW (shoot only RAW for IR because of the ability to shift the white balance easily) onto your computer you should automatically tell yourself that you are going to process each selected image in Faux color and B&W. Sometimes you will notice that the un processed image looks great also (wonderful bronze tones) and decide to do a version like this as well!
Lets talk about the RAW conversion process a little bit. Photoshops ACR built in RAW converter will NOT apply the white balance correctly and your images will appear deep red. For this reason I use Capture One version 7 from Phase One. It is simply the BEST RAW converter that I have ever used. You can download a trial version and decide for yourself if what I am telling you is true!
My Initial Editing Steps:
Save your image again with a NEW file name that reflects the difference in your master image library tree!
Murrells Inlet Salt Marsh, X Pro 1 720nm IR
Remember: Process ALL IMAGES as both Faux Color and B&W. You really do not know what you are going to get till you do so.
All of this really is VERY SIMPLE and once you have done it a few times it will become second nature to you. Soon you will be a post processing Infrared God or Goddess! Congratulations
No, let’s take a look at the image below. Notice the areas that I have circled as places where I desire to change the colors, contrasts and saturations (both plus and minus). Also consider that this is a 720nm converted camera and as such has a very limited color range (light pinks and warm tones and blues).
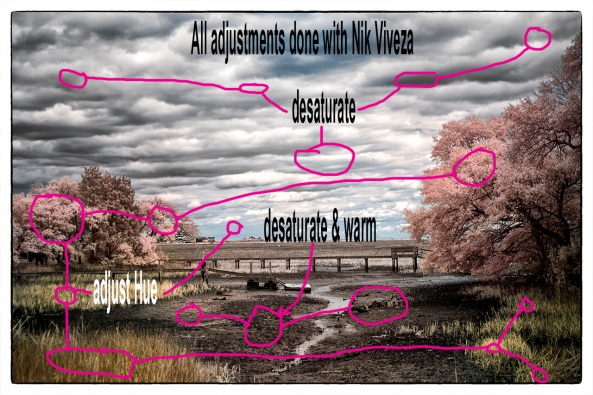
Annotated Faux Color, X Pro 1 720nm IR
It is in this area and others like them (similar color values that are the same) that we are going to place control points on and change these values! If you notice that the areas around them also change a little you can place what we call anchor points which are simply control points with no adjustments to bring those areas back to where you wanted them!
You will find this ENTIRE process from the initial loading into photoshop to finish will just take 4 or 5 minutes or less as you become more practiced!
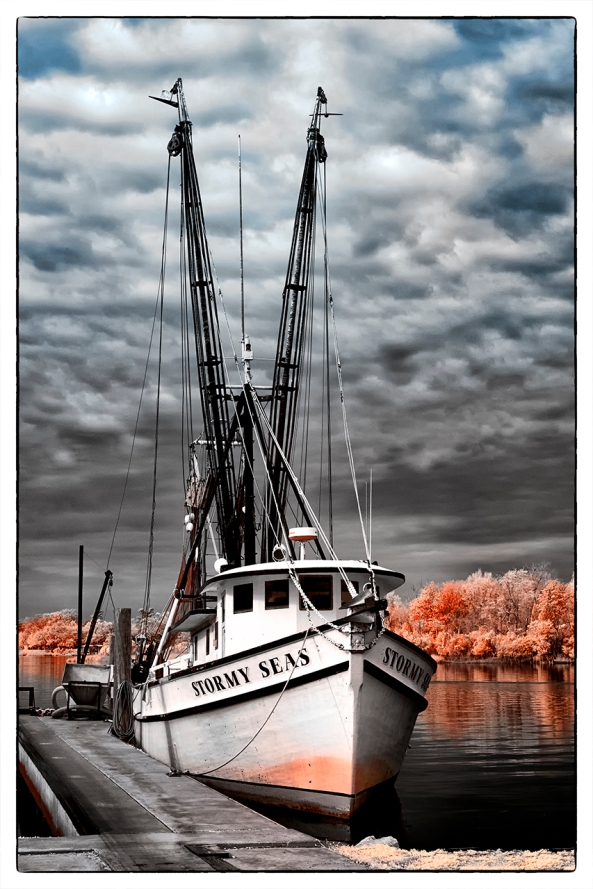
Stormy Seas Faux Color, X Pro 1 720nm IR

Stormy Seas B&W, X Pro 1 720nm IR
Sometimes Faux Color images simply do not work, then you still have the great B&W ones to work with!
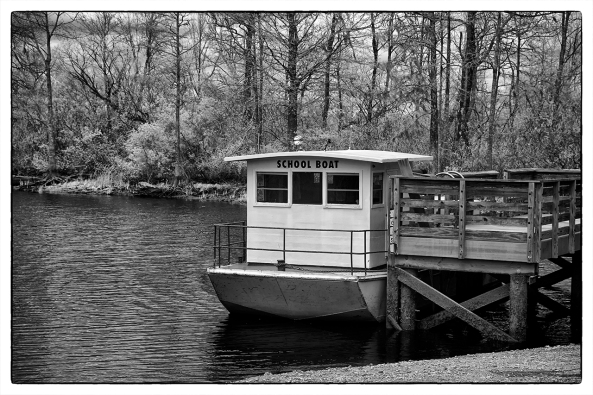
SC School Bus Boat, X Pro 1 720nm IR
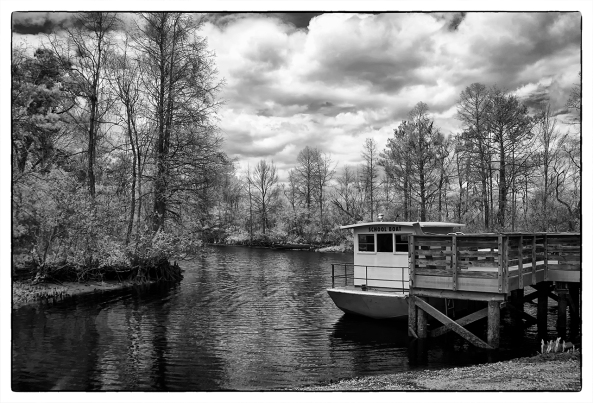
SC School Bus Boat, X Pro 1 720nm IR

Fuji X Pro 1, Brookgreen Gardens, 720nm B&W processed. Fuji X 35mm lens.
 Well, it arrived! After months of consideration after I got my X-E1 I finally decided to send off the X Pro 1 for Infrared conversion. It went to Dan at LDP (maxmax.com) and the cost was $500.00. YIKES! yes I said $500.00! Dan explains that the X Pro 1 is the most difficult conversion that he does! It required him 1.5 days to do the conversion and lots unsoldering/soldering to get to the sensor. Still, better than sitting on the shelf or an attempted sale on Ebay, plus I really like the camera and the hybrid viewfinder is just perfect for IR.
I had to decide between 720nm and 850nm so decided to go for the 720 in order to have a little color ( I really like the bronze tones right out of the camera at 720nm). The total time for shipping – conversion – shipping was 8 days, door to door. Very fast!
Importantly, the Fuji X Pro 1 camera White Balances perfectly. For these tests I white balanced on a green shrub in front of my gallery. The process to do so on the camera is simple and fast!
The scope of THIS post is to talk about the conversion itself and to give you some sample images testing each of my normal Fuji and Voigtlander lens set that I use.
My first image out of the camera was with the Fujifilm XF 35mm F1.4 Lens. It is stunningly sharp with great contrasts and tones without any processing at all! This is simply a perfect IR image right out of the camera.
Fuji X Pro 1, Brookgreen Gardens, 720nm RAW un-processed. Fuji X 35mm lens.
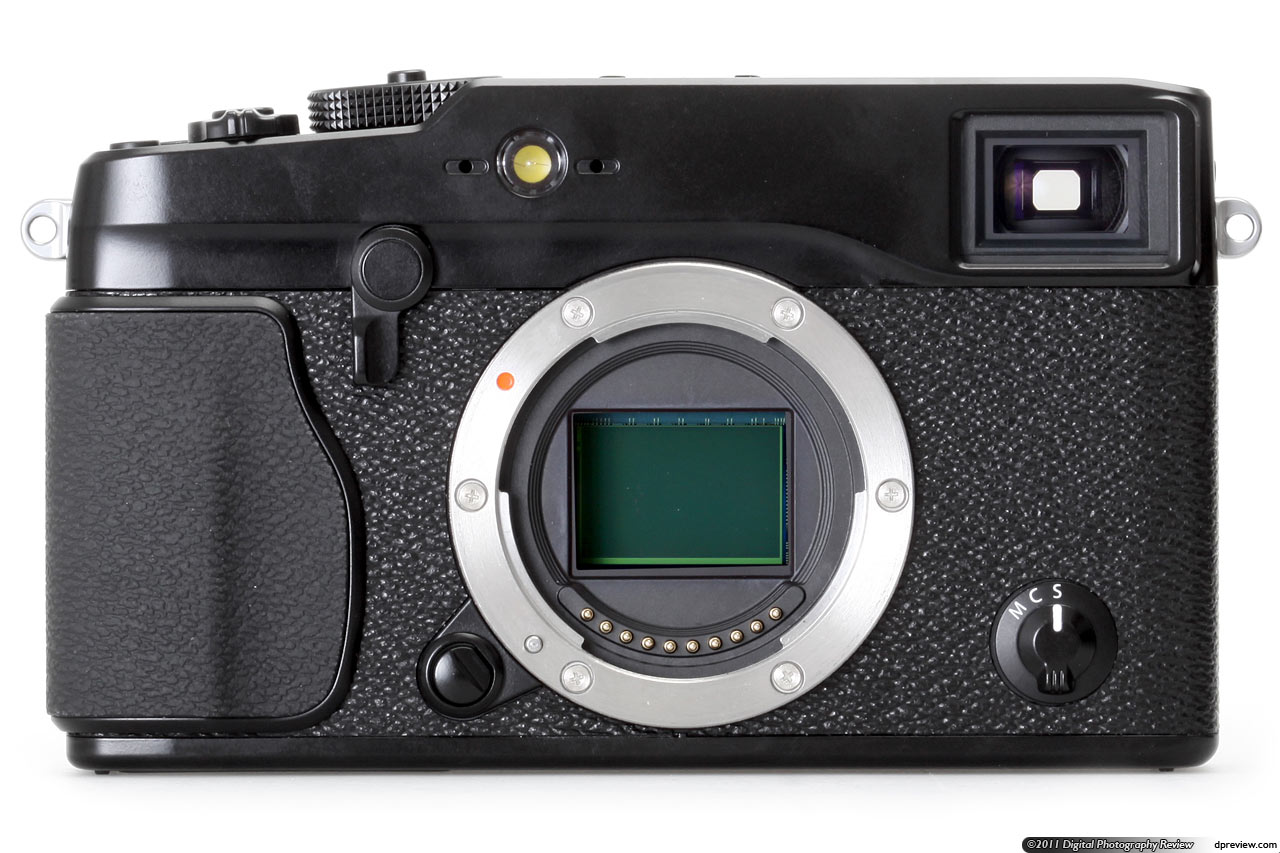
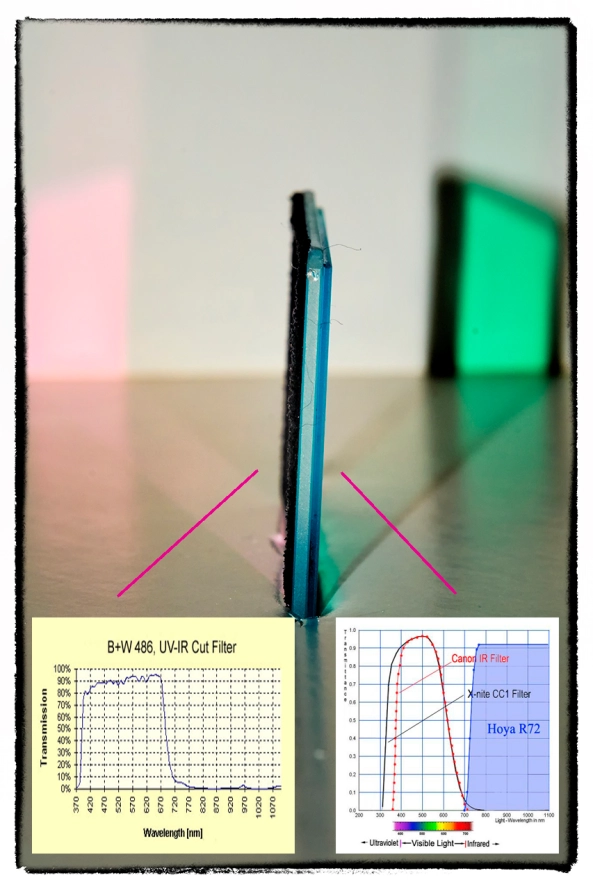
OK, the original hot mirror can tell us a lot about the capability of the Fuji body to take IR with no conversion. The strength of the internal filter from the X Pro 1 is quite strong! It is actually 2 filters sandwiched together. They are very much like the B+W 486 IR blocking filter and the LDP CC1 IR blocking filter back to back. The 486 is a pink/gold filter that extends a little further into the visible light spectrum before falling off and allows a little less IR to pass through. The CC1 filter is wider at the UV end. The two filters together will pass light to the sensor from about 300nm to 700nm. You can see this in the image below. This is the same filter arrangement (hot mirror) that we normally see in the Canon DSLR line and on the Panasonic Micro 4/3 camera line.
X Pro 1 Hot Mirror showing both Wide bandpass side (gold tint) and the Lower UV side (Aqua)
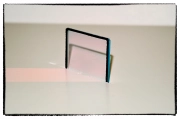
X Pro 1 Hot Mirror showing the Wider bandpass side (gold tint)
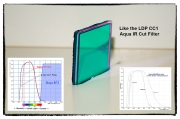
X Pro 1 Hot Mirror showing the Lower UV side (Aqua) similar to the CC1 filter from LDP
If you were to look at the 486 and CC1 filters they are the same general colors and pass band to what we actually see here! So , what does this all mean to you? If you decide (and convince Dan) to have a full spectrum conversion done on your X Pro 1, you can convert it back to a normal color camera by stacking both of these filters (B+W486 and the LDP CC1) on the end of your lens. The full spectrum Infrared conversion is one where the hot mirror (IR blocking filter) is removed from in front of the sensor and replaced with a piece of clear glass. Then, the camera is programmed to the specific UV or IR band with the addition of the appropriate filter on the end of the lens.
Normally, the hot mirror can bee seen as the colored layer of glass under the lens as shown here where you can now see the 720nm filter installed.
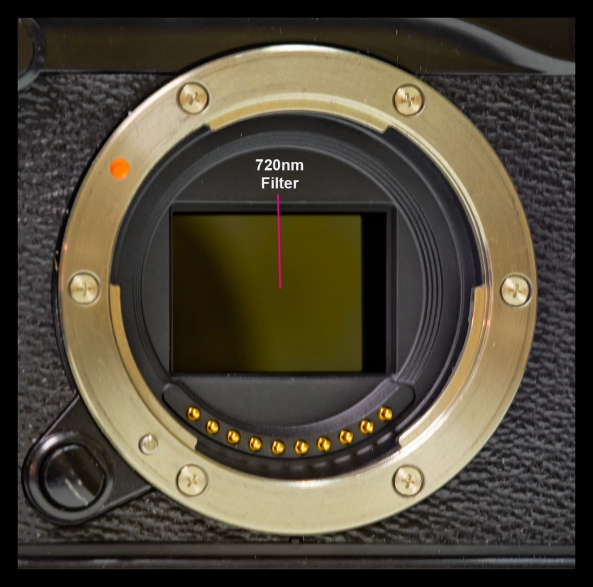
Inside the X Pro 1 showing the 720nm filter.
Lens Hot Spots
As you may know (or guessed), not all lenses work well in the Infrared spectrum. This is due to many things, but most commonly, the coatings on the lens elements and the coatings on the internal lens barrel and how they reflect IR light energy. The common failure then is in the form of HOT SPOTS in the center of the image captured by the camera. These are always dead center in the middle of the image and present as large round white areas. Sometimes, they can be overcome by using a wider aperture, but not always…
Lets talk about the lenses that I tested that work (or in 1 case mostly work)…
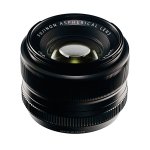
Fuji X 35mm Lens
WOW, what can I say? This lens works perfectly in the 720nm spectrum at all apertures! The camera auto focuses perfectly and fast, the images are sharp and there are no hot spots at any aperture! Lets take a look. This first image is raw out of the camera. I have done not post processing for B&W or Faux Color but there is enough color in the 720nm spectrum to have some interesting Faux Color results. These types of images will be covered in another post next week and we will spend a lot of time and effort teaching and going through each step in the recipe used to create them in Photoshop CS6 and the Nik filter set.
Fuji X Pro 1, Brookgreen Gardens, 720nm RAW un-processed. Fuji X 35mm lens f/8
Next, is the same image post processed using CS6 and Nik’s Silver EFX Pro for B&W…
Fuji X Pro 1, Brookgreen Gardens, 720nm B&W processed. Fuji X 35mm lens f/8
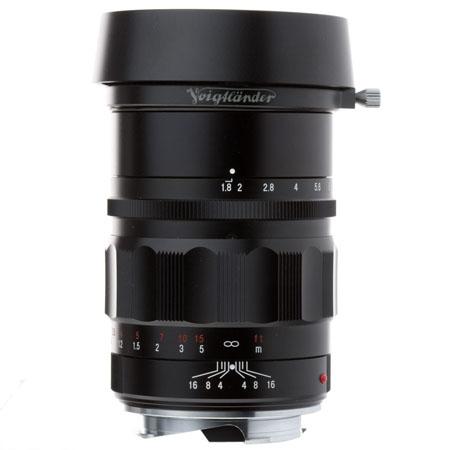 This lens from Voigtlander is one of the sharpest, easy to use lenses that I own. The fit and finish on this lens is something to behold. The lens has an included clamp on lens hood that works very well. The focusing is so smooth that it is scary… It is a PERFECT match for the Fuji X system (X Pro 1 and the X-E1) and works just as well here in Infrared! I was very happy to discover this in my tests at 720nm! There are no hot spots at any aperture. It takes Take a look:
Voigtlander Heliar 75mm f/1.8 Lens at f/11. Raw (notice the nice bronze coloring)

Voigtlander Heliar 75mm f/1.8 Lens, f/8 Faux Color Post Processing
Voigtlander Heliar 75mm f/1.8 Lens, f/8 B&W Post Processing
Fuji X 18mm lens.
This lens works well as long as you do not go beyond f/8. Past that it generates very discinct hot spot in the center of the image. While this can be overcome in post processing with Nik’s Viveza, it is still slightly disappointing… Still, when used at f/8 or wider the lens generates pleasing sharp images that make it worthwhile to carry in your camera bag! Here are the RAW test samples for you to consider.
Fujifilm XF 18mm F2.0 Lens at f/2
Fujifilm XF 18mm F2.0 Lens at f/4
Fujifilm XF 18mm F2.0 Lens at f/5.6
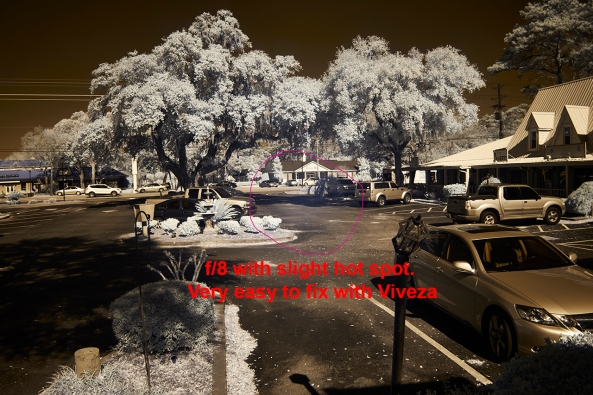
Fujifilm XF 18mm F2.0 Lens at f/8
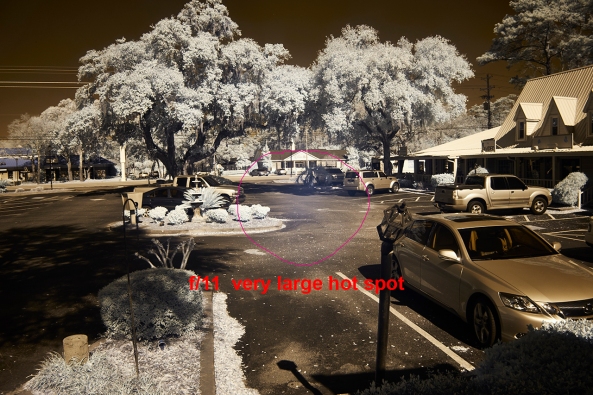
Fujifilm XF 18mm F2.0 Lens at f/11
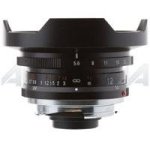
Voitlander 12mm
Another great lens from Voigtlander. This one has a built in lens hood and while it will take screw in filters they need to be wide angle versions. It also has that super smooth focusing feel but since it is so ultra wide at 12mm you can focus it pretty much at infinity and it will always be in focus. I love this lens on the X Pro 1 and X-E1. For 720nm Infrared, it works great until you hit f/22 then it gives a faint hot spot. This is just fine with me as I rarely go beyond f/11 or f/16.
Take a look at the samples:
Voigtlander Ultra Wide-Heliar 12mm f/5.6 at f/8 RAW
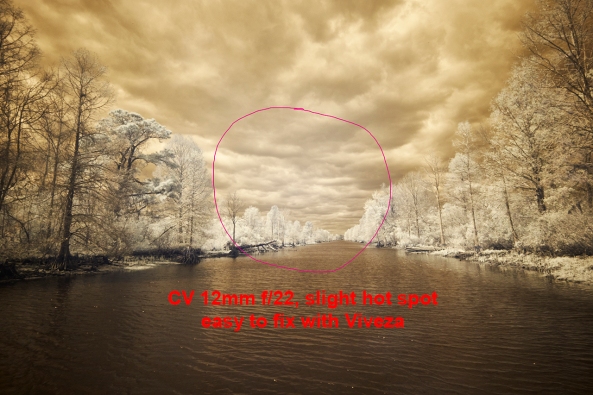
Voigtlander Ultra Wide-Heliar 12mm f/5.6 at f/22 RAW with hot spot
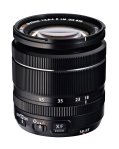
Fuji 18-55
This lens is such a disappointment to me… It is without a doubt my favorite walk around Fuji lens on the X-E1 camera. I hardly ever take it off. Sharp and clear with great contrast. That being said it is all but USELESS for Infrared! There is a major hot spot problem at ALL focal lengths at ANY aperture past f/4. At f/4 it did take nice images but as you understand, useless for landscapes. Bummer….. I am beyond disappointed over this one.
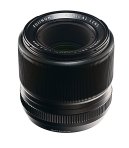
Fuji 60mm
I am going to initially tell you to simply forget this lens for Infrared. It has a seriously bad hot spot at all apertures. I will also share with you that I might actually have a bad copy of it. It gives a terrible hot spot on my X-E1 when shooting in color as well, especially when using a flash. I think that I am going to send it back to Fuji for repair and see what they think. Depending upon that I might re-evaluate it for Infrared later on!
The next post will focus on post procseeing and what can be acheived artistically with this new Infrared Fuji X Pro 1!
Please let me know what you think!
Well I actually did it and sent off the X Pro-1 to LDP in New Jersey for a 720nm conversion! The camera is due back today and the fun will begin! Stand by….
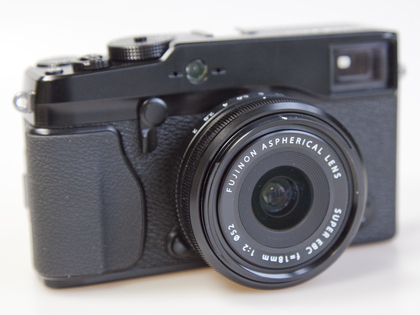
Fuji X Pro-1 720nm IR conversion!

Using the Fuji X Pro 1 for Infrared
Infrared photography means so many things to me… It is more than a type of photography, rather a passion or better yet an addiction! I have a LOT of experience in Infrared, I have a book in work on it, but MOST IMPORTANTLY, I have practiced the art of creating emotionally charged Infrared images for longer than I can remember, even as long as 45 years ago with film. Here, today, I will disscuss with you the technical details of using your Fuji X Pro 1 camera system to create these emotionally powerful images as well.

X Pro 1 Faux Color IR Image with only the channel swap
Understand this, you can create Infrared images several different ways:

Hoya R72
Standard Digital COLOR Camera: With the addition of a 720nm or 850nm IR filter on your camera lens your camera can capture Infrared images. There is a tradeoff to this way though because each camera manufacturer places some sort of UV/IR blocking filter over the image sensor that allows only visible light to pass through. Some of these filters are weaker than others and these cameras make for a system that will do well in Color and OK in Infrared with reasonable IR exposure times around a second or two. Others have a strong filter allowing only a small amount of IR energy to pass. These require VERY LONG exposure time in order to overcome this filter. The Fuji X Pro 1 is one of the cameras with a weaker filter! This is exciting because it enables you to easily create IR images with an unmodified camera system!

What your camera sees!
So with regard for the Fuji X Pro 1 system we are going to discuss option #2, the standard color camera with an external IR filter attached to its lens. But you ask: “What filter can I use?”. Well since we are not modifying the internal UV/IR blocking filter you must understand that the camera will pass normal visible colors as well as IR if the external filter allows it. This is both good and bad! If you were to install a 590nm IR filter on your lens the camera, it would see everything from 590nm up to 1000nm. But because the internal UV/IR blocking filter allows much more visible light than IR through, it will poison the exposure metering system. It is going to see the vast majority of the light as color (red) and expose for that rather than the IR portion. So attempting to do this will cause very unreliable exposure and great frustration on the part of the photographer.
What we need is to attach an IR filter that blocks ALL of the visible light and only passes IR to the sensor! So it is best to choose a 720nm IR pass filter to your lens like the Hoya R72 or a 800nm B&W IR only filter like the B+W 093. The higher you go in nm the longer the exposure time will be…
Now, knowing that we are going to use the 720nm filter which will only pass IR energy from 720nm and up while blocking ALL of the visible light our metering system will now function as it should!

Fuji X Pro 1 with a custom WB right out of the camera. This is as close as you can get but will still generate a great image.
White Balance is IMPORTANT when shooting in IR! The X Pro 1 will NOT reliably do a custom white balance with the 720nm IR filter installed. But it does have a manual Kelvin White Balance option, so when shooting IR you need to go to this sub menu in the WB settings and set it to 2500K. I have talked to others doing this and have heard that they also take away green as well in the menu. I personally think that this is unnecessary and by leaving the green neutral you will get more pleasing Faux Color images. A properly white balanced image taken on your camera has s slight reddish cast, the sky should be bronze and the green leaves should have a monochromatic feel with a bluish cast. (more on this later) An improperly white balanced camera image will be pure dark red. While you can still use this image in post processing the lack of a good white balance will throw off your exposure system. Read your camera manual on white balance and understand it!
Ok, enough of this for now. Lets talk images…
The Hoya R72 IR filter is almost black. You can see very little through it but don’t worry, the camera can see through it just fine! You can find these filters on Amazon for about $58.00 in 52mm. There are a lot of other filter companies out there that make these, some good some not so good… I trust the Hoya!
Mount the filter on your lens, set the ISO to around 1000 and put the camera on a tripod. Make sure that you have properly set the WB either as a custom on or as a Kelvin entry. If you choose custom, the camera will require a lot of light to due this properly. Use green grass to generate the custom white balance.
I like to use the optical viewfinder rather then the LCD or EVF for shooting in IR. Choose and frame your subject carefully. Hmm, a word about composition…
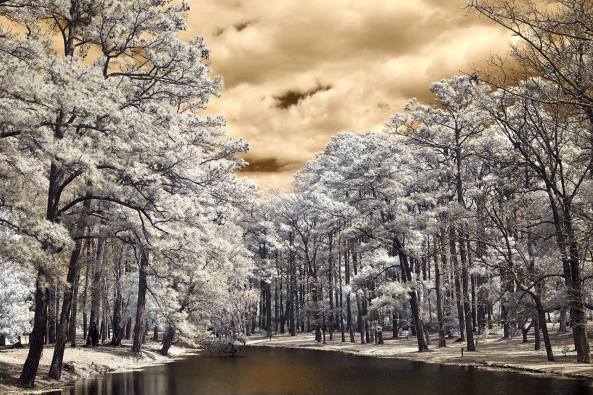
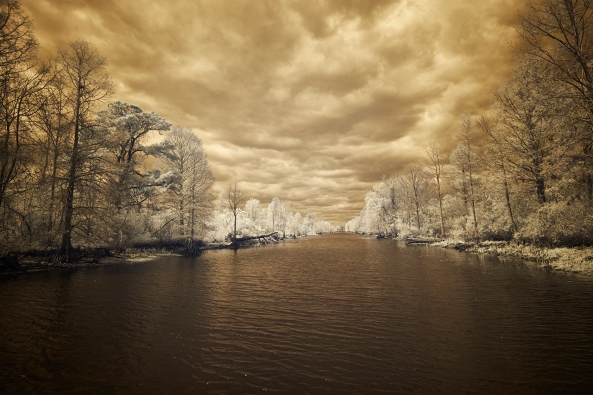
There are three items that can make IR images really powerful and full of emotional impact:
The more of these items you can get in your images the better they will be! Here is an example…

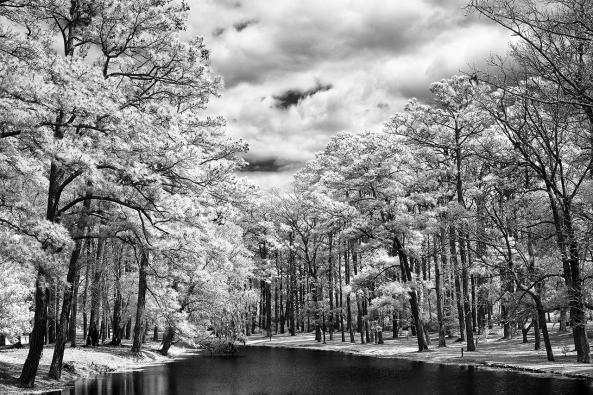
Clouds, Water and Leaves! What more could you ask for? While not done on a X Pro 1, this image could just have well been so!
As you can see, the sky, reflections and leaves create an emotionally packed, etherial image that draws your viewer into it! Keep these three compositional elements in mind as you go forth and create your images!
OK, last part of this post! There are a few small exposure issues that you need to be aware of while doing IR work. They are:
OK, this is enough for today. The next post will be a detailed Post Processing tutorial that will take you through both Faux Color and B&W processing. I even have a photoshop action that you can download to semi automate the channel swap and cut down your post processing time!
There is a new updated version of the Grist Mill GPX file available in the Downloads area on the right side menu! I have added all of the Ohio and Indiana mills plus made repairs to older entries that proved to be incorrect! Please download them and install on your GPS!
As ALWAYS please share the lat/long, name, location, address and description of any mills that you find that are NOT on this download!!

Glade Creek Grist Mill, WV
Thanks for your continued help.

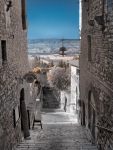
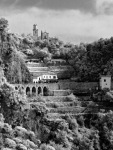
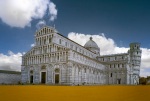
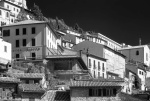
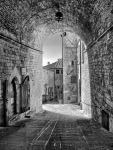
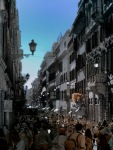
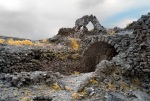
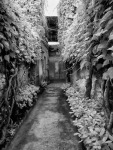
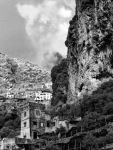
Assisi, Road Thru Houses 590nm Infrared
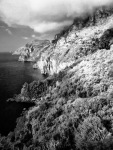
Todays post are just a few more of my favorite Infrared Images taken around Italy. All are 590nm with an equal mix of Faux Color and B&W. The post processing on them are basically the same as in the last post. All were taken with the Panasonic GH2 with the 14-140mm Panasonic lens.

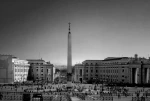
Rome, the high fashion district at the Spanish Steps. Notice the vast crowds! 590nm
I will likely add some Color images here as well in the coming days to highlight the differences between locations done in both Infrared and Color! But for now, on last gallery of Infrared images:


Michelangelo's "Pieta" in Saint Peters Basilica, Rome, 590nm Faux Color Infrared.
Oh my, where to start… Hmm well I think that there is no need to proceed in any order so I will tackle the most important images in order rather than by location!
Looking at the image of the Pieta above the first thing that comes to mind is the full beautiful saturated colors. One would look at this and never realize that this is a Faux Color Infrared image! It is indeed a 590nm IR images taken on the Panasonic GH2 with the 14-140mm lens, INDOORS, THROUGH PROTECTIVE GLASS at a super high ISO of 1250, 1/60 s, f/5.6 HANDHELD. It is in fact not a scene that one would normally consider for Infrared. This is EXACTLY why I did choose it. Color was nice, but everyone shoots it in color. I desired something different and new. I cannot imagine that it has EVER been photographed in Infrared!
Post processing for this one took considerably longer than the standard 30 seconds with CS5 and the Nik filters. There were also several problems with the scene that I had to overcome! First and foremost was the Plexiglas shield between the public and the statue. It was not exactly clear and there were literally thousands of people standing there shooting wildly all of them using their flashes which were just bouncing off the plastic making it more difficult to see through. Also there was a large window just over the head of Mary which had the sun directly behind it. Ok how I did this image:
Things to consider when shooting through plexiglass:
Still, knowing all of the issues I knew that I could overcome them in Post Processing, so I simply set everything up and shot away with the thousand other tourists!
I trusted my ability to set the exposure perfectly on the white statue in the spot meter mode of the camera and then wisely selected ZONE 7 & 8 by dialing in the appropriate positive exposure compensation. I also knew that I could hold the camera quite still and trusted in its built in image stabilizer to help. I used the LENS HOOD to cut down on flash reflections striking my lens objective and causing further loss of contrast (you do this also… right?)
After getting back home I went through my 20 images and selected the absolute best version to move into the post processing phase.
My Post Processing Recipe:
That is it. The entire process took about 20 min from start to end and I feel that the process was very much worth the time investment.
Here is a B&W version generated by Nik Silver EFX Pro 2 for you to compare. It looks good, but the color image just grabs me by the throat and screams, LOOK AT ME!

Michelangelo's "Pieta" in the Saint Peters Basilica, Rome, 590nm B&W IR

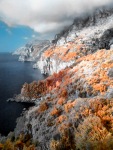
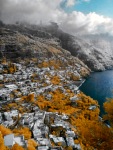
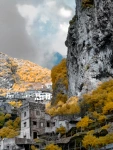
Amalfi, 590nm Faux IR
Ellen (my wife) and I decided that it was time to take a trip somewhere to “get away” for a short while. We decided that a trip to Italy was just what the doctor ordered! Last year we went to Greece but booked an inexpensive hotel in the center of Athens then took day trips to various places in Greece. We learned that this was NOT the way to go. So for Italy we booked a total package trip through Gate 1 which included 5 star hotels, ground transportation, guides and entry fees for the following cities:
The hotels were amazing and the ground transportation was luxury buses. All very well planed and executed! The only real drawbacks were the food costs and the amount of walking required to tour the various locations. This was a group tour which had 35 people plus one full time guide. Everyone was from the USA except for the guide who was from Rome. She was very good and kept us all very organized. There was another professional photographer in our group besides me who specialized in Pin Hole Photography using home made wooden cameras shooting film! I had several hours of very good conversation with him. I would not hesitate to use Gate 1 again in the future.

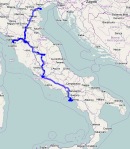
GPS track of our path through Italy
As you can see from the rough GPS track above we covered a lot of the country. I took along a small GPS device to generate a bread crumb track so that I could TAG all of my images for location as well as keep a detailed plot of our movements. It worked very well and had enough memory for several months of movement and a 44 hour battery life! The unit I decided on was from Ostarz and called the X-1000 Travel Recorder XT. It is TINY and has a bluetooth interface for uploading the date to your computer system. I am very pleased with it so far and it has worked flawlessly.
Each of the cities that we visited were interesting in their own way and all were different! Below I will give you a basic overview of each and what I liked about it!

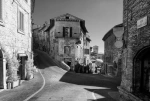
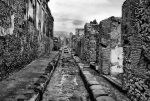
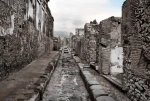
An Assisi street. 590nm Faux Color