Grist Mill GPX Download Updated!


Updated Version (April 2012) Ready In The Downloads Window!

There is a new updated version of the Grist Mill GPX file available in the Downloads area on the right side menu!  I have added all of the Ohio and Indiana mills plus made repairs to older entries that proved to be incorrect!  Please download them and install on your GPS!

As ALWAYS please share the lat/long, name, location, address and description of any mills that you find that are NOT on this download!!

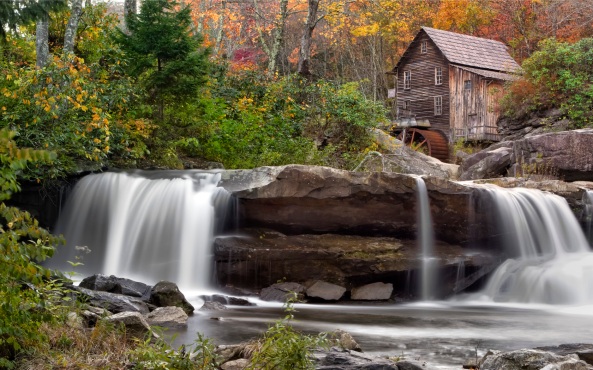
Glade Creek Grist Mill, WV

Thanks for your continued help.

Italy, 2012, Post 3


Images, Images and More Images!

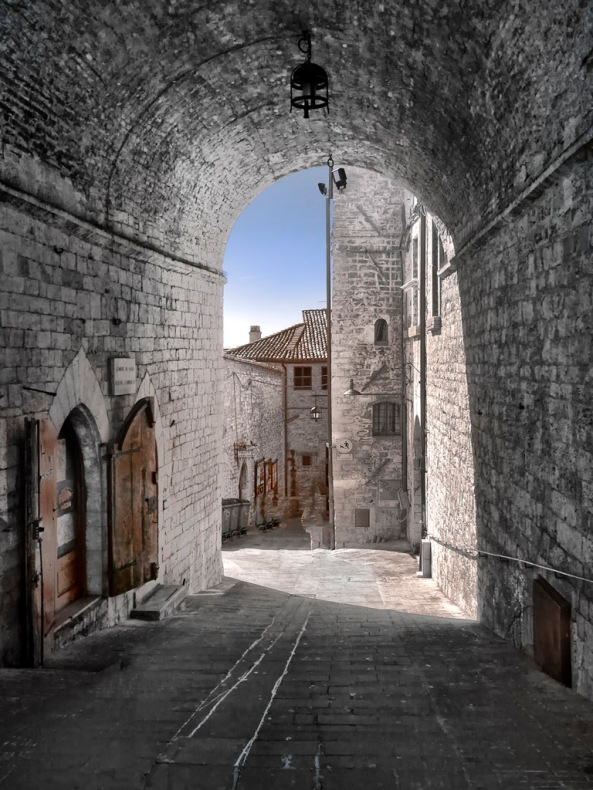
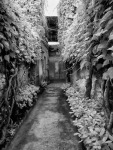
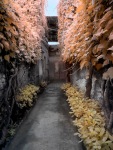
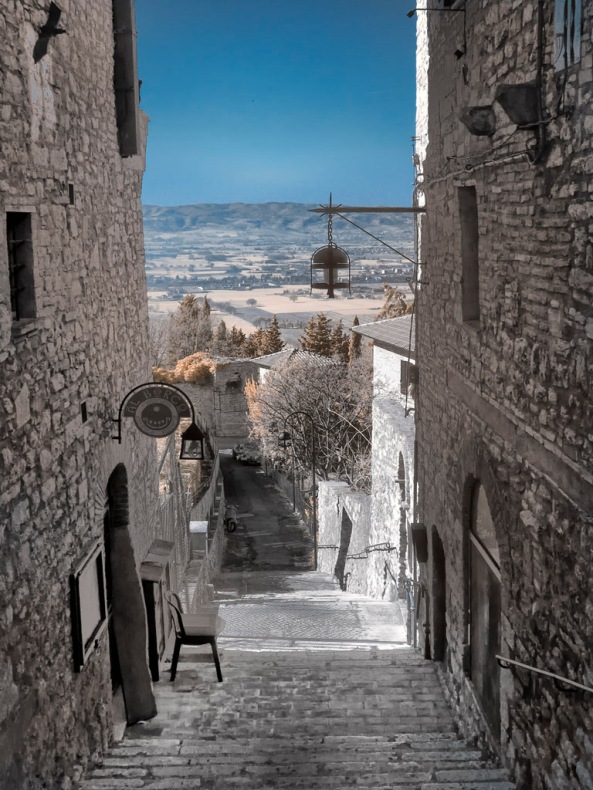
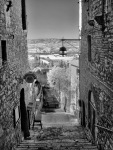
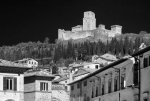
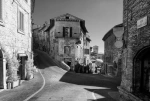
Assisi, Road Thru Houses 590nm Infrared

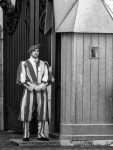
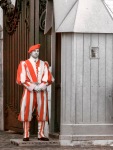
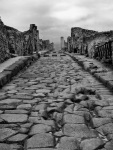
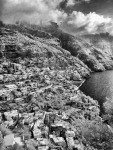
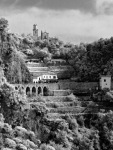
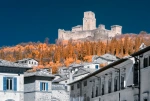
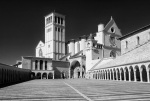
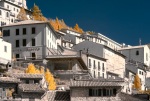
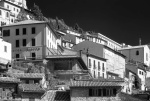
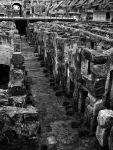
Todays post are just a few more of my favorite Infrared Images taken around Italy.  All are 590nm with an equal mix of Faux Color and B&W.  The post processing on them are basically the same as in the last post.  All were taken with the Panasonic GH2 with the 14-140mm Panasonic lens.

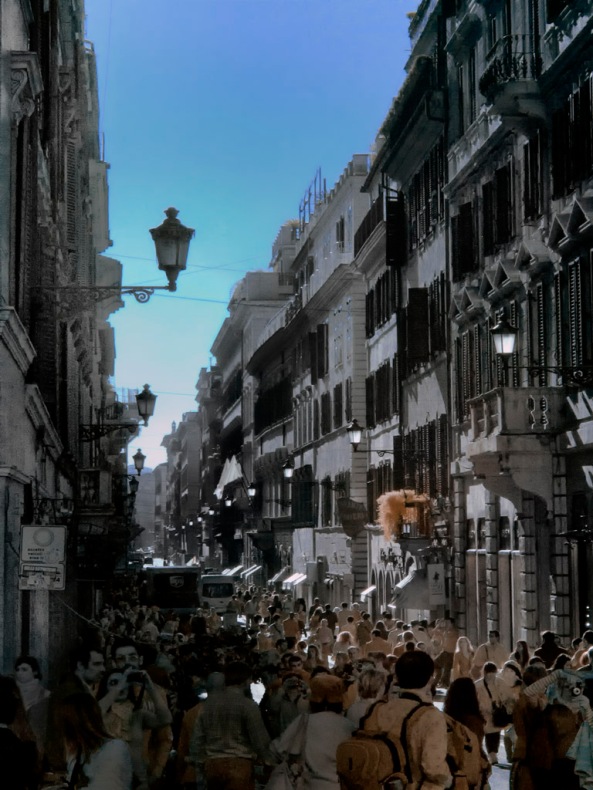
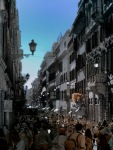
Rome, the high fashion district at the Spanish Steps. Notice the vast crowds! 590nm

I will likely add some Color images here as well in the coming days to highlight the differences between locations done in both Infrared and Color!  But for now, on last gallery of Infrared images:

Italy, 2012, Post #2


Speciality 590nm Post Processing to OVERCOME Difficult Images!

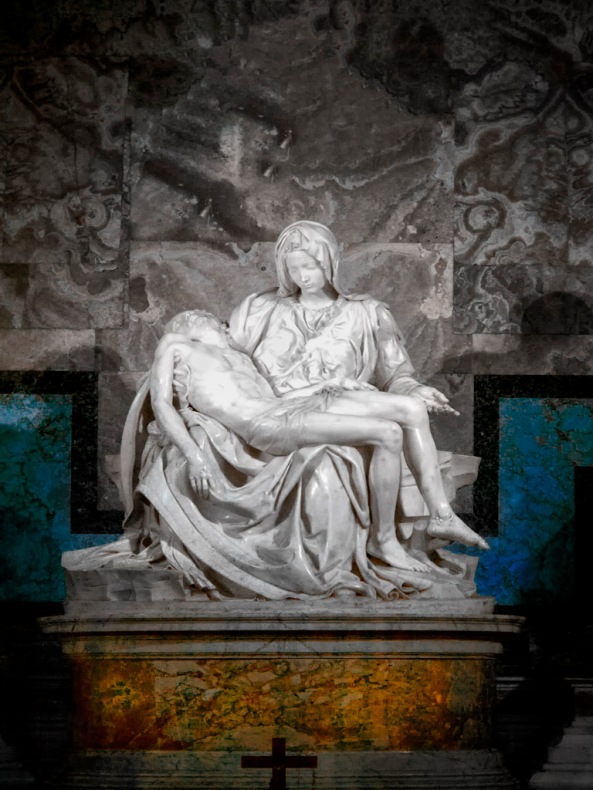
Michelangelo's "Pieta" in Saint Peters Basilica, Rome, 590nm Faux Color Infrared.

Oh my, where to start… Hmm well I think that there is no need to proceed in any order so I will tackle the most important images in order rather than by location!

Looking at the image of the Pieta above the first thing that comes to mind is the full beautiful saturated colors.  One would look at this and never realize that this is a Faux Color Infrared image!  It is indeed a 590nm IR images taken on the Panasonic GH2 with the 14-140mm lens, INDOORS, THROUGH PROTECTIVE GLASS at a super high ISO of 1250, 1/60 s, f/5.6 HANDHELD. It is in fact not a scene that one would normally consider for Infrared.  This is EXACTLY why I did choose it.  Color was nice, but everyone shoots it in color.  I desired something different and new.  I cannot imagine that it has EVER been photographed in Infrared!

Post processing for this one took considerably longer than the standard 30 seconds with CS5 and the Nik filters.  There were also several problems with the scene that I had to overcome!  First and foremost was the Plexiglas shield between the public and the statue.  It was not exactly clear and there were literally thousands of people standing there shooting wildly all of them using their flashes which were just bouncing off the plastic making it more difficult to see through.  Also there was a large window just over the head of Mary which had the sun directly behind it.  Ok how I did this image:

  • I took my time moving up through the crowd until I got to the rope divider and placed myself directly in the center of the plastic so that I would not cause issues from photographing from an angle.
  • I made sure to have the flash turned off (its normal condition).
  • I set the ISO to 1250 so as to have a f/5.6 aperture at at least 1/60s shutter.
  • I chose a zoom range of 24mm so as to overcome lens bending issues.
  • I then choose the composition in the Portrait mode and set my exposure ON THE WHITE STATUE set to Zone 7 and 8.
  • I took a LOT of pictures as I needed to overcome camera shake, other folks flash reflections bouncing back at me and reflections in the plastic.  By a lot I mean 20 or so images…

Things to consider when shooting through plexiglass:

  1. Your overall contrast will be greatly reduced so PERFECT EXPOSURE is a must!
  2. Flash bounce back from others cameras will KILL your image.
  3. Low shutter speed will require a solid support.

Still, knowing all of the issues I knew that I could overcome them in Post Processing, so I simply set everything up and shot away with the thousand other tourists!

I trusted my ability to set the exposure perfectly on the white statue in the spot meter mode of the camera and then wisely selected ZONE 7 & 8 by dialing in the appropriate positive exposure compensation.  I also knew that I could hold the camera quite still and trusted in its built in image stabilizer to help.  I used the LENS HOOD to cut down on flash reflections striking my lens objective and causing further loss of contrast (you do this also… right?)

After getting back home I went through my 20 images and selected the absolute best version to move into the post processing phase.

My Post Processing Recipe:

  1.  Using Capture One RAW converter I made sure that the image was straight.  I adjusted the contrast up about 10% and adjusted the exposure so that the RED channel was from edge to edge in the histogram. I also insured that there were no hotspots on the statue.
  2. After converted to a 16 bit TIFF image I opened it up in CS5
  3. I cropped the image to my master image size of 8.5″ x 12.5″ at 300 dpi.
  4. I ran Nik Define 2.0 and manually chose measurement points on the statue and the marble wall behind it.
  5. I ran Nik Viveza and increased contrast up again by 10%, structure up 10% and brightened the overall image a few percent.
  6. I used the lasso selection tool and selected the window behind the statue and then via edit > fill with content aware allowed CS5 to remove the window and replace it with more marble from around it. I had to reselect the edges a few times  and go through the process again to make sure that the marble blended perfectly!
  7. I now ran the Channel Swap Action that you can download from here.  At the end of the action it pops up a window with the color channels.  From that window I selected RED and made saturation and hue adjustments, Yellow with saturation and hue adjustments, Cyan  for saturation and hue adjustments (cyan is the most important adjustment, this is where you overcome the blue/green sky during the channel swap by adjusting the hue control towards the blue end!) then selected OK to end the action.
  8. I ran Nik Define 2.0 again to clean up some noise generated by the channel swap action.
  9. I now ran Nik Viveza AGAIN and using selection points I started at the top of the image and worked my way down to the bottom adjusting BRIGHTNESS, CONTRAST, STRUCTURE, RED, GREEN & BLUE levels and finally SHADOW adjustments.  All in all I placed about 100 selection points in the image to get it just right.  As you can see, this recipe is much more detailed than that which I usually use for normal Infrared post processing!
  10. I ran Nik Viveza AGAIN and darkened the four corners to force the viewers eyes into the image center.
  11. I ran Nik Color EFX Pro and chose the Vignette: BLUR filter and adjusted the outside edges of the image to be slightly blurry.
  12. Flatten and save image as a PSD file with a name that is meaningful!

That is it.  The entire process took about 20 min from start to end and I feel that the process was very much worth the time investment.

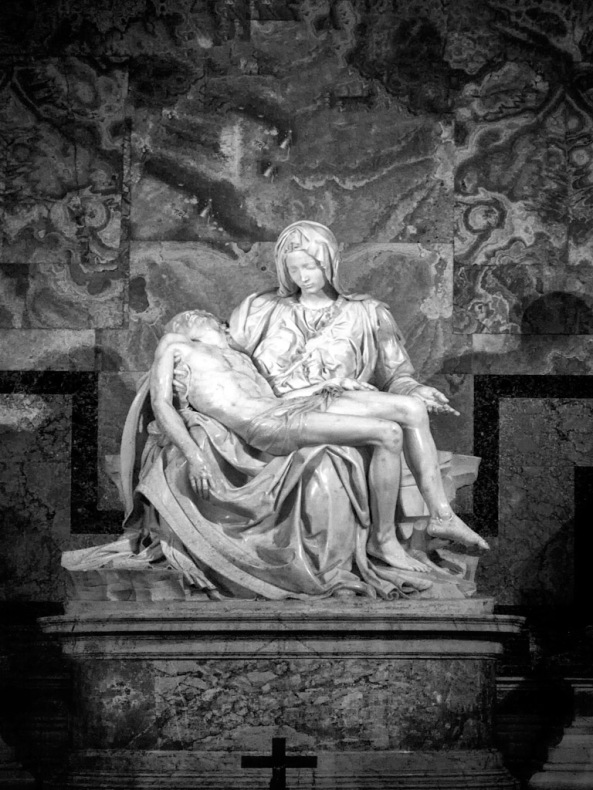
Here is a B&W version generated by Nik Silver EFX Pro 2 for you to compare.  It looks good, but the color image just grabs me by the throat and screams, LOOK AT ME!

Michelangelo's "Pieta" in the Saint Peters Basilica, Rome, 590nm B&W IR

What do you think?  Please give me some feed back on how you feel the images look and feel to you!

Italy, 2012, Post #1


Or, How I Spent My Summer Vacation…

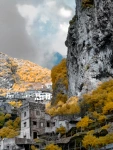
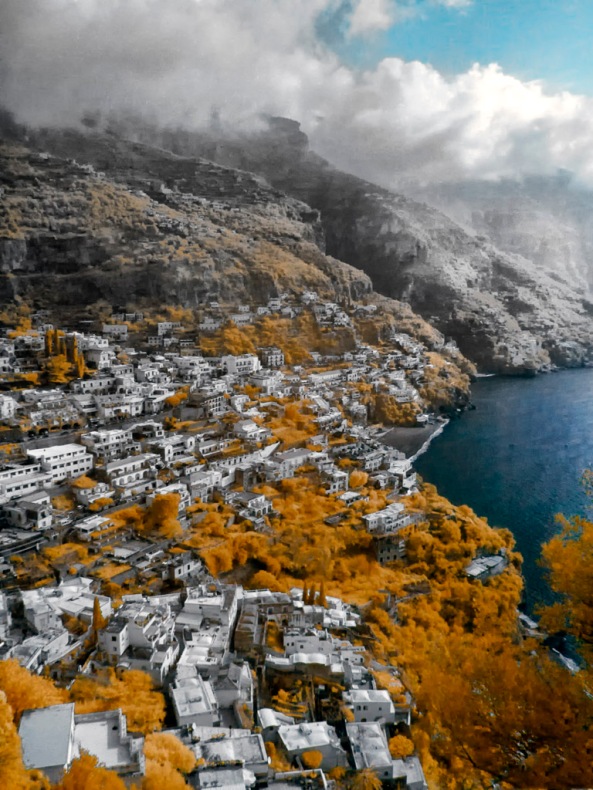
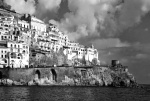
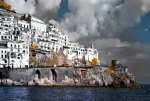
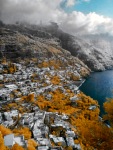
Amalfi, 590nm Faux IR

Ellen (my wife) and I decided that it was time to take a trip somewhere to “get away” for a short while.  We decided that a trip to Italy was just what the doctor ordered!  Last year we went to Greece but booked an inexpensive hotel in the center of Athens then took day trips to various places in Greece.  We learned that this was NOT the way to go.  So for Italy we booked a total package trip through Gate 1 which included 5 star hotels, ground transportation, guides and entry fees for the following cities:

  • Venice, 2 days
  • Pisa, 1 day
  • Florance, 2 days
  • Assisi, 1 day
  • Rome, 3 days
  • Pompeii, 1 day
  • Sorrento, 2 days
  • Amalfi, 1 day

The hotels were amazing and the ground transportation was luxury buses.  All very well planed and executed!  The only real drawbacks were the food costs and the amount of walking required to tour the various locations. This was a group tour which had 35 people plus one full time guide.  Everyone was from the USA except for the guide who was from Rome.  She was very good and kept us all very organized. There was another professional photographer in our group besides me who specialized in Pin Hole Photography using home made wooden cameras shooting film!  I had several hours of very good conversation with him. I would not hesitate to use Gate 1 again in the future.

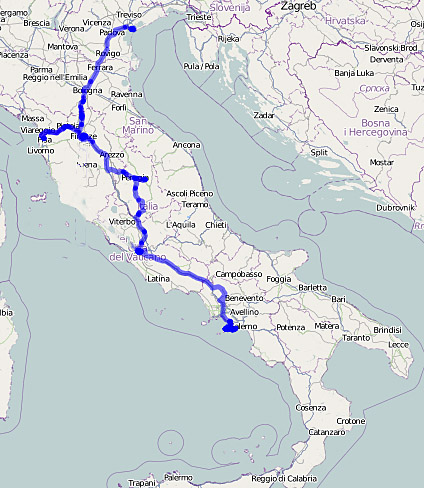
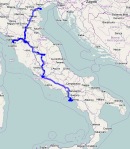
GPS track of our path through Italy

As you can see from the rough GPS track above we covered a lot of the country.  I took along a small GPS device to generate a bread crumb track so that I could TAG all of my images for location as well as keep a detailed plot of our movements.  It worked very well and had enough memory for several months of movement and a 44 hour battery life! The unit I decided on was from Ostarz and called the X-1000 Travel Recorder XT.  It is TINY and has a bluetooth interface for uploading the date to your computer system.  I am very pleased with it so far and it has worked flawlessly.

Each of the cities that we visited were interesting in their own way and all were different!  Below I will give you a basic overview of each and what I liked about it!

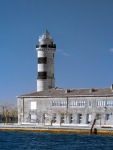
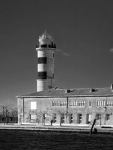
  • Venice.  A very unusual city of boats.  The water scenes were amazing and I loved every moment here.  I only took a few IR shots here and a ton of color images!  We visited ALL of the major attractions here plus took a water taxi to the island of Murano where we watched artisan master glass blowers create their wares!  All in all a most enjoyable destination that I would have enjoyed another day at.
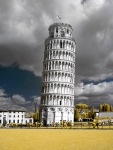
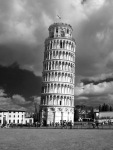
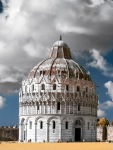
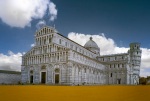
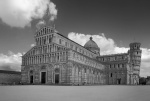
  • Pisa. We were told that we would not enjoy this location because it was boring and full of gypsies.  NOT TRUE!  The basilica which is made up of the Battistero, the Duomo and the Leaning Tower were amazing both inside and out.   Amazing photography!  There was another big plus here in that we found a McDonalds and Ellen was able to have her first cup of normal American coffee!  Color her happy!
  • Florance.  A city of the arts full of splendor.  I really enjoyed walking along the river taking photographs both during the day and night!  Very interesting buildings and statues!
  • Assisi.  Here I would have liked to spend another day!  Amazing is the only word for it.  The basilica of Saint Francis was amazing and full of world class photographic opportunity.  I took a LOT  of Infrared images here…
  • Rome.  BIG, 4 million residents.  The Vatican was amazing.  We visited there both during the day as well as at night.  The Chapels and Museums there left me stunned.  We took a walking tour of all of the famous fountains, ruins and basilicas.  I took a lot of Infrared here.  I would have been happy with 2 days here instead of 3.
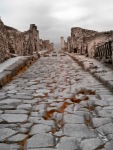
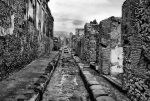
  • Pompeii.  HUGE ruins.  Interesting.  No good for color photography due to the time of day so I basically shot Infrared all day.  After the first 2 streets everything started to look the same.  
  • Sorrento.  What can I say about Sorrento… AMAZING! More time please!  Lovely town in the south.  Had a GREAT time here.  Lots of images in both color and Infrared!
  • Amalfi.  OMG!! This was the highlight of the entire country for me!  Amazing, scary, rough, tall cliffs with twisty turnie tiny roads.  Shere cliffs that have been terraced with small towns built on them! Ohhh, could have spend a week here alone!

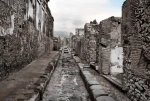
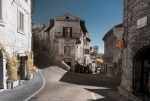
An Assisi street. 590nm Faux Color

For the trip I decided to travel light.  I took my Panasonic GH2 590nm IR camera with the 14-140mm lens & the 8-18mm lens (which I never used) along with my Fuji X100 color camera system.  I learned after my Costa Rica trip several years ago that heavy DSLR systems just sucks the life out of any vacation trip…  I had ordered the new Fuji XPro 1 camera system with the 35mm and 60mm lenses for this trip but it did not arrive in time for it (in fact I still don’t have it and they are telling me the end of March!).  The little X100 works great though and due to its small size and silent operation it made for some easy street photography as well.
I will add further images of the trip along with technical details on how they were taken and processed in my next post.  I will also include my thoughts on travel photography. I will also be including some color images as well so that you can see and understand the differences in impact for each.  Some images simply work better in IR or Color and until you have processed them you will not know!
It is going to take me weeks to wade through all of the images that I took.  I am working on the Infrared ones today and will include a small gallery below to share some of them with you.  Please click on each image to bring up a larger view!

The 3 Faces of Infrared Conversions…


Or, which way should you jump?

Different Spectrum Choices...

Recently, I have been asked several times in emails and via reader comments on which Infrared camera conversion is the best for someone who is planning on jumping into IR!  So, it is time to address that small question…

There are three ways to go when considering Infrared Photography:

  1. Normal color camera with external IR filter.  This is the cheapest way to try your hand at IR photography.  You simply adda 720nm filter to your lens.
  2. Internal conversion to Infrared. This is the cheapest easy way to get into IR.  The internal IR blocking filter (hot mirror) is replaced with a IR pass filter.
  3. Full Spectrum conversion.  This is the best way to get into IR, but the most expensive.  The hot mirror is replaced with clear glass and you put IR filters on the lens.

Let’s discuss each option..

  • The first, normal color camera with a 720nm external filter will work great, but it does have some major issues to overcome.  The exposure times are greatly increased due to the fact that you have limited the amount of light reaching the sensor with the addition of the external filter plus it must overcome the internal hot mirror built into the camera.  The results in exposure time around a minute long and no ability to compose (unless you have live view) because your eyes cannot see through the 720nm external filter.  Focus is off and must be adjusted for IR as well.  Still, it is a good way to see if you even like IR work!
  • The second, internal conversion is a really good way to go.  It requires no special camera functionality (you do not need live view) and will give the ability to shoot normal hand held exposures. It works well in all camera types.  They only issue is the decision on which filter to choose!  I usually tell people to go with a 590nm conversion (Goldie or Super Color) because it gives the best combination of Faux Color and B&W work.  There is another consideration to the internal conversion, it is that you can change the flavor of the conversion by adding an additional filter on the end of your camera lens!  You can only go down in frequency  (up in nm) from whatever your internal filter is but it can be done allowing a different flavor for your camera!  Remember when you hit 720nm or lower you loose the ability to use your optical viewing path so you MUST have a camera with some sort of live view system for this to work! I have a Panasonic GH2 at 590nm, a Canon 20D at 590nm and they both work great.
  • The third option, Full spectrum gives you the most versatility but with added costs.  The hot mirror is replaced with a clear piece of glass and you then program the camera with an external filter!  This opens up an entire world for you to explore.  The camera will see everything from UV to FULL COLOR to INFRARED!  You simply tell it what you wish by your choice of external filter.  If you only are interested in 590 nm, 620 nm and 665 nm then any digital camera will be fine for you.  But if you wish to explore some of the alternatives, like the Super Blue (in camera Faux) or  UV+IR (UG1) or the deep IR filters like 720nm (standard), 850nm (deep IR) and lower then you MUST have a camera with live view or full time LCD display!  The reason for this is the fact that normal DSLR camera systems use an OPTICAL image path that goes from the viewfinder thru a prism, bounces off a mirror and out thru the lens and filter!  If your filter is dark then you cannot see to compose although the camera will still focus!  Live view will allow you to overcome this problem.  There are some REALLY interesting filters out there like the UG1 (UV+IR) and the 047B (Super Blue in camera Faux) that will only work with an internal or Full Spectrum conversion but need a live view with the Full Spectrum Conversion!  Now, the additional costs are the prices of the external filters to fit your lenses.  The darker the filter the more they cost!  Oh, did I mention that with a Full Spectrum Conversion you can convert the camera back to normal color by adding a UV/IR blocking filter (expensive)!!

Spectrum choices

UG1 – UV+IR  This is an interesting filter that mixes UV and Infrared to give ultra white colored leaves and a dark blue or purple sky!  You will see a lot of this posted around the net but very little in the galleries!  It is not for everyone but still can be very pretty and interesting.  The filter is very expensive!  It is around $120 for 58mm.

Hoya 047B Super Blue

Super Blue – In Camera Faux Color.  This filter is becoming more popular as you can shoot normal Faux Color IR images right in the camera with no post processing. It is highly dependent upon good white balance but gives very good Faux Color images.  For B&W it is not so good… The cost of the Tiffen 047B is around $70 in 58mm. Lifepixel now offers a Super Blue internal conversion service.

B+W 090 Super Color 590nm

Super Color (Goldie) – 590nm.  This is (and should be) usually the filter of choice for most IR shooters.  It gives great gold toned Faux Color images and stunning B&W images as well.  For Faux Color special post processing is required in Photoshop and the Red and Blue channels must be swapped which is VERY difficult in Elements but simple in Photoshop CS5!  The cost for a B+W 090 590nm filter is about $25 for 58mm.

B+W 091 Pinkie, 630nm

Pinkie – 630nm.  This is my personal favorite filter for Infrared work.  Instead of golds it gives pinks and reds in Faux Color and stunning B&W work.  No on offers this filter as an internal conversion so the only way to use it is with a Full Spectrum conversion.  The same post processing rules that apply to 590nm apply to 630nm.  The cost is about $25 for 58mm for the B+W 091 590nm filter.

Enhanced Color – 665nm.  This is very close to the 630nm filter but with more reds than pinks.  B&W is stunning and this filter can be had on both the internal conversion and the Full Spectrum Conversion.  The cost is slightly higher at about $50 for 58mm. You will find a lot of P&S cameras on EBay with this conversion.

Hoya R72 720nm Standard IR Filter

Standard – 720nm.  This is called standard for good reason, most IR conversions out there are at 720nm which really does not make any sense to me! It gives very LIMITED Faux color but great B&W!  The filter is black to normal vision and while it works great as an internal conversion it is not so good with Full Spectrum unless you are using it on a camera with live view or full time live view like a Micro 4/3, P&S or any of the other mirror less systems out there.  With a DSLR with live view it works great in Full Spectrum.  The cost is expensive at around $100 for a 58mm version of the Hoya R72.

Deep IR – 850nm.  This filter is totally black.  It gives ZERO Faux Color but beautiful rich and deep B&W images.  This is for the person who only wants to work in B&W.  Even with an internal conversion there will be about a 3 stop hit in exposure do the the limiting factors of the filter.  With a DSLR with live view it works great in Full Spectrum.  The cost is expensive at around $150 for a 58mm version.

LDP CC1 UV/IR Blocking Filter

IR Blocking – Normal Color.  This filter has a aqua appearance that blocks the UV/IR spectrum which will convert your camera back to normal color AS LONG AS YOUR CAMERA IS A FULL SPECTRUM conversion!  This is VERY expensive around $200 for 58mm for the LDP CC1 Filter. I have found that if you couple this filter with the B+W 486 UV/IR blocking filter that you get a better return to normal color.  The reason is that it blocks slightly more on the UV end of things.  I usually dissemble the 486 and install it in the CC1 filter ring along with the CC1 filter.  Again, this is expensive at about $125 for a 58mm.

As you can see, there are a lot of choices out there for you.  The Full Spectrum Conversion has much more options but requires a live view capable camera system.  I have both internal conversions and Full Spectrum conversions and like them both.  I really like playing with the Super Blue you must remember that it does not do well with B&W work!

There are endless examples of images created with each of these filters spread out in this blog.  Go take a look around to see the examples of each to help you decide on which way you might jump!

Please let me know what you decide upon!

Panasonic GH2 590nm Review Part 2, White Balance Revisited


Proper White Balance Makes Such A Difference!

The Gray WB Card

OK, I realize that in terms of actual helpful posts that it has been a long time.  With advertising for workshops and camera sales, things have been a little stale around here.  But all is not lost!  I have been out and about for 2 days shooting the GH2 (590nm) and playing with different white balances.  Todays post is about setting your WB on the GREEN grass and how it affects the image.  In the first review, I detailed the differences in setting WB on the grass vs. a Gray card, so I will not repeat that prices here.  With this camera (GH2) the choice of how you WB makes a MAJOR difference.  This weekend i simply forgot to bring along the Gray card so all of the work was done on the grass!  In my defense, it just seems to go against all of my advice on WB that I have given you in the past.  Green grass has always been the main source of WB and generally would produce really nice monochromatic tones in the LCD of your camera when properly done in the leaves and a nice bronze in the blue areas of the sky.  I would even Post Proces RAW files to take advantage of this from time to time.  But with a Gray card, the sky takes on a sickly greenish cast that just looks terrible on the LCD, but when you get the RAW file on the computer you get such vibrent gold tones!  What a difference it made…

The image below is an example of forced processing in Viveza caused by a Green grass WB.  It still looks good but it had to be forced in Post Processing….

I simply must remember to bring along the Gray card in the future!

Bellimatrix, 590nm, WB on Green Grass

I have to honestly admit that the Gray card works much better with the GOLDIE (590nm) conversion on the GH2 that it has any right to!  NONE of my other IR camera systems seems to be affected like the GH2 in this regard! I just HATE the way the RAW images look straight out of the camera with the Gray card, but in terms of Faux Color IR the difference is stunning!  The RAW images take on a greenish cast when done on the Gray card vs. the nice bronze & monochrome elements when balanced on the grass.  If you are looking for some interesting bronze tones straight out of the camera then you need to WB on the grass, but if you are shooting primarily for Faux Color then choose the Gray card. By doing so the yellows and golds seem to come naturally during the channel swap rather than being forced in Nik’s Viveza.

For B&W Post Processing, WB had an effect on the overall output, but much less so than when working in Faux Color.  You will notice tonality changes between the WB versions in the mid tones!

Bellimatrix, 590nm, B&W Processing

Still, you can achieve both if you desire in photoshop.  The choice is yours but to me it just makes sense to get the best results straight out of the camera!

720nm IR E-P1 Camera System For Sale!


720nm IR E-P1 Camera For Sale!

720nm IR image from THIS camera!

This was the first KING of IR camera systems.  You can read about THIS camera and its capabilities on my Infrared Educational site at:  infraredatelier.wordpress.com  There will be many example images, tips and IR recipes specific to this camera system.  The conversion was done at Spencers Camera in Utah in 720nm called Standard IR.  It is a small, compact IR camera system that is easy to carry with you meaning that you will never have an excuse for not getting the shot!  

Visit this Auction HERE

Included with this auction:


  • E-P1 Camera
  • Olympus 14-42mm lens.
  • Battery Charger
  • 3 Batteries
  • Shoulder Strap
  • Box
  • Lens Hood
  • Instruction Manual
  • Magic Lantern r E-P1 guide
  • Access to educational IR site at infraredatelier.wordpress.com


This is a great IR system that will give you years of fun and artful creation.  Look at the 3 samples above that were taken with THIS camera and you will see what I mean.  You can change the flavor of this camera with the addition of external IR filters on the end of the lens as long as you go up in nm range  ie 800nm 850nm and so on.  You cannot go down since the internal filter will block it.


The camera is in great shape with very small minor scratches on the bottom where the tripod attaches!  The lens is clean and clear with no dust.  For IR work the 14-42mm lens is the best selection since we mainly shoot landscapes but this camera will work perfectly with ANY micro 4/3 lens that you desire!

System


Grist Mills Of Rhode Island


Post Processing the Infrared Grist Mills of Rhode Island

Hammond Mill, Selective Focus

I have just now getting around to post processing the Rhode Island section of The Great 2 Week Grist Mill Trip!  I cannot believe that I am so behind… Oh well, better late than never!  Since completion of the trip I have had 2 other Grist Mill Trips with a ton of photos in the que! All of these images were taken on my Olympus E-PL1 Full Spectrum converted IR system using the Oly 14-150mm lens with a B+W 091 630nm filter.

As you can see I processed for both Faux Color and B&W IR images because you just never know how they will look unless you try!

Does everyone understand exactly what a Faux Color Infrared image is?  It is likened to the old Kodak HIE IR films of the 80’s (I actually designed the silver salt growing system for that film while I worked at Kodak!).  In modern converted IR digital camera systems the images are true IR images, but since the sensor is RGB we have a lot of color data there!  To get to what the film was capable of producing we simply swap the data on the Red and Blue channel of the image in Photoshop, fine tune the colors in NIK Viveza and work from there!  Just because it is described as a Faux or False Color IR image doesn’t mean that it is so!

The B+W 091 is a little more on the red  end of the spectrum so the images tend to (when Faux Color…) lean more towards the pinks and reds.

Basic Post processing is as follows:

  1. After conversion of my RAW files in Capture One Pro v6 I then do my critical deletion edit using Bridge.  This is perhaps the most difficult step. You have to look beyond low contrast off color images and see what they can be. Look for coloration (this will get better with time), emotional impact (yes you CAN do this! I have several BLOG postings here that talk specifically about this one…) and sharpness and exposure.  Think about each and every image in terms of Faux Color and B&W! When finished, I then open the images one at a time in Adobe Photoshop CS5 with ALL of the NIK filters installed.
  2. I did my normal cropping to my master storage size of 12.5×8.5 making sure that the image was at 300dpi and in the Adobe RGB 1998 color space
  3. I ran NIK Software’s Define 2.0 for noise reduction. For this I simply accept the default settings!
  4. I then ran NIK Viveza 2.0 and specifically added 20% structure and 10% extra contrast without any control points so that the changes affected the entire image!  This was to create a brighter deeper image before I ran the channel swap Photoshop Action!  WOW!  WHAT A DIFFERENCE THIS MADE!
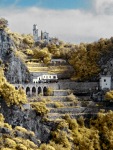
  5. I then ran the channel swap action and proceeded as normal with the rest of my Post Processing Recipe! This is the Khomography Photoshop Action that you can download here towards the bottom of the right hand menu! The action swaps data between the Red and Blue image channel and allows you to adjust the Hue/Saturation in the Red, Yellow, Green, Cyan, Blue & Magenta color channels separately!
  6. In the action select the Red, Yellow, Cyan and Blue channels and adjust each of them using saturation and hue to get the image elements to start to fall into place. Pay careful attention to the Cyan channel adjustment as most of the time the sky takes on a green/aqua tint which looks terrible!  Simply adjust the Hue of the Cyan channel to fix this!
  7. Now, Calling up Nik’s Viveza again I will select specific elements of the image with control points.  I will add contrast and structure then adjust the primary colors R,G and B to adjust the specific color of the compositional element to achieve the overall color I want for it.  You can also use the Warmth Slider to add or remove warmth.  This entire process takes only a few moments to do if you understand your basic color wheel and how to mix to change!  This process will give you your final ball park image!
  8. THEN I called up another of NIK Software’s world class filters and ran the TONAL CONTRAST filter in the COLOR EFX PRO plugin.  The result was this incredible image full of contrasts tonalities as well as contrasting colors!

Rather than simply place the images here in the post separately I am going to try Word Press’s new Photo Gallery.  Simply click on any of the images that you see to bring up a nice slide show!

Added Grist Mill GPX and Covered Bridge GPX Updated Files!


Go Get Them!

Glade Creek Mill, WV

There are two new downloads for your GPS system in the download box!  I added the Covered Bridges in Georgia and several NEW and corrected Grist Mill locations!

These are in the GPX file format and can be downloaded from here from the download menu on the lower right menu.

Once you have them on your computer you will need to have the GPS software that camera with your personal GPS to download them into your GPS.

Once done they will be available for you while you travel around the country!

As Always, I would appreciate ANY help that any of your could offer in expanding this database!  So far there are 185 Grist Mill locations and I would like to double that by the end of the year.

Send the following information to have it included in the Database:

  • Mill or Bridge name
  • Address
  • State
  • Lat/Long (IMPORTANT)
  • Description
  • Info on ownership and contact info if on private property.
  • You name and email
  • Best time of day and season for photographing them
  • Image if possible

You Do NOT have to spend a fortune to do IR!


How To Do It On The Cheap!


I know, this was supposed to be a post on the GH2 tests but I have been getting a lot of email and comments about the assumed high cost of getting into Infrared Photography!  This insane notion needed to be stopped before it got any further!

If you have an extra camera system laying around you can reasonably expect to send it off for conversion for $200-$300.  Yes that is a lot of money but the expansion of your artistic mind set that Infrared will give you will be worth it.  But there is a cheaper way!

EBay is a great place to find used digital camera systems already converted to Infrared!  I have purchased several of these used IR camera systems in the past year for next to nothing and have NEVER had a problem with a single one that came from EBay!

So far I have purchased from Ebay:

  • Canon G10 at 720nm for $350 (G10’s are in high demand)
  • Canon G9 at 665nm for $300
  • Canon 10D at 850nm for $250
  • Olympus E-P1 at 720nm for $300
  • Canon 20D at 590nm that I picked up for $300.00!

Why you ask did I purchase all of these system?  Well I TEACH Infrared Workshops and as part of that I have loaner cameras so that my students can try different camera systems before they decide on what type of camera and what conversion they like the best!  But the real point that I am trying to make here is that YOU DO NOT have to spend a lot of money and that EBay is your friend!

Point and Shoot cameras are very inexpensive and are light and easy to carry.  This means that you will always have a IR system on hand.  Mirror-less SLR IR systems like the GH2 and OLY Pen systems give your the advantage of interchangeable lenses and are small and light.  DSLR IR systems have the advantage of being able to share lenses and accessories!  If you shoot Nikon, do not be afraid to buy a used Canon camera and a cheap lens and vice-versa!

Go back through this blog and read the posts on the 14 IR camera systems that I have tested!  You will notice that I tend towards smaller lighter and cheaper cameras!  There is a whole world out there full of people with IR systems that are upgrading to something newer and cooler (in their eyes!) who would jump at the chance to sell the old ones for funds to add to their new ones.

Beware of buying from friends in camera clubs as they are looking to recover ALL of the money they spent both for the camera as well as the conversion!  As I said EBay is your friend!