New Fuji 55-200mm lens for IR!


Finally, a LONG X Lens for the Fuji Family!

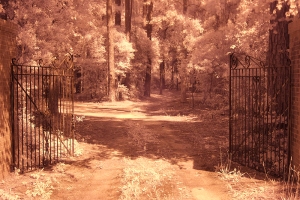
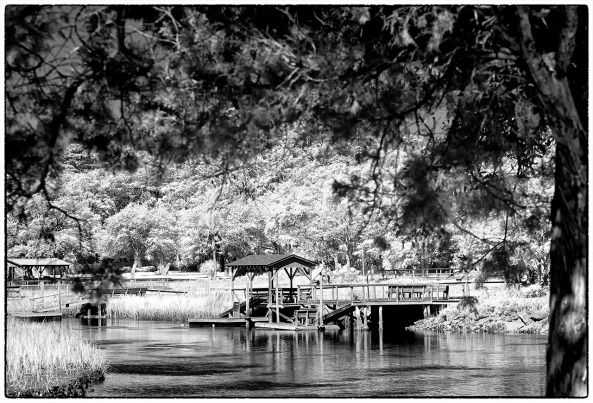
Pawleys Marsh, Fuji X Pro 1 720nm IR conversion w/ the new 55-200mm lens.

Pawleys Marsh, Fuji X Pro 1 720nm IR conversion w/ the new 55-200mm lens.

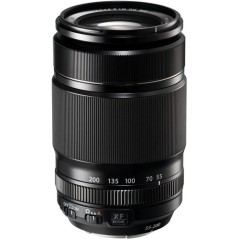
Fuji X 55-200mm

Fuji X 55-200mm

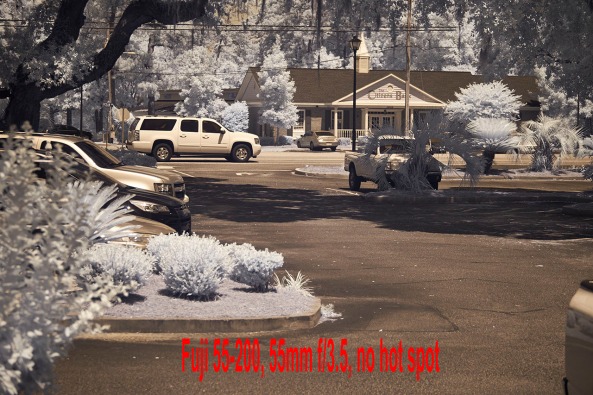
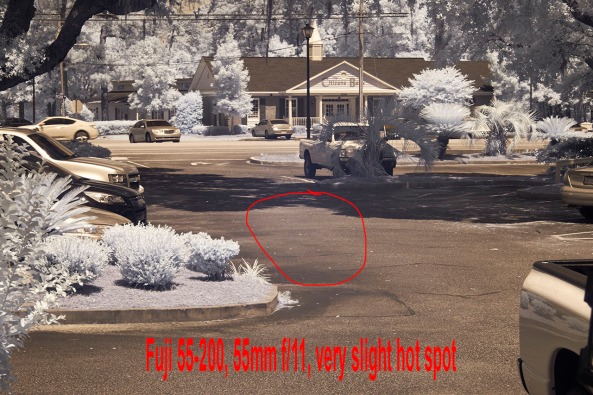
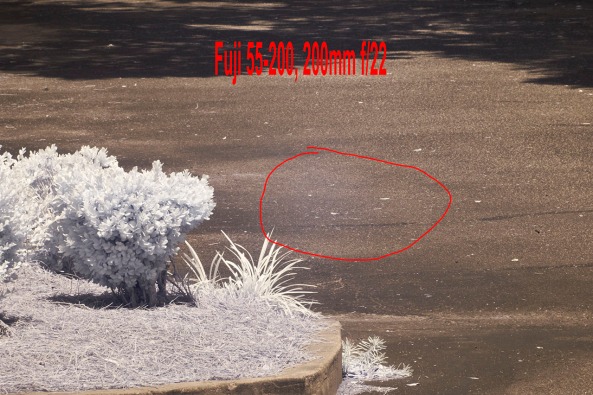
Yes, the new Fuji 55-200mm lens arrived for my fuji camera systems!  I am currently shooting with a color X-E1, a color X Pro 1 and a IR converted (720nm) X Pro 1.   I know how well the 55-200 works on the color bodies but what I really needed to know how did it work with the IR system!  Would it give hot spots as so many of the Fuji lenses do?  This post is the report of my findings.  The final verdict is that it works very well and as long as you do not go higher than f/16 there are no hot spots to worry about at any zoom range! To me this is a really big deal.  

So far only the 14mm and 35mm Fuji lenses are usable in infrared. So the addition of another lens really helps.  

I am going to give you some examples of how this lens actually does at both the wide and long ends of the zoom range wide open and closed down so that you can get a feel of the usable Infrared range that you can use.  Next week I will do a posting using the lens for color work only.

Pawleys Marsh, Fuji X Pro 1 720nm IR conversion w/ the new 55-200mm lens.

Pawleys Marsh, Fuji X Pro 1 720nm IR conversion w/ the new 55-200mm lens.

OK, let’s take a look at the good and bad of the 55-200 in IR, the Wide end:

55-200mm @ 55mm, f/23.5 No hot spot

55-200mm @ 55mm, f/23.5 No hot spot

55-200mm @ 55mm, f/11  Small hot spot

55-200mm @ 55mm, f/11 Small hot spot

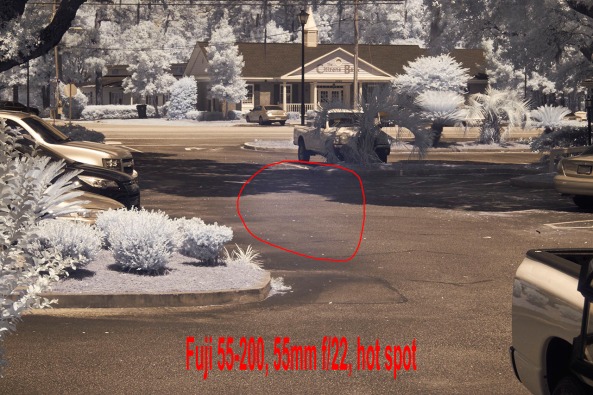
55-200mm @ 55mm, f/22 Bad hot spot

55-200mm @ 55mm, f/22 Bad hot spot

As you can see as you get to f/11 we start to develop a small hot spot, but nothing that cannot be fixed.  Above f/11 the lens becomes unusable at the wide end.

Now, let’s take a look at the long end of the zoom range:

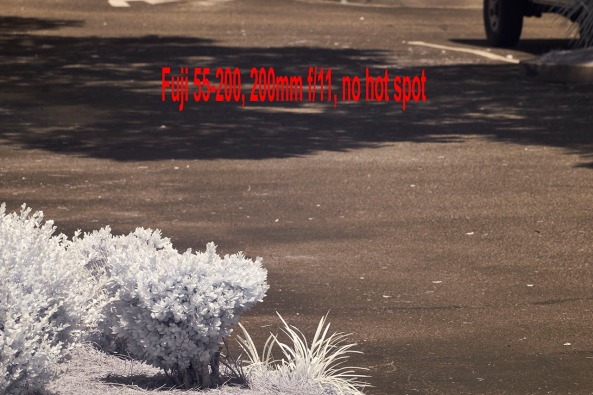
55-200mm @ 200mm, f/11 Bad hot spot, NO HOT SPOT

55-200mm @ 200mm, f/11 Bad hot spot, NO HOT SPOT

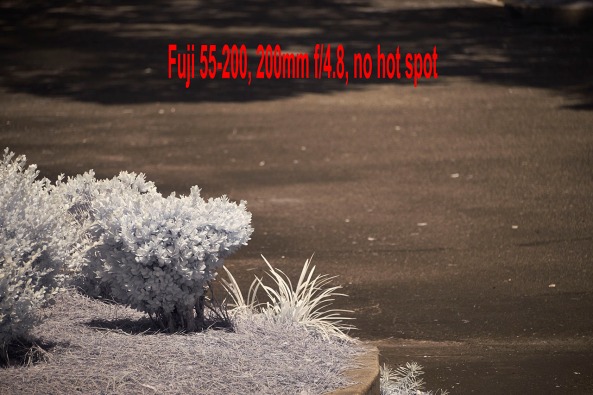
55-200mm @ 200mm, f/4.8 Bad hot spot, NO HOT SPOT

55-200mm @ 200mm, f/4.8 Bad hot spot, NO HOT SPOT

55-200mm @ 200mm, f/22 Bad hot spot, SMALL HOT SPOT

55-200mm @ 200mm, f/22 Bad hot spot, SMALL HOT SPOT

The difference at the long end of the zoom is amazing and is usable over the entire range of the aperture!  This is great news for us IR shooters.

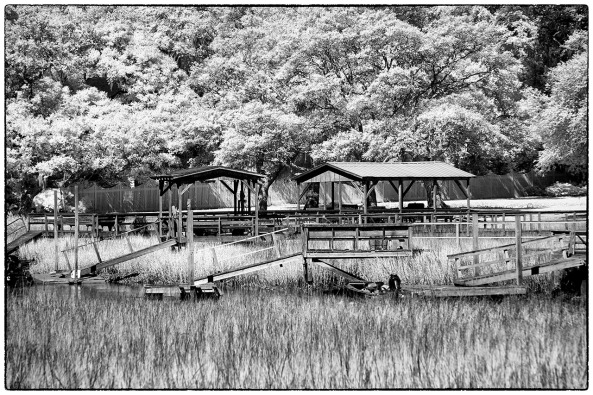
Pawleys Island Marsh, 200mm B&W Post Processing

Pawleys Island Marsh, 200mm B&W Post Processing

There is starting to be a large number of IR photographers out there who are using converted Fuji X Pro 1 camera systems.  There are currently 2 conversion companies out there who can do the conversion.  I HIGHLY recommend the X Pro 1 as an Infrared platform and with the addition of the 55-200mm lens to our shooting arsenal we are way ahead of the game!


A Simple Tutorial on Infrared Post Processing…

from my fine art photography blog

Murrells Inlet Marsh, X Pro 1 720nm IR Faux Color

Murrells Inlet Marsh, X Pro 1 720nm IR Faux Color

The Fuji X Pro 1 has turned out to be one of the best Infrared camera systems that I have ever used… period!  The only good Fuji lenses for Infrared have proved to be the 35mm f/1.4, the 18mm f/2 and the new 14mm.  The Viogtlander 75mm f/1.8 has also proved to be a STUNNING lens also!  So, the camera has proven its infrared capability, now it is time to discuss in detail the recipe for post processing!  It is all quite simple but there are a few requirements that you must understand in order to follow my workflow with understanding.

Needed:

  • Photoshop CS5 or CS6
  • Nik Filters, Viveza, Define Silver EFX Pro plugins for Photoshop, NOT LIGHTROOM.  (You can now purchase the entire library of Nik filters for $149)
  • Kromography False Color Action which can be downloaded here from the right menu bar under the box menu.  You can simply  click on it to download to your computer then drag it to photoshop to install.
  • A converted Infrared camera system capable of generating enough color data to make Faux Color images.  This means 720nm, 665nm, 630nm and 590nm conversions.
  • The ability and desire to experiment!

As you move your RAW (shoot only RAW for IR because of the ability to shift the white balance easily) onto your computer you should automatically tell yourself that you are going to process each selected image in Faux color and B&W.  Sometimes you will notice that the un processed image looks great also (wonderful bronze tones) and decide to do a version like this as well!

Lets talk about the RAW conversion process a little bit.  Photoshops ACR built in RAW converter will NOT apply the white balance correctly and your images will appear deep red.  For this reason I use Capture One version 7 from Phase One.  It is simply the BEST RAW converter that I have ever used.  You can download a trial version and decide for yourself if what I am telling you is true!

My Initial Editing Steps:

  1. Move images from my camera to my computer with an intelligent download tool that renames them with a meaningful name and create an intelligent directory tree for my RAW Library.  For this I have tested dozens of tools and found that Ingestimatic is the best and lowest cost one out there! You can find them here.
  2. Visually edit the RAW files by deleting the images that are simply no good.  Do not clutter up your computer with these useless files.
  3. Batch process my RAW conversion choices and adjust the exposure, contrast and angles.  Capture One will allow this and place the converted image files into a storage directory for later editing.
  4. Within Photoshop, open  each converted image one at a time for post processing
  5. Run Nik Define 2.0 in its default mode on the image for noise reduction, Save.
  6. Run Nik Viveza and without using any selection points increase the structure around 10% and the contrast about 5%, Save.
  7. Having installed the channel swap action that you downloaded here, run it on your image.  The last thing it will do is to open a Hue/Saturation window with the Master channel selected.  Simply select the CYAN channel  and vary the HUE a little bit to bring the sky to a normal blue rather than a blue/green.  Then select the RED channel and adjust the saturation up to a value you like, and repeat with the YELLOW and MAGENTA channels.  When you are happy with the results click on DONE to move on.  REMEMBER:  This is to only get the colors of the FAUX COLOR IR image into the ball park!  The real adjustment will happen next.
  8. Run Nik Viveza again.  Here is where you will use your control points to slightly adjust the colors and contrasts of various image elements to bring out a stunning, etherial work of art!  LOOK closely at your image, decide what you wish to adjust (Hue, saturation, contrasts and de-saturation). MORE ON THIS LATER!
  9. Run Nik Define one more time.
  10. Flatten the image, crop to taste, correct any imperfections (healing tool and content aware fill).
  11. Save the image with a meaningful name in a planned and thought out master image library.
  12. With the finished Faux Color image still open in Photoshop, now run Nik Silver EFX Pro to do your B&W conversion.  There are several built in recipes in this filter that can be used as a starting point.  My favorites are:
  • High Structure Harsh
  • High Structure Smooth
  • Full Dynamic Range Harsh
  • Full Dynamic Range Smooth
  • Fine Art Process
  • Wet Rocks (once in a while)

Save your image again with a NEW file name that reflects the difference in your master image library tree!

Murrells Inlet Salt Marsh, X Pro 1 720nm IR

Murrells Inlet Salt Marsh, X Pro 1 720nm IR

Remember:  Process ALL IMAGES as both Faux Color and B&W.  You really do not know what you are going to get till you do so.

All of this really is VERY SIMPLE and once you have done it a few times it will become second nature to you.  Soon you will be a post processing Infrared God or Goddess!  Congratulations

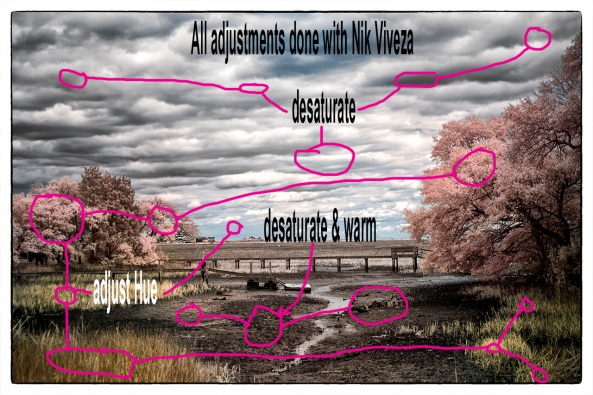
No, let’s take a look at the image below.  Notice the areas that I have circled as places where I desire to change the colors, contrasts and saturations (both plus and minus). Also consider that this is a 720nm converted camera and as such has a very limited color range (light pinks and warm tones and blues).

Annotated Faux Color, X Pro 1 720nm IR

Annotated Faux Color, X Pro 1 720nm IR

It is in this area and others like them (similar color values that are the same) that we are going to place control points on and change these values!  If you notice that the areas around them also change a little you can place what we call anchor points which are simply control points with no adjustments to bring those areas back to where you wanted them!

You will find this ENTIRE process from the initial loading into photoshop to finish will just take 4 or 5 minutes or less as you become more practiced!

Here are a few more images for you to consider that were taken on the 720nm Fuji X Pro 1 camera system:

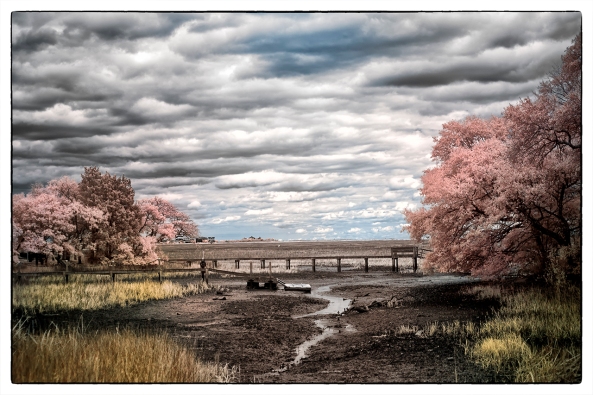
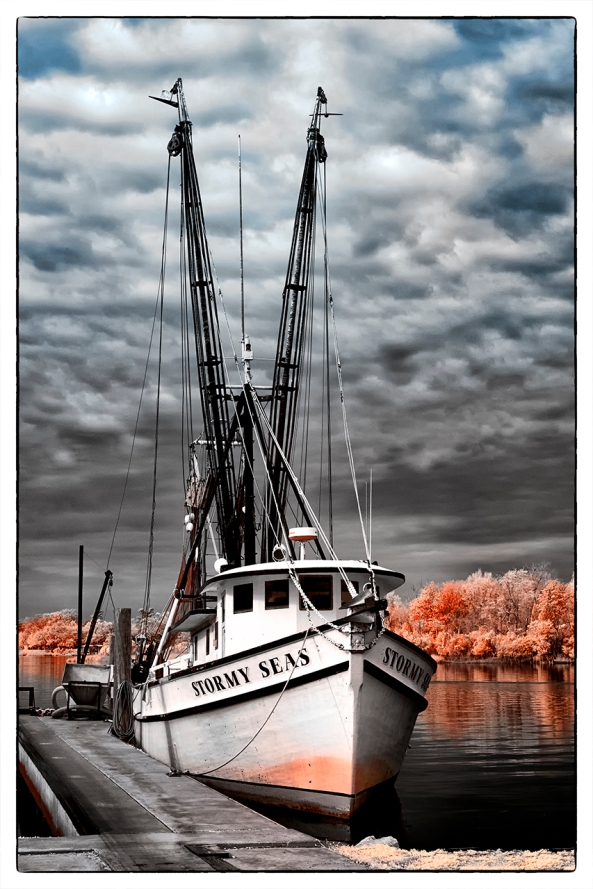
Stormy Seas Faux Color, X Pro 1 720nm IR

Stormy Seas Faux Color, X Pro 1 720nm IR

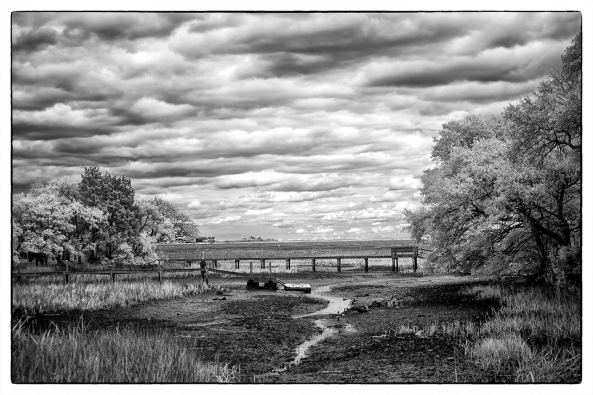
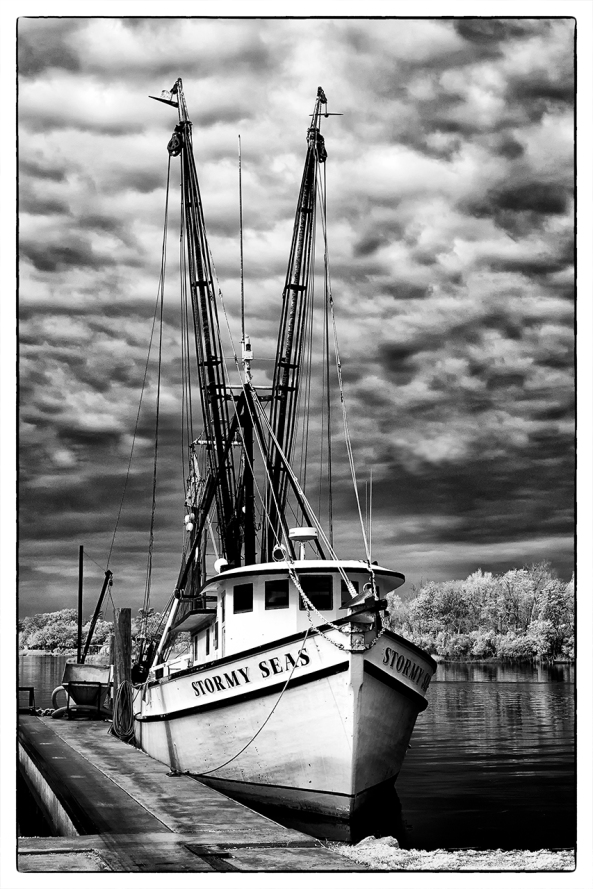
Stormy Seas B&W, X Pro 1 720nm IR

Stormy Seas B&W, X Pro 1 720nm IR

Sometimes Faux Color images simply do not work, then you still have the great B&W ones to work with!

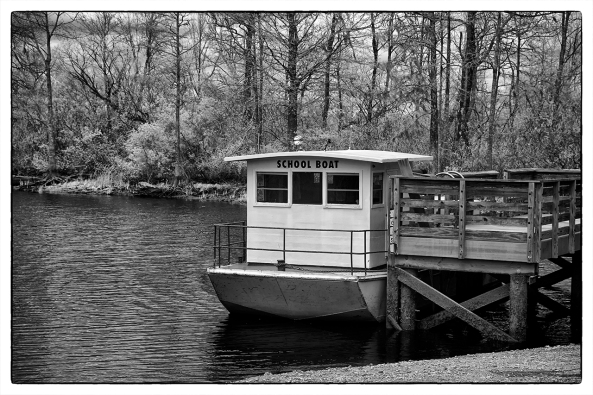
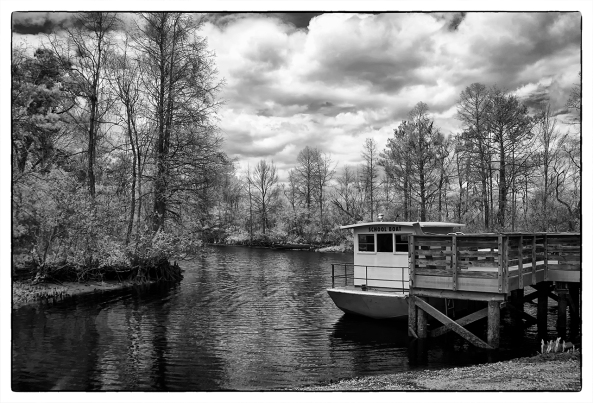
SC School Bus Boat, X Pro 1 720nm IR

SC School Bus Boat, X Pro 1 720nm IR

SC School Bus Boat, X Pro 1 720nm IR

SC School Bus Boat, X Pro 1 720nm IR

Was this information helpful?  Please let me know one way or the other!

Get Ready…. Here it comes!


Fuji X Pro-1 720nm Conversion!


Well I actually did it and sent off the X Pro-1 to LDP in New Jersey for a 720nm conversion!  The camera is due back today and the fun will begin!  Stand by….

Fuji X Pro-1  720nm IR conversion!

Fuji X Pro-1 720nm IR conversion!

Repost: Fuji X Pro 1 For Infrared, Part 1, Technical Details


Creating Emotional IR Images From Your Heart
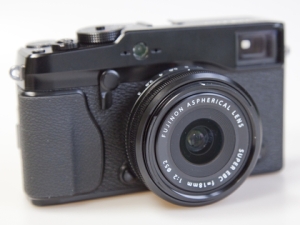
This post was originally posted in my Fine Art Gallery BLOG at: http://markhilliardatelier.wordpress.com/

Using the Fuji X Pro 1 for Infrared

Infrared photography means so many things to me… It is more than a type of photography, rather a passion or better yet an addiction! I have a LOT of experience in Infrared, I have a book in work on it, but MOST IMPORTANTLY, I have practiced the art of creating emotionally charged Infrared images for longer than I can remember, even as long as 45 years ago with film.  Here, today, I will disscuss with you the technical details of using your Fuji X Pro 1 camera system to create these emotionally powerful images as well.
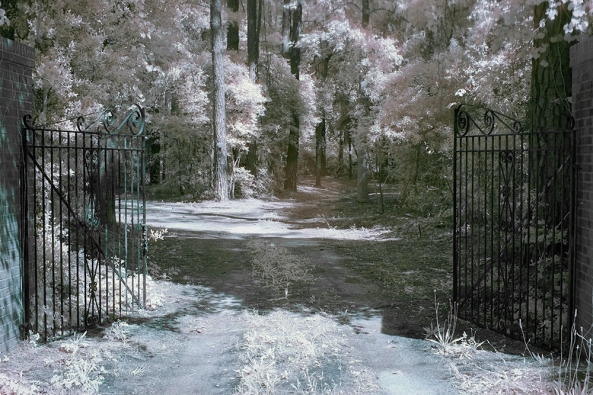
X Pro 1 Faux Color IR Image with only the channel swap

Understand this, you can create Infrared images several different ways:

  1. Film:  Rolli makes a great 720nm IR film in many different formats that with the addition of a 720nm filter on your lens will create great IR images at 100 ISO, and with no filter great B&W images at 400 ISO!
  2. Hoya R72

    Standard Digital COLOR Camera:  With the addition of a 720nm or 850nm IR filter on your camera lens your camera can capture Infrared images.  There is a tradeoff to this way though because each camera manufacturer places some sort of UV/IR blocking filter over the image sensor that allows only visible light to pass through.  Some of these filters are weaker than others and these cameras make for a system that will do well in Color and OK in Infrared with reasonable IR exposure times around a second or two.  Others have a strong filter allowing only a small amount of IR energy to pass.  These require VERY LONG exposure time in order to overcome this filter.  The Fuji X Pro 1 is one of the cameras with a weaker filter! This is exciting because it enables you to easily create IR images with an unmodified camera system!

  3. Converted Infrared Camera:  This type of system is the most popular by far.  There are 2 types:
    • Full Spectrum conversion: The internal UV/IR blocking filter is removed and replaced with a clear glass filter. You can then program the camera with an external IR filter in any range from UV to Color to Infrared!  This is the most adaptable IR system but costly because IR filters for your different lens sizes are expensive!
    • Dedicated Infrared Conversion:  This type has the internal UV/IR blocking filter removed and replaced with a specific IR pass filter and will create IR images in that band only.
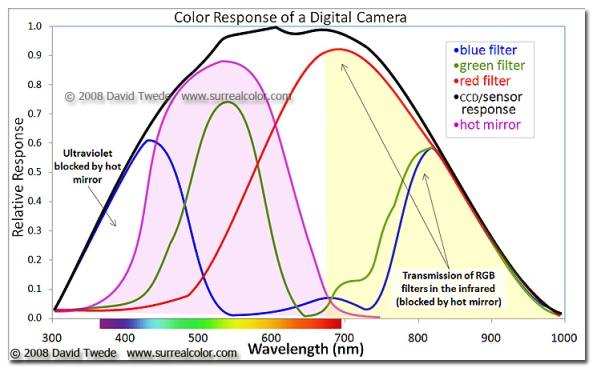
What your camera sees!

So with regard for the Fuji X Pro 1 system we are going to discuss option #2, the standard color camera with an external IR filter attached to its lens.  But you ask: “What filter can I use?”. Well since we are not modifying the internal UV/IR blocking filter you must understand that the camera will pass normal visible colors as well as IR if the external filter allows it.  This is both good and bad!  If you were to install a 590nm IR filter on your lens the camera, it would see everything from 590nm up to 1000nm.  But because the internal UV/IR blocking filter allows much more visible light than IR through, it will poison the exposure metering system.  It is going to see the vast majority of the light as color (red) and expose for that rather than the IR portion.  So attempting to do this will cause very unreliable exposure and great frustration on the part of the photographer.

What we need is to attach an IR filter that blocks ALL of the visible light and only passes IR to the sensor!  So it is best to choose a 720nm IR pass filter to your lens like the Hoya R72 or a 800nm B&W IR only filter like the B+W 093.  The higher you go in nm the longer the exposure time will be…

Now, knowing that we are going to use the 720nm filter which will only pass IR energy from 720nm and up while blocking ALL of the visible light our metering system will now function as it should!

Considerations of problems that must be overcome within the X Pro 1 to get good IR images

  • Even though the Fuji X Pro 1 has a weak UV/IR blocking filter there is still one there.  Exposure time at a normal low noise ISO of 800 and below will still require an exposure time too long to hand hold and still get sharp images.  Most of mine were at 1/30s and longer.
  • Yes, the X Pro 1 works well at high ISO settings, but in IR the camera will still create noise in the dark areas of the image.
  • Fuji X Pro 1 with a custom WB right out of the camera. This is as close as you can get but will still generate a great image.

    White Balance is IMPORTANT when shooting in IR!  The X Pro 1 will NOT reliably do a custom white balance with the 720nm IR filter installed.  But it does have a manual Kelvin White Balance option, so when shooting IR you need to go to this sub menu in the WB settings and set it to 2500K.  I have talked to others doing this and have heard that they also take away green as well in the menu.  I personally think that this is unnecessary and by leaving the green neutral you will get more pleasing Faux Color images.  A properly white balanced image taken on your camera has s slight reddish cast, the sky should be bronze and the green leaves should have a monochromatic feel with a bluish cast. (more on this later) An improperly white balanced camera image will be pure dark red.  While you can still use this image in post processing the lack of a good white balance will throw off your exposure system. Read your camera manual on white balance and understand it!

  • Longer shutter speeds need a tripod to get sharp images!
  • Remote shutter cable to cut down on camera shake!
  • The Hoya R72 720nm IR filter will generate good Faux Color infrared images some of the time, but good B&W images all of the time.  Keep this in mind while shooting and plan to always explore both options in post processing!
  • Faux Color IR images require a channel swap in post processing.  ONLY the Photoshop family (CS through CS6) has this function built in!  Photoshop Elements has an optional plugin called Elements Plus that you can purchase to do this.  Lightroom and Aperture DO NOT have this function!

Ok, enough of this for now. Lets talk images…

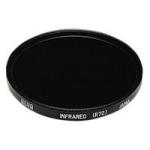
 The Hoya R72 IR filter is almost black.  You can see very little through it but don’t worry, the camera can see through it just fine!  You can find these filters on Amazon for about $58.00 in 52mm.  There are a lot of other filter companies out there that make these, some good some not so good… I trust the Hoya!

Mount the filter on your lens, set the ISO to around 1000 and put the camera on a tripod.  Make sure that you have properly set the WB either as a custom on or as a Kelvin entry.  If you choose custom, the camera will require a lot of light to due this properly.  Use green grass to generate the custom white balance.

I like to use the optical viewfinder rather then the LCD or EVF for shooting in IR.  Choose and frame your subject carefully.  Hmm, a word about composition…

There are three items that can make IR images really powerful and full of emotional impact:

  • Sky with clouds!
  • Water reflections!
  • Green Leaves!

The more of these items you can get in your images the better they will be!  Here is an example…
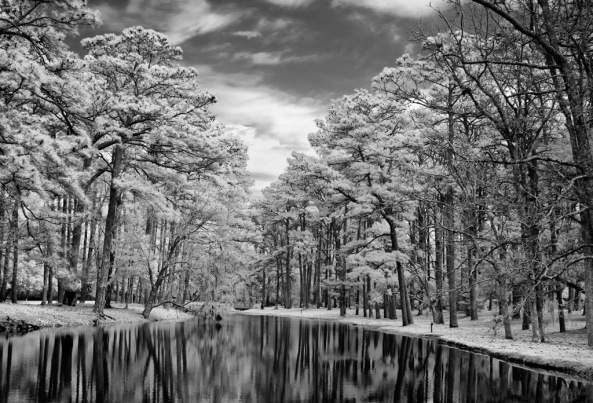
Clouds, Water and Leaves! What more could you ask for? While not done on a X Pro 1, this image could just have well been so!

 As you can see, the sky, reflections and leaves create an emotionally packed, etherial image that draws your viewer into it!  Keep these three compositional elements in mind as you go forth and create your images!

Exposure Issues…

OK, last part of this post!  There are a few small exposure issues that you need to be aware of while doing IR work.  They are:

  • Red Channel over exposure: The RED channel will aways expose a stop or more higher than the blue and green.  After you have taken the image and see the preview on the LCD panel look at the histogram.  It only displays the combination monochrome histogram and if it is close to being overexposed you will get better results by dialing in -1ev exposure compensation and re-take the image.  This is due to the red channel being more sensitive to infrared and causing the overexposure.  You can really see this during the RAW conversion or in photoshop during post processing by looking at the RGB histogram there.
  • Hot Spots:  Some people have reported hot spots in the center of their images when using the 18mm lens.  I have NOT personally  seen any evidence of this with my system as of yet.  Hot spots are areas in the center of each picture that is usually a stop brighter.  They are caused by light bouncing back and forth between the sensor and the lens elements.  These are lens specific and very little can be done while taking the picture to stop or reduce them.  BUT, the aperture can have a drastic effect on them!  If you see these then try adjusting the aperture and review the results, you just might be surprised!  You MUST ALWAYS use a lens hood when shooting in IR.  This will also help stop hot spots by stopping light from striking the objective lens at extreme angles then bouncing around inside the lens between elements.  If you do notice the hot spot you can remove it in post processing very easily by using Nik Filters Viveza.  You use the selection point by placing it in the center of the spot and then reduce the brightness!

OK, this is enough for today.  The next post will be a detailed Post Processing tutorial that will take you through both Faux Color and B&W processing.  I even have a photoshop action that you can download to semi automate the channel swap and cut down your post processing time!
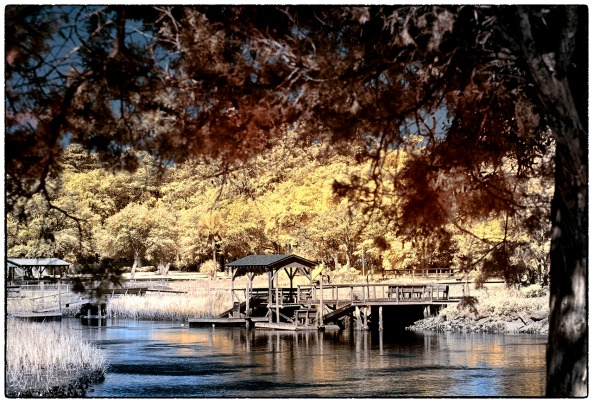
Italy, 2012, Post #2


Speciality 590nm Post Processing to OVERCOME Difficult Images!

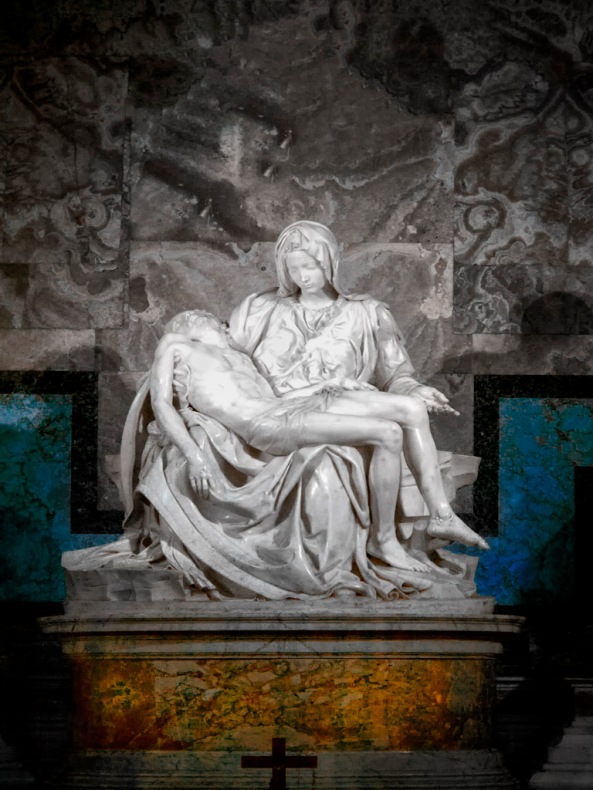
Michelangelo's "Pieta" in Saint Peters Basilica, Rome, 590nm Faux Color Infrared.

Oh my, where to start… Hmm well I think that there is no need to proceed in any order so I will tackle the most important images in order rather than by location!

Looking at the image of the Pieta above the first thing that comes to mind is the full beautiful saturated colors.  One would look at this and never realize that this is a Faux Color Infrared image!  It is indeed a 590nm IR images taken on the Panasonic GH2 with the 14-140mm lens, INDOORS, THROUGH PROTECTIVE GLASS at a super high ISO of 1250, 1/60 s, f/5.6 HANDHELD. It is in fact not a scene that one would normally consider for Infrared.  This is EXACTLY why I did choose it.  Color was nice, but everyone shoots it in color.  I desired something different and new.  I cannot imagine that it has EVER been photographed in Infrared!

Post processing for this one took considerably longer than the standard 30 seconds with CS5 and the Nik filters.  There were also several problems with the scene that I had to overcome!  First and foremost was the Plexiglas shield between the public and the statue.  It was not exactly clear and there were literally thousands of people standing there shooting wildly all of them using their flashes which were just bouncing off the plastic making it more difficult to see through.  Also there was a large window just over the head of Mary which had the sun directly behind it.  Ok how I did this image:

  • I took my time moving up through the crowd until I got to the rope divider and placed myself directly in the center of the plastic so that I would not cause issues from photographing from an angle.
  • I made sure to have the flash turned off (its normal condition).
  • I set the ISO to 1250 so as to have a f/5.6 aperture at at least 1/60s shutter.
  • I chose a zoom range of 24mm so as to overcome lens bending issues.
  • I then choose the composition in the Portrait mode and set my exposure ON THE WHITE STATUE set to Zone 7 and 8.
  • I took a LOT of pictures as I needed to overcome camera shake, other folks flash reflections bouncing back at me and reflections in the plastic.  By a lot I mean 20 or so images…

Things to consider when shooting through plexiglass:

  1. Your overall contrast will be greatly reduced so PERFECT EXPOSURE is a must!
  2. Flash bounce back from others cameras will KILL your image.
  3. Low shutter speed will require a solid support.

Still, knowing all of the issues I knew that I could overcome them in Post Processing, so I simply set everything up and shot away with the thousand other tourists!

I trusted my ability to set the exposure perfectly on the white statue in the spot meter mode of the camera and then wisely selected ZONE 7 & 8 by dialing in the appropriate positive exposure compensation.  I also knew that I could hold the camera quite still and trusted in its built in image stabilizer to help.  I used the LENS HOOD to cut down on flash reflections striking my lens objective and causing further loss of contrast (you do this also… right?)

After getting back home I went through my 20 images and selected the absolute best version to move into the post processing phase.

My Post Processing Recipe:

  1.  Using Capture One RAW converter I made sure that the image was straight.  I adjusted the contrast up about 10% and adjusted the exposure so that the RED channel was from edge to edge in the histogram. I also insured that there were no hotspots on the statue.
  2. After converted to a 16 bit TIFF image I opened it up in CS5
  3. I cropped the image to my master image size of 8.5″ x 12.5″ at 300 dpi.
  4. I ran Nik Define 2.0 and manually chose measurement points on the statue and the marble wall behind it.
  5. I ran Nik Viveza and increased contrast up again by 10%, structure up 10% and brightened the overall image a few percent.
  6. I used the lasso selection tool and selected the window behind the statue and then via edit > fill with content aware allowed CS5 to remove the window and replace it with more marble from around it. I had to reselect the edges a few times  and go through the process again to make sure that the marble blended perfectly!
  7. I now ran the Channel Swap Action that you can download from here.  At the end of the action it pops up a window with the color channels.  From that window I selected RED and made saturation and hue adjustments, Yellow with saturation and hue adjustments, Cyan  for saturation and hue adjustments (cyan is the most important adjustment, this is where you overcome the blue/green sky during the channel swap by adjusting the hue control towards the blue end!) then selected OK to end the action.
  8. I ran Nik Define 2.0 again to clean up some noise generated by the channel swap action.
  9. I now ran Nik Viveza AGAIN and using selection points I started at the top of the image and worked my way down to the bottom adjusting BRIGHTNESS, CONTRAST, STRUCTURE, RED, GREEN & BLUE levels and finally SHADOW adjustments.  All in all I placed about 100 selection points in the image to get it just right.  As you can see, this recipe is much more detailed than that which I usually use for normal Infrared post processing!
  10. I ran Nik Viveza AGAIN and darkened the four corners to force the viewers eyes into the image center.
  11. I ran Nik Color EFX Pro and chose the Vignette: BLUR filter and adjusted the outside edges of the image to be slightly blurry.
  12. Flatten and save image as a PSD file with a name that is meaningful!

That is it.  The entire process took about 20 min from start to end and I feel that the process was very much worth the time investment.

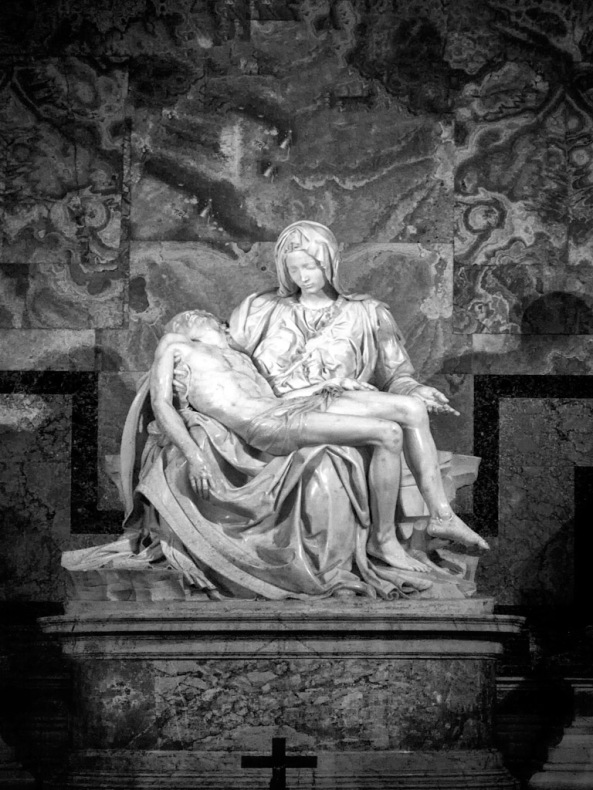
Here is a B&W version generated by Nik Silver EFX Pro 2 for you to compare.  It looks good, but the color image just grabs me by the throat and screams, LOOK AT ME!

Michelangelo's "Pieta" in the Saint Peters Basilica, Rome, 590nm B&W IR

What do you think?  Please give me some feed back on how you feel the images look and feel to you!

The 3 Faces of Infrared Conversions…


Or, which way should you jump?

Different Spectrum Choices...

Recently, I have been asked several times in emails and via reader comments on which Infrared camera conversion is the best for someone who is planning on jumping into IR!  So, it is time to address that small question…

There are three ways to go when considering Infrared Photography:

  1. Normal color camera with external IR filter.  This is the cheapest way to try your hand at IR photography.  You simply adda 720nm filter to your lens.
  2. Internal conversion to Infrared. This is the cheapest easy way to get into IR.  The internal IR blocking filter (hot mirror) is replaced with a IR pass filter.
  3. Full Spectrum conversion.  This is the best way to get into IR, but the most expensive.  The hot mirror is replaced with clear glass and you put IR filters on the lens.

Let’s discuss each option..

  • The first, normal color camera with a 720nm external filter will work great, but it does have some major issues to overcome.  The exposure times are greatly increased due to the fact that you have limited the amount of light reaching the sensor with the addition of the external filter plus it must overcome the internal hot mirror built into the camera.  The results in exposure time around a minute long and no ability to compose (unless you have live view) because your eyes cannot see through the 720nm external filter.  Focus is off and must be adjusted for IR as well.  Still, it is a good way to see if you even like IR work!
  • The second, internal conversion is a really good way to go.  It requires no special camera functionality (you do not need live view) and will give the ability to shoot normal hand held exposures. It works well in all camera types.  They only issue is the decision on which filter to choose!  I usually tell people to go with a 590nm conversion (Goldie or Super Color) because it gives the best combination of Faux Color and B&W work.  There is another consideration to the internal conversion, it is that you can change the flavor of the conversion by adding an additional filter on the end of your camera lens!  You can only go down in frequency  (up in nm) from whatever your internal filter is but it can be done allowing a different flavor for your camera!  Remember when you hit 720nm or lower you loose the ability to use your optical viewing path so you MUST have a camera with some sort of live view system for this to work! I have a Panasonic GH2 at 590nm, a Canon 20D at 590nm and they both work great.
  • The third option, Full spectrum gives you the most versatility but with added costs.  The hot mirror is replaced with a clear piece of glass and you then program the camera with an external filter!  This opens up an entire world for you to explore.  The camera will see everything from UV to FULL COLOR to INFRARED!  You simply tell it what you wish by your choice of external filter.  If you only are interested in 590 nm, 620 nm and 665 nm then any digital camera will be fine for you.  But if you wish to explore some of the alternatives, like the Super Blue (in camera Faux) or  UV+IR (UG1) or the deep IR filters like 720nm (standard), 850nm (deep IR) and lower then you MUST have a camera with live view or full time LCD display!  The reason for this is the fact that normal DSLR camera systems use an OPTICAL image path that goes from the viewfinder thru a prism, bounces off a mirror and out thru the lens and filter!  If your filter is dark then you cannot see to compose although the camera will still focus!  Live view will allow you to overcome this problem.  There are some REALLY interesting filters out there like the UG1 (UV+IR) and the 047B (Super Blue in camera Faux) that will only work with an internal or Full Spectrum conversion but need a live view with the Full Spectrum Conversion!  Now, the additional costs are the prices of the external filters to fit your lenses.  The darker the filter the more they cost!  Oh, did I mention that with a Full Spectrum Conversion you can convert the camera back to normal color by adding a UV/IR blocking filter (expensive)!!

Spectrum choices

UG1 – UV+IR  This is an interesting filter that mixes UV and Infrared to give ultra white colored leaves and a dark blue or purple sky!  You will see a lot of this posted around the net but very little in the galleries!  It is not for everyone but still can be very pretty and interesting.  The filter is very expensive!  It is around $120 for 58mm.

Hoya 047B Super Blue

Super Blue – In Camera Faux Color.  This filter is becoming more popular as you can shoot normal Faux Color IR images right in the camera with no post processing. It is highly dependent upon good white balance but gives very good Faux Color images.  For B&W it is not so good… The cost of the Tiffen 047B is around $70 in 58mm. Lifepixel now offers a Super Blue internal conversion service.

B+W 090 Super Color 590nm

Super Color (Goldie) – 590nm.  This is (and should be) usually the filter of choice for most IR shooters.  It gives great gold toned Faux Color images and stunning B&W images as well.  For Faux Color special post processing is required in Photoshop and the Red and Blue channels must be swapped which is VERY difficult in Elements but simple in Photoshop CS5!  The cost for a B+W 090 590nm filter is about $25 for 58mm.

B+W 091 Pinkie, 630nm

Pinkie – 630nm.  This is my personal favorite filter for Infrared work.  Instead of golds it gives pinks and reds in Faux Color and stunning B&W work.  No on offers this filter as an internal conversion so the only way to use it is with a Full Spectrum conversion.  The same post processing rules that apply to 590nm apply to 630nm.  The cost is about $25 for 58mm for the B+W 091 590nm filter.

Enhanced Color – 665nm.  This is very close to the 630nm filter but with more reds than pinks.  B&W is stunning and this filter can be had on both the internal conversion and the Full Spectrum Conversion.  The cost is slightly higher at about $50 for 58mm. You will find a lot of P&S cameras on EBay with this conversion.

Hoya R72 720nm Standard IR Filter

Standard – 720nm.  This is called standard for good reason, most IR conversions out there are at 720nm which really does not make any sense to me! It gives very LIMITED Faux color but great B&W!  The filter is black to normal vision and while it works great as an internal conversion it is not so good with Full Spectrum unless you are using it on a camera with live view or full time live view like a Micro 4/3, P&S or any of the other mirror less systems out there.  With a DSLR with live view it works great in Full Spectrum.  The cost is expensive at around $100 for a 58mm version of the Hoya R72.

Deep IR – 850nm.  This filter is totally black.  It gives ZERO Faux Color but beautiful rich and deep B&W images.  This is for the person who only wants to work in B&W.  Even with an internal conversion there will be about a 3 stop hit in exposure do the the limiting factors of the filter.  With a DSLR with live view it works great in Full Spectrum.  The cost is expensive at around $150 for a 58mm version.

LDP CC1 UV/IR Blocking Filter

IR Blocking – Normal Color.  This filter has a aqua appearance that blocks the UV/IR spectrum which will convert your camera back to normal color AS LONG AS YOUR CAMERA IS A FULL SPECTRUM conversion!  This is VERY expensive around $200 for 58mm for the LDP CC1 Filter. I have found that if you couple this filter with the B+W 486 UV/IR blocking filter that you get a better return to normal color.  The reason is that it blocks slightly more on the UV end of things.  I usually dissemble the 486 and install it in the CC1 filter ring along with the CC1 filter.  Again, this is expensive at about $125 for a 58mm.

As you can see, there are a lot of choices out there for you.  The Full Spectrum Conversion has much more options but requires a live view capable camera system.  I have both internal conversions and Full Spectrum conversions and like them both.  I really like playing with the Super Blue you must remember that it does not do well with B&W work!

There are endless examples of images created with each of these filters spread out in this blog.  Go take a look around to see the examples of each to help you decide on which way you might jump!

Please let me know what you decide upon!

Panasonic GH2 590nm Review Part 2, White Balance Revisited


Proper White Balance Makes Such A Difference!

The Gray WB Card

OK, I realize that in terms of actual helpful posts that it has been a long time.  With advertising for workshops and camera sales, things have been a little stale around here.  But all is not lost!  I have been out and about for 2 days shooting the GH2 (590nm) and playing with different white balances.  Todays post is about setting your WB on the GREEN grass and how it affects the image.  In the first review, I detailed the differences in setting WB on the grass vs. a Gray card, so I will not repeat that prices here.  With this camera (GH2) the choice of how you WB makes a MAJOR difference.  This weekend i simply forgot to bring along the Gray card so all of the work was done on the grass!  In my defense, it just seems to go against all of my advice on WB that I have given you in the past.  Green grass has always been the main source of WB and generally would produce really nice monochromatic tones in the LCD of your camera when properly done in the leaves and a nice bronze in the blue areas of the sky.  I would even Post Proces RAW files to take advantage of this from time to time.  But with a Gray card, the sky takes on a sickly greenish cast that just looks terrible on the LCD, but when you get the RAW file on the computer you get such vibrent gold tones!  What a difference it made…

The image below is an example of forced processing in Viveza caused by a Green grass WB.  It still looks good but it had to be forced in Post Processing….

I simply must remember to bring along the Gray card in the future!

Bellimatrix, 590nm, WB on Green Grass

I have to honestly admit that the Gray card works much better with the GOLDIE (590nm) conversion on the GH2 that it has any right to!  NONE of my other IR camera systems seems to be affected like the GH2 in this regard! I just HATE the way the RAW images look straight out of the camera with the Gray card, but in terms of Faux Color IR the difference is stunning!  The RAW images take on a greenish cast when done on the Gray card vs. the nice bronze & monochrome elements when balanced on the grass.  If you are looking for some interesting bronze tones straight out of the camera then you need to WB on the grass, but if you are shooting primarily for Faux Color then choose the Gray card. By doing so the yellows and golds seem to come naturally during the channel swap rather than being forced in Nik’s Viveza.

For B&W Post Processing, WB had an effect on the overall output, but much less so than when working in Faux Color.  You will notice tonality changes between the WB versions in the mid tones!

Bellimatrix, 590nm, B&W Processing

Still, you can achieve both if you desire in photoshop.  The choice is yours but to me it just makes sense to get the best results straight out of the camera!

Grist Mills Of Rhode Island


Post Processing the Infrared Grist Mills of Rhode Island

Hammond Mill, Selective Focus

I have just now getting around to post processing the Rhode Island section of The Great 2 Week Grist Mill Trip!  I cannot believe that I am so behind… Oh well, better late than never!  Since completion of the trip I have had 2 other Grist Mill Trips with a ton of photos in the que! All of these images were taken on my Olympus E-PL1 Full Spectrum converted IR system using the Oly 14-150mm lens with a B+W 091 630nm filter.

As you can see I processed for both Faux Color and B&W IR images because you just never know how they will look unless you try!

Does everyone understand exactly what a Faux Color Infrared image is?  It is likened to the old Kodak HIE IR films of the 80’s (I actually designed the silver salt growing system for that film while I worked at Kodak!).  In modern converted IR digital camera systems the images are true IR images, but since the sensor is RGB we have a lot of color data there!  To get to what the film was capable of producing we simply swap the data on the Red and Blue channel of the image in Photoshop, fine tune the colors in NIK Viveza and work from there!  Just because it is described as a Faux or False Color IR image doesn’t mean that it is so!

The B+W 091 is a little more on the red  end of the spectrum so the images tend to (when Faux Color…) lean more towards the pinks and reds.

Basic Post processing is as follows:

  1. After conversion of my RAW files in Capture One Pro v6 I then do my critical deletion edit using Bridge.  This is perhaps the most difficult step. You have to look beyond low contrast off color images and see what they can be. Look for coloration (this will get better with time), emotional impact (yes you CAN do this! I have several BLOG postings here that talk specifically about this one…) and sharpness and exposure.  Think about each and every image in terms of Faux Color and B&W! When finished, I then open the images one at a time in Adobe Photoshop CS5 with ALL of the NIK filters installed.
  2. I did my normal cropping to my master storage size of 12.5×8.5 making sure that the image was at 300dpi and in the Adobe RGB 1998 color space
  3. I ran NIK Software’s Define 2.0 for noise reduction. For this I simply accept the default settings!
  4. I then ran NIK Viveza 2.0 and specifically added 20% structure and 10% extra contrast without any control points so that the changes affected the entire image!  This was to create a brighter deeper image before I ran the channel swap Photoshop Action!  WOW!  WHAT A DIFFERENCE THIS MADE!
  5. I then ran the channel swap action and proceeded as normal with the rest of my Post Processing Recipe! This is the Khomography Photoshop Action that you can download here towards the bottom of the right hand menu! The action swaps data between the Red and Blue image channel and allows you to adjust the Hue/Saturation in the Red, Yellow, Green, Cyan, Blue & Magenta color channels separately!
  6. In the action select the Red, Yellow, Cyan and Blue channels and adjust each of them using saturation and hue to get the image elements to start to fall into place. Pay careful attention to the Cyan channel adjustment as most of the time the sky takes on a green/aqua tint which looks terrible!  Simply adjust the Hue of the Cyan channel to fix this!
  7. Now, Calling up Nik’s Viveza again I will select specific elements of the image with control points.  I will add contrast and structure then adjust the primary colors R,G and B to adjust the specific color of the compositional element to achieve the overall color I want for it.  You can also use the Warmth Slider to add or remove warmth.  This entire process takes only a few moments to do if you understand your basic color wheel and how to mix to change!  This process will give you your final ball park image!
  8. THEN I called up another of NIK Software’s world class filters and ran the TONAL CONTRAST filter in the COLOR EFX PRO plugin.  The result was this incredible image full of contrasts tonalities as well as contrasting colors!

Rather than simply place the images here in the post separately I am going to try Word Press’s new Photo Gallery.  Simply click on any of the images that you see to bring up a nice slide show!

Added Grist Mill GPX and Covered Bridge GPX Updated Files!


Go Get Them!

Glade Creek Mill, WV

There are two new downloads for your GPS system in the download box!  I added the Covered Bridges in Georgia and several NEW and corrected Grist Mill locations!

These are in the GPX file format and can be downloaded from here from the download menu on the lower right menu.

Once you have them on your computer you will need to have the GPS software that camera with your personal GPS to download them into your GPS.

Once done they will be available for you while you travel around the country!

As Always, I would appreciate ANY help that any of your could offer in expanding this database!  So far there are 185 Grist Mill locations and I would like to double that by the end of the year.

Send the following information to have it included in the Database:

  • Mill or Bridge name
  • Address
  • State
  • Lat/Long (IMPORTANT)
  • Description
  • Info on ownership and contact info if on private property.
  • You name and email
  • Best time of day and season for photographing them
  • Image if possible

You Do NOT have to spend a fortune to do IR!


How To Do It On The Cheap!


I know, this was supposed to be a post on the GH2 tests but I have been getting a lot of email and comments about the assumed high cost of getting into Infrared Photography!  This insane notion needed to be stopped before it got any further!

If you have an extra camera system laying around you can reasonably expect to send it off for conversion for $200-$300.  Yes that is a lot of money but the expansion of your artistic mind set that Infrared will give you will be worth it.  But there is a cheaper way!

EBay is a great place to find used digital camera systems already converted to Infrared!  I have purchased several of these used IR camera systems in the past year for next to nothing and have NEVER had a problem with a single one that came from EBay!

So far I have purchased from Ebay:

  • Canon G10 at 720nm for $350 (G10’s are in high demand)
  • Canon G9 at 665nm for $300
  • Canon 10D at 850nm for $250
  • Olympus E-P1 at 720nm for $300
  • Canon 20D at 590nm that I picked up for $300.00!

Why you ask did I purchase all of these system?  Well I TEACH Infrared Workshops and as part of that I have loaner cameras so that my students can try different camera systems before they decide on what type of camera and what conversion they like the best!  But the real point that I am trying to make here is that YOU DO NOT have to spend a lot of money and that EBay is your friend!

Point and Shoot cameras are very inexpensive and are light and easy to carry.  This means that you will always have a IR system on hand.  Mirror-less SLR IR systems like the GH2 and OLY Pen systems give your the advantage of interchangeable lenses and are small and light.  DSLR IR systems have the advantage of being able to share lenses and accessories!  If you shoot Nikon, do not be afraid to buy a used Canon camera and a cheap lens and vice-versa!

Go back through this blog and read the posts on the 14 IR camera systems that I have tested!  You will notice that I tend towards smaller lighter and cheaper cameras!  There is a whole world out there full of people with IR systems that are upgrading to something newer and cooler (in their eyes!) who would jump at the chance to sell the old ones for funds to add to their new ones.

Beware of buying from friends in camera clubs as they are looking to recover ALL of the money they spent both for the camera as well as the conversion!  As I said EBay is your friend!